
Christmas Tree Brownies
Festive Christmas tree brownies made from fudgy brownie mix, topped with green icing, candy cane trunks, and colorful sprinkles. A fun, family-friendly treat perfect for the holidays.

By Emma & Ella FrostUpdated June 13, 2026

- Prep Time
- 10 min
- Cook Time
- 30 min
- Total Time
- 120 min
- Servings
- 12-14 brownies

5-Ingredient Dump & Go Crockpot Meals
101 effortless slow cooker recipes for busy families.
View on AmazonAvailable on AmazonChristmas tree brownies are a joyful, family-friendly dessert that turns simple brownies into edible holiday art. With bright green frosting, candy cane trunks, and sparkling sprinkles, these festive treats make baking feel like playtime. Perfect for kids or cozy family nights, these brownies add a magical touch to every Christmas table.
Table of Contents
Table of Contents
What is Christmas Tree Brownies
Growing up, my mom always handed me a butter knife and a tray of cooled brownies on Christmas Eve. My job? Turning those chocolate squares into “trees.” These Christmas tree brownies aren’t just dessert they’re a creative moment wrapped in chocolate and cheer. You start with a classic brownie base, cut it into triangles, then decorate each one with green frosting and colorful sprinkles until it looks like it came straight from Santa’s kitchen. See also our Santa Snowman Puff Pastry Stack. See also: snowman-cookie-smash.
They’re ideal for parties, cookie exchanges, or school celebrations where everyone wants a bite-sized piece of holiday fun. These brownies take the nostalgia of frosted gingerbread brownies and blend it with the whimsy of a Christmas craft. The best part? You can customize them go bold with neon green icing or sprinkle edible glitter for extra sparkle.
Much like our no-bake Christmas mini cheesecakes, these brownies are more than sweets they’re experiences that pull families together in the most delicious way. Whether baked from a box mix or homemade from scratch, Christmas tree brownies never fail to make people smile.
Even our younger helpers love pressing candy cane sticks into each brownie triangle, giggling as they “plant” their trees. The results look straight out of a holiday movie, especially when paired with a cup of Frosty’s Christmas Cookie Hot Chocolate.
They’re a guaranteed hit for December gatherings, combining rich, fudgy chocolate with the season’s merry sparkle. You can even serve them next to bite-sized Christmas tree appetizers for a matching theme that ties your party together perfectly.
Why You’ll Love This
Christmas Tree Brownies are pure joy in dessert form. They’re not just brownies they’re a fun, edible craft that brings everyone together during the holidays.Sweet craving or a special treat — this one delivers every time.
1. They’re Easy and Fun for All Ages
Unlike fancy layered cakes, these Christmas tree brownies use a simple boxed brownie mix and a few decorative touches. No need for complex baking skills just mix, bake, cut, and decorate. Kids love piping the icing and adding sprinkles, and you’ll love watching them light up with pride when their trees are done. It’s an activity and dessert all in one, just like our crowd-favorite Christmas chocolate Rice Krispie balls.
2. Perfect for Holiday Parties and Gifts
Wrapped in clear treat bags or stacked on a dessert platter, Christmas Tree Brownies make a beautiful (and budget-friendly) homemade gift. They’re sturdy, easy to transport, and stay fresh for days. Plus, they pair beautifully with other festive sweets like Christmas sugar cookie cheesecake for an unforgettable dessert table.
These brownies are also a lifesaver when you’re short on time ready in under two hours, from mix to decoration. They’re just as at home on a cozy family movie night as they are at a big holiday bash.
| Reason | Why You’ll Love It |
|---|---|
| Quick to Make | Uses simple boxed brownie mix |
| Kid-Friendly | Decorating feels like arts and crafts |
| Customizable | Change sprinkles, icing shades, or candy canes |
| Great for Parties | Easy to serve and pack |
| Looks Impressive | Festive colors and cute shapes |
And the best part? They taste as amazing as they look. The fudgy brownies with creamy frosting and crunchy candy canes offer every texture you could want soft, rich, and delightfully festive.
For even more no-fuss desserts like this, check out our 3-ingredient no-bake brownies another family favorite when time is short and you want something sweet fast.
How to Make Christmas Tree Brownies
Quick Overview
These Christmas tree brownies are as easy as they are adorable. You’ll bake a tray of brownies, cut them into triangles, and turn each one into a decorated Christmas tree using frosting, candy canes, and colorful sprinkles. It’s quick, fun, and looks like something straight from a holiday bakery window.
Here’s a quick snapshot:
| Step | Action | Time |
|---|---|---|
| 1 | Bake brownies | 25–30 mins |
| 2 | Cool completely | 90 mins |
| 3 | Cut into triangles | 10 mins |
| 4 | Decorate | 20 mins |
| Total Time | About 2.5 hours |
This recipe makes about 12 to 14 brownies perfect for a party platter or holiday cookie swap.
Ingredients

| Ingredient | Amount |
|---|---|
| Brownie mix | 1 box |
| White vanilla icing | 1 tub |
| Green food coloring | As needed |
| Small round sprinkles | A handful |
| Small star sprinkles | A few |
| Candy canes | 6 (cut into halves) |
Tip: You can use a homemade brownie recipe too just make sure it’s dense and fudgy so it holds its shape when cut.
If you want a nutty twist, crumble a few pecans or walnuts on top before baking, similar to the method we used in our frosted gingerbread brownies.
Step-by-Step
Step 1: Prepare and Bake
Line an 8×8-inch pan with foil and lightly coat it with nonstick spray. Mix and bake the brownie batter according to your package directions (or use your favorite homemade version).
Step 2: Cool Completely
Let the brownies cool for at least 1.5 hours. Patience matters here cutting too soon can cause the brownies to crumble.
Step 3: Cut into Trees
Lift the brownies from the pan using the foil edges. Slice into three long rows, then cut alternating diagonals to form triangles. Each piece should look like a tiny Christmas tree.
Step 4: Add the “Trunks”
Carefully break candy canes into 1.5-inch pieces. Insert one piece into the bottom of each brownie triangle. The curved edge of the candy cane will look like a real tree trunk.
Step 5: Mix and Pipe the Frosting
Scoop about half the tub of white icing into a bowl. Add a few drops of green food coloring and stir until you get your desired tree shade. Spoon it into a ziplock bag and snip a tiny corner.
Step 6: Decorate the Trees
Starting from the top, pipe the icing in a gentle zigzag motion down each triangle. Add colorful round sprinkles as ornaments and place a star sprinkle at the top.
For extra sparkle, lightly dust edible glitter or gold sugar crystals. The final result will rival the charm of our no-bake Christmas mini cheesecakes.
What to Serve Christmas Tree Brownies With
Christmas Tree Brownies are incredibly versatile they shine as the centerpiece of a dessert tray or pair beautifully with other holiday favorites.Hosting or feeding a crowd — this one always earns its place.
1. With Warm Holiday Drinks
There’s nothing cozier than pairing a fudgy brownie tree with a steaming mug of Frosty’s Christmas Cookie Hot Chocolate. The creamy chocolate drink balances the sweetness of the icing perfectly. You can also serve them with peppermint mochas or classic hot cocoa for a winter wonderland combo everyone loves.
2. As Part of a Dessert Board
Arrange your brownies alongside Christmas chocolate Rice Krispie balls and bite-sized Christmas tree appetizers for a charming, tree-themed spread. Add candy canes, marshmallows, and red-and-green candies for a festive finishing touch. It’s the kind of display that guests will want to photograph before eating!
3. With Ice Cream or Whipped Cream
Serve warm brownies with a scoop of vanilla ice cream or a dollop of whipped cream for an extra indulgent treat. The cold, creamy texture contrasts beautifully with the rich, fudgy brownies. Sprinkle crushed peppermint or drizzle hot fudge on top for that over-the-top Christmas magic.
4. With No-Bake Favorites
If you’re setting up a “sweet table” without turning on the oven, mix these brownies with cool desserts like no-bake Christmas mini cheesecakes. It keeps things fun and stress-free, perfect for last-minute gatherings.
| Serving Idea | Perfect For | Flavor Match |
|---|---|---|
| Hot cocoa | Family night | Chocolatey & creamy |
| Dessert board | Holiday parties | Variety of textures |
| Ice cream | After-dinner dessert | Hot & cold contrast |
| Cheesecakes | No-bake collection | Sweet & smooth |
Want to make your presentation even more special? Garnish the platter with powdered sugar “snow” and a few candy cane shards for a festive, photo-ready look.
For more inspiration, you can follow our cozy Christmas dessert boards on Pinterest or see how fans recreate our recipes on Facebook.
Top Tips for Perfecting Christmas Tree Brownies
Making Christmas tree brownies is simple, but these expert tricks will take your dessert from cute to truly show-stopping.Hosting or feeding a crowd — this one always earns its place.
1. Use Fudgy Brownie Mix, Not Cakey
The key to perfect Christmas tree brownies is texture. You want dense, chewy brownies that hold their triangle shape when cut. Look for mixes labeled “fudgy” or “gooey,” not “cake-style.” If you prefer a homemade version, use the same base we love in our frosted gingerbread brownies.
2. Chill Before Cutting
Once baked, let the brownies cool completely then chill them in the fridge for 20 minutes. This step firms up the texture, making it easier to cut precise triangles without crumbling. A warm knife helps too just run it under hot water and wipe between slices.
3. Practice the Perfect Frosting Flow
When decorating, cut only a tiny corner off your icing bag. Start at the top and zigzag slowly downward for those classic Christmas tree lines. If you’re baking with kids, fill multiple small bags so everyone can decorate at once.
4. Decorate Right Before Serving
The candy canes can soften if they sit too long in the brownies. For best results, insert them a few hours before serving. Store the brownies separately, then add candy canes and sprinkles at the last minute for a fresh, festive look.
5. Get Creative With Flavors and Colors
While green icing is the classic look, try using different shades or even flavored frosting mint, buttercream, or cream cheese. You can also add red or gold drizzle for a more dramatic effect, just like we did in our Christmas sugar cookie cheesecake photoshoot.
| Tip | Why It Works |
|---|---|
| Chill before cutting | Prevents cracks and crumbs |
| Use fudgy mix | Holds tree shape better |
| Small piping hole | Cleaner, more defined lines |
| Late decoration | Keeps candy canes crisp |
| Flavor variations | Adds color and creativity |
With these tricks, your brownies will look so professional that guests will think you bought them from a bakery. And honestly, when your dessert looks this good, it might just steal the spotlight from the main course.
Storing and Reheating Tips
One of the best things about Christmas tree brownies is how well they store. You can easily make them ahead for parties or gift trays and still enjoy that just-baked texture days later. Follow these simple steps to keep every bite fudgy, festive, and fresh.
1. How to Store Christmas Tree Brownies
Once decorated, let the icing set completely before storing. Arrange the brownies in a single layer inside an airtight container. If stacking, place a sheet of parchment paper between layers to prevent smudging.
| Storage Method | Duration | Best Practice |
|---|---|---|
| Room temperature | 2–3 days | Keep in airtight container away from heat |
| Refrigerator | 5–6 days | Ideal for make-ahead party prep |
| Freezer | Up to 2 months | Freeze undecorated, thaw before frosting |
Pro Tip: If freezing, skip the candy canes until after thawing they can become sticky when frozen and defrosted.
For a festive dessert table, serve these brownies alongside Christmas chocolate Rice Krispie balls or no-bake Christmas mini cheesecakes. They store just as beautifully and complement the brownies’ chocolate flavor.
2. How to Reheat Brownies Without Drying Them
If you prefer warm brownies, reheat individual pieces for about 10–12 seconds in the microwave. Avoid overheating it can dry out the edges. For larger batches, cover the tray with foil and warm in a 300°F oven for 5–7 minutes.
Optional Trick: Add a small slice of bread to the storage container overnight. It keeps the brownies moist without altering the taste an old baker’s secret that works every time.
To maintain that fresh-from-the-oven aroma, store them in decorative tins lined with wax paper. Not only does this keep them soft, but it also makes your brownies look gift-ready, much like our presentation for bite-sized Christmas tree appetizers.
If you share your creations, don’t forget to tag us on Facebook or Pinterest we love seeing how families decorate their own brownie trees!
FAQs
Can I use homemade brownie batter instead of a mix?
Absolutely! A homemade recipe works perfectly for Christmas tree brownies just make sure the brownies are rich and fudgy, not cakey. A denser batter holds its shape better when cut into triangles. You can even use your favorite base from our frosted gingerbread brownies for a seasonal twist.
How can I make the icing smooth and vibrant?
Start with white vanilla frosting and add green food coloring a few drops at a time. Mix thoroughly to avoid streaks. If you want extra shine, stir in a teaspoon of light corn syrup it creates that bakery-style sheen seen in our Christmas sugar cookie cheesecake.
3. Can I make Christmas tree brownies ahead of time?
Yes! You can bake the brownies up to two days in advance and decorate them just before serving. Store the cut triangles in an airtight container, then add icing and candy canes later. This keeps the colors fresh and the candy crisp.
4. What can I use instead of candy canes?
If you’re out of candy canes or prefer a softer texture, try using pretzel sticks or chocolate wafer rolls. They make perfect “tree trunks” and add a delicious crunch. You can also match them with no-bake Christmas mini cheesecakes for a themed dessert platter that looks stunning together.
Final Thoughts
Christmas tree brownies are proof that the most delightful desserts don’t need to be complicated. With just a few ingredients, you can transform simple brownies into a fun, festive masterpiece that brings smiles to every table. It’s an edible holiday craft perfect for kids, families, and anyone who loves chocolate and creativity in one bite.
So grab your brownie mix, sprinkles, and a dash of Christmas spirit it’s time to bake up some joy.
For even more merry, mess-free desserts, visit The Cooking Twins and follow us on Pinterest or Facebook for new holiday ideas every week.
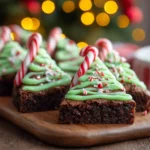
Christmas Tree Brownies
- Total Time: 120 min
- Yield: 12–14 brownies 1x
- Diet: Vegetarian
Description
Festive Christmas tree brownies made from fudgy brownie mix, topped with green icing, candy cane trunks, and colorful sprinkles. A fun, family-friendly treat perfect for the holidays.
Ingredients
1 box brownie mix
1 tub white vanilla icing
Green food coloring
Small round sprinkles
Small star sprinkles
Candy canes (cut into 1.5-inch pieces)
Instructions
- Prepare: Line an 8×8 pan with foil and spray with cooking spray.
- Bake: Prepare brownie mix per package and bake as directed.
- Cool: Let brownies cool completely for about 1.5 hours.
- Cut: Slice into 3 rows, then cut diagonally to form triangles.
- Add Trunks: Insert candy cane pieces at the base of each triangle.
- Mix Frosting: Tint icing with green food coloring.
- Decorate: Pipe zigzags of frosting and top with sprinkles and stars.
- Serve: Chill briefly, then enjoy!
Notes
Make ahead by baking brownies a day early and decorating before serving. Store in an airtight container for up to 5 days.
- Prep Time: 10 min
- Cook Time: 30 min
- Category: Baked Desserts
- Method: Bake and Decorate
- Cuisine: American
Nutrition
- Serving Size: 1 brownie
- Calories: 210
- Sugar: 18g
- Sodium: 90mg
- Fat: 9g
- Saturated Fat: 3g
- Unsaturated Fat: 5g
- Trans Fat: 0g
- Carbohydrates: 28g
- Fiber: 1g
- Protein: 2g
- Cholesterol: 20mg

Must‑Have Kitchen Equipment for This Recipe:
- Instant Pot Duo Plus 6‑Qt 9‑in‑1 Programmable Pressure Cooker
- Instant Vortex Plus 6‑Qt Air Fryer (ClearCook + OdorErase)
- Aucma 6.5‑Qt 6‑Speed Tilt‑Head Stand Mixer
Some links may be affiliate links. Read our affiliate disclosure.

Ratings & Reviews
Leave a reviewWe'd love to hear how it turned out.