
Reese’s Peanut Butter Earthquake Cake
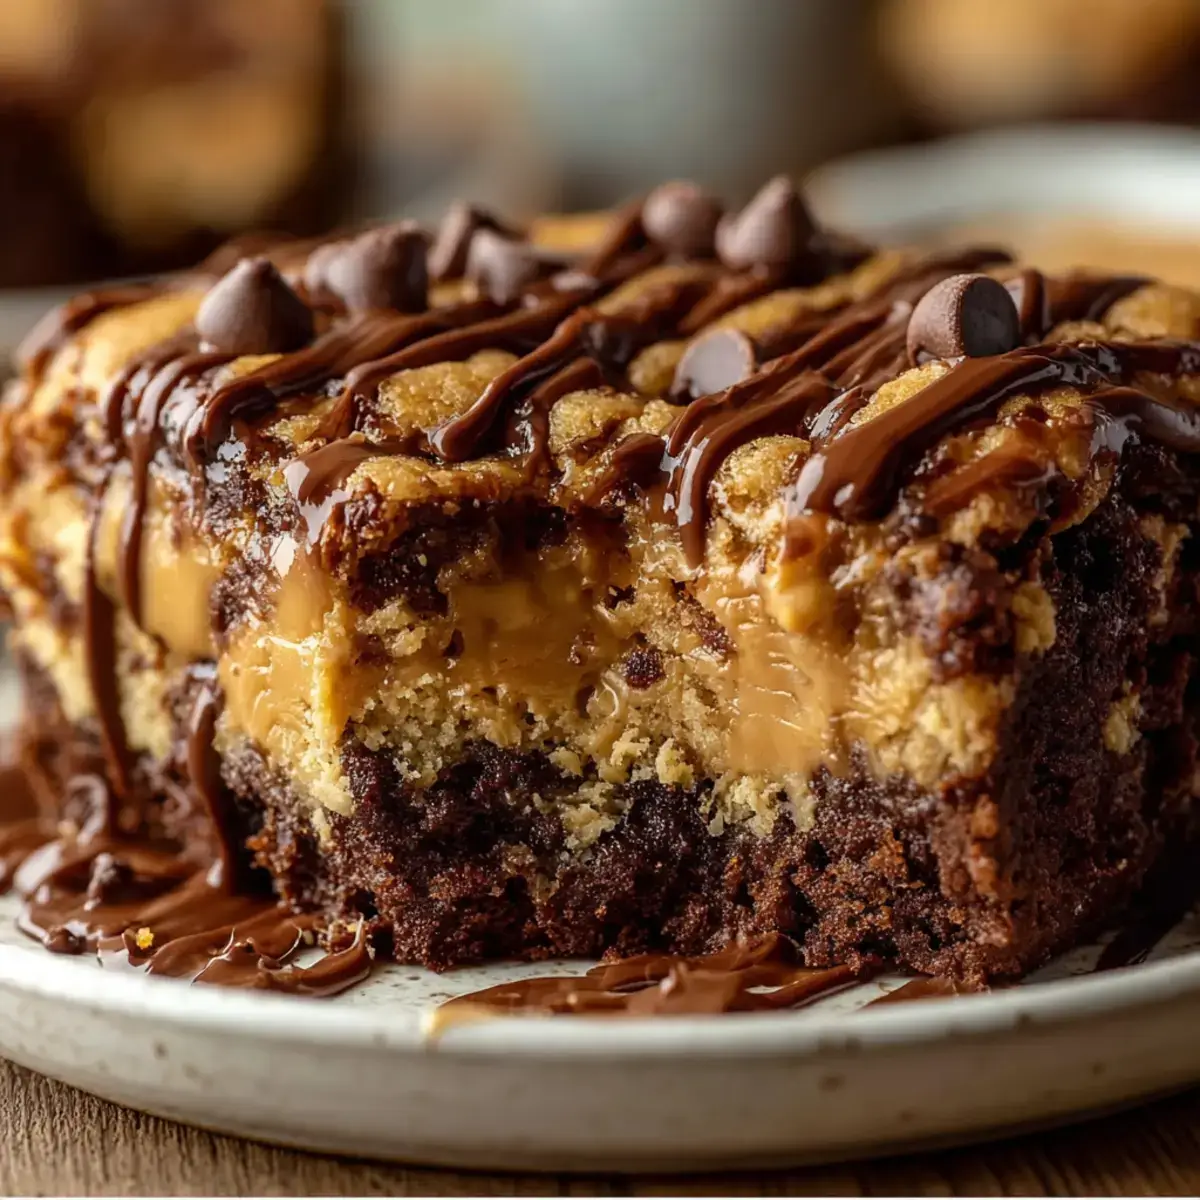
Gooey, candy-loaded Reese’s Peanut Butter Earthquake Cake with creamy peanut butter swirls baked into rich chocolate cake.

By Emma & Ella FrostUpdated June 13, 2026
- Prep Time
- 10 min
- Cook Time
- 45 min
- Total Time
- 55 min
- Servings
- 12 servings

5-Ingredient Dump & Go Crockpot Meals
101 effortless slow cooker recipes for busy families.
View on AmazonAvailable on AmazonReese’s Peanut Butter Earthquake Cake is the ultimate dessert mash-up a chocolate cake base meets a gooey peanut butter swirl and melty candy topping. It’s a share-worthy showstopper that’s both playful and indulgent, perfect for parties or just because. Today, we’re baking this irresistible treat Emma & Ella–style big flavor, bold presentation, and pure fun.
Table of Contents
Table of Contents
What is Reese’s Peanut Butter Earthquake Cake
If you’ve never met an Earthquake Cake before, get ready for a delicious kind of chaos. It’s named for its signature “cracked” look that forms as it bakes those gooey swirls and sunken chocolate peaks are what make it unforgettable. The Reese’s Peanut Butter Earthquake Cake takes that classic Southern concept and turns it into a candy-lover’s dream.
It starts with a box of rich chocolate cake mix, but the magic happens when you layer on a luscious swirl of peanut butter cream cheese filling. As it bakes, the heavy swirl sinks and bubbles through the chocolate, creating dramatic fissures that look like an edible earthquake. Once cooled, you’ll have a cake that’s marbled, molten, and absolutely loaded with peanut butter flavor.
It’s the kind of dessert that wins over crowds at birthday parties, potlucks, or movie nights. Think of it as the dessert version of a mash-up between a Black Forest Cheesecake Delight and a gooey brownie sundae. Every bite hits with layers of chocolate, creamy peanut butter, and melty candy pieces a guaranteed crowd favorite.
This cake sits beautifully next to other rich creations like 3-Ingredient No-Bake Brownies and festive treats such as Christmas Chocolate Rice Krispie Balls. It’s fun to make, even more fun to serve, and totally Instagram-worthy for your next dessert table spread.
For peanut butter lovers who already adore recipes like No-Bake Coconut Pecan Praline Cookies or Sugar-Free No-Bake Cheesecake, this cake hits the sweet spot between nostalgic and new comforting but with that signature party-perfect Emma & Ella flair.
Why You’ll Love This Reese’s Peanut Butter Earthquake Cake
There’s a reason this Reese’s Peanut Butter Earthquake Cake steals the spotlight at every gathering it’s got that perfect balance of messy, melty, and mouthwatering. This dessert doesn’t try to be perfect; instead, it embraces all the gooey, chocolatey “flaws” that make it unforgettable. Here’s why you’ll fall in love after just one bite.
1. It’s a Showstopper with Minimal Effort
This recipe looks like something from a fancy bakery but starts with a humble box of chocolate cake mix. Emma & Ella loves this type of dessert because it’s bold without being fussy. You don’t need to frost or layer the magic literally happens in the oven. The peanut butter swirl creates its own visual drama, with cracks and rivers of creamy goodness running through every slice.
If you’re already obsessed with easy party hits like our 3-Ingredient No-Bake Brownies or No-Bake Coconut Pecan Praline Cookies, this cake fits right into your dessert lineup it’s indulgent but completely doable on a weeknight.
2. Flavor Layers That Hit All the Right Notes
Chocolate and peanut butter are the ultimate duo and this cake doesn’t hold back. The moist chocolate base melts into the rich peanut butter cream cheese swirl, creating a crave-worthy texture that’s half fudge, half cake. Add a sprinkle of Reese’s cups on top, and you’ve got that candy-shop crunch to finish things off.
Want to pair it with something light on your dessert table? Try it alongside the Sugar-Free No-Bake Cheesecake or festive Christmas Chocolate Rice Krispie Balls for a fun mix of textures and flavors that guests will rave about.
3. Built for Sharing
This cake feeds a crowd and looks beautiful sliced right in the pan. Bring it to a potluck, bake sale, or birthday, and it’ll disappear faster than you can say “save me a piece.” Ivy’s favorite trick? Serve it slightly warm with vanilla ice cream it turns into a molten peanut butter sundae situation that never fails to impress.
4. Customizable and Fun
Want to go bigger? You can swap Reese’s cups for peanut butter chips, drizzle melted chocolate on top, or even toss in crushed pretzels for a salty twist. The base recipe is sturdy and flexible, meaning you can adapt it to whatever candy mood strikes you.
And if you love experimenting with fun, shareable desserts, don’t miss our Black Forest Cheesecake Delight another layered showpiece that’s made for celebrations.
How to Make Reese’s Peanut Butter Earthquake Cake
Baking this Reese’s Peanut Butter Earthquake Cake is as fun as watching it bake the swirls, cracks, and melty pockets of candy make every step worth it. Follow this guide to pull off Emma & Ella’ signature crowd-pleaser like a pro.
Quick Overview
This dessert layers a fudgy chocolate cake with a peanut butter swirl that “earthquakes” through the center while baking. The topping of chocolate chips and Reese’s cups seals in the gooey, candy-bar magic. From prep to serve, you’ll be done in under an hour.
| Step | Action | Time |
|---|---|---|
| 1 | Prepare cake batter | 10 mins |
| 2 | Make peanut butter swirl | 8 mins |
| 3 | Layer & swirl “earthquake style” | 3 mins |
| 4 | Bake until just set | 42–46 mins |
| 5 | Cool & serve warm | 45 mins |
Ingredients
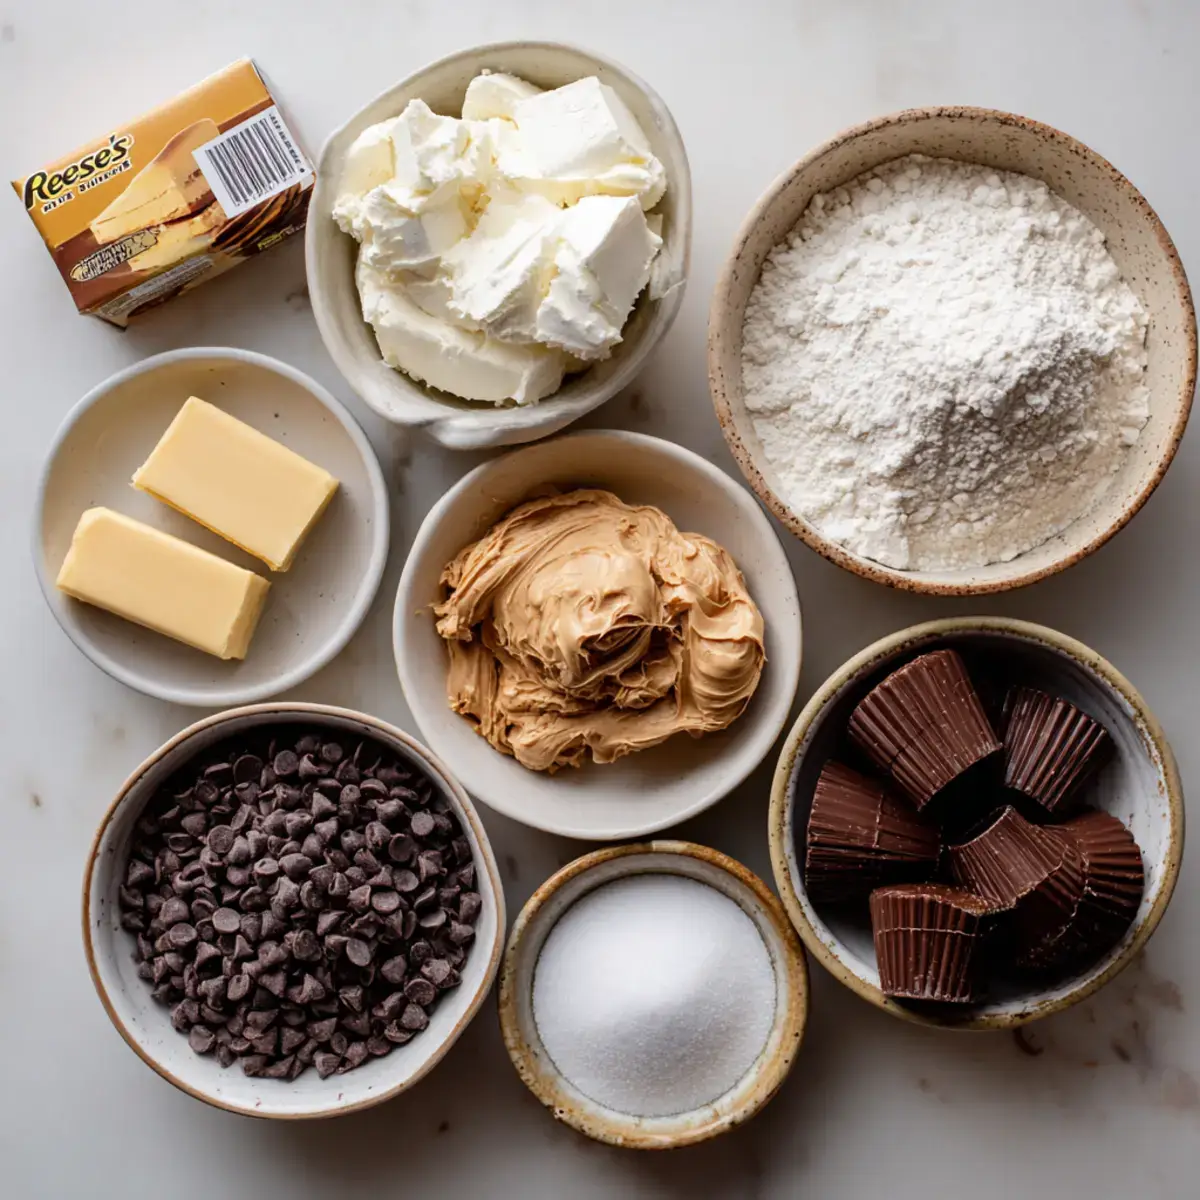
| Cake Base | Amount |
|---|---|
| Chocolate cake mix | 1 (15.25 oz) box |
| Eggs | 3 large |
| Vegetable oil | ½ cup |
| Water | 1 cup |
| Swirl Filling | Amount |
|---|---|
| Full-fat cream cheese, softened | 8 oz |
| Creamy peanut butter | ½ cup |
| Unsalted butter, melted and cooled | ¼ cup |
| Pure vanilla extract | ½ tsp |
| Powdered sugar, sifted | 2 ½ cups |
| Finish | Amount |
|---|---|
| Semi-sweet chocolate chips | ½ cup |
| Chopped Reese’s Peanut Butter Cups | ¼ cup (optional) |
Step-by-Step Instructions
Step 1: Prep & Start Cake Base
Preheat oven to 350°F (175°C). Grease a 9×13-inch baking pan and line with parchment paper if you want easy removal. Prepare the chocolate cake batter following the directions on the box. Pour the batter into the pan and smooth the top evenly.
Step 2: Make the Swirl Filling
In a large mixing bowl, beat softened cream cheese until smooth about 1 minute. Add peanut butter, melted butter, and vanilla extract. Mix until creamy and consistent. Slowly add sifted powdered sugar. Start mixing on low to avoid sugar dust, then increase speed until thick and glossy. The texture should be spreadable but not runny.
Step 3: Add the Filling “Earthquake Style”
Drop tablespoon-sized dollops of the peanut butter filling evenly over the chocolate batter. Use a butter knife or skewer to swirl gently in a figure-eight motion 3–4 times. Don’t over-swish; those minimal swirls create the signature “cracked” look once baked.
Step 4: Add Toppings & Bake
Sprinkle chocolate chips and chopped Reese’s peanut butter cups across the top. Bake for 42–46 minutes, until the edges are set and the center has a slight jiggle. Check doneness by inserting a toothpick 2 inches from the edge it should come out with moist crumbs, not raw batter.
Step 5: Cool & Serve
Let the cake cool in the pan for at least 45 minutes. Slice and serve slightly warm. For the full experience, top each piece with vanilla ice cream or a drizzle of hot fudge.
Want to pair this dessert with something lighter? Try our refreshing Sugar-Free No-Bake Cheesecake or festive Christmas Chocolate Rice Krispie Balls both balance the richness beautifully.
And for even more crowd-ready desserts, check out Ivy’s favorite Black Forest Cheesecake Delight or playful No-Bake Coconut Pecan Praline Cookies.
What to Serve Reese’s Peanut Butter Earthquake Cake With
The beauty of this Reese’s Peanut Butter Earthquake Cake is that it can stand alone or star in a full dessert spread. It’s rich, sweet, and decadent so pairing it with lighter or contrasting flavors takes the experience to another level.
Sweet Complements
If you want to go full-on dessert party, this cake pairs perfectly with cool, creamy, or nutty companions:
| Pairing Idea | Why It Works |
|---|---|
| Vanilla bean ice cream | Melts into the warm cake and enhances the peanut butter flavor. |
| Whipped cream | Adds lightness to balance the dense, fudgy texture. |
| Caramel drizzle | Sweet contrast that brings out the chocolate depth. |
| Crushed pretzels | Salty crunch for a sweet-and-salty explosion. |
| Reese’s Pieces or mini cups | Extra fun texture and candy crunch for topping. |
You can even drizzle hot fudge and caramel on top for a sundae-style dessert a trick Emma & Ella swears by when serving to a crowd.
Great Dessert Companions
When hosting a dessert bar or potluck, mix it up with other no-bake or party-friendly sweets. A few fan favorites from our kitchen include:
- The Black Forest Cheesecake Delight for an elegant layered look beside this rustic cake.
- The crunchy, chocolatey Christmas Chocolate Rice Krispie Balls for easy grab-and-go bites.
- The smooth Sugar-Free No-Bake Cheesecake to give guests a lighter option.
- Or even the 3-Ingredient No-Bake Brownies for a quick win when you’re short on prep time.
Add all these to your dessert table, and you’ll have something for everyone from chocolate lovers to those craving something a bit less sweet.
Perfect Drinks to Serve Alongside
Chocolate and peanut butter desserts shine with the right drink pairing. Try one of these easy options:
| Drink | Flavor Note |
|---|---|
| Cold brew coffee | Deepens the cocoa flavor beautifully. |
| Chocolate milkshake | Over-the-top indulgence for dessert lovers. |
| Iced caramel latte | Adds a sweet, smooth finish. |
| Peanut butter hot chocolate | Doubles down on that signature flavor combo. |
Hosting tip from Ivy: Serve small slices with mini milkshakes for an adorable dessert flight at parties guaranteed to get attention and compliments.
Want even more no-bake inspiration and chocolate ideas? Join us on Pinterest for dessert boards that make party planning simple, or see what’s trending on our Facebook page for this season’s fan-favorite sweets.
Top Tips for Perfecting Reese’s Peanut Butter Earthquake Cake
Making the perfect Reese’s Peanut Butter Earthquake Cake is all about the texture gooey in the middle, soft on the edges, and just the right amount of “crack” on top. Here are Emma & Ella’ party-tested tips to make sure your cake bakes beautifully every time.
1. Don’t Overmix the Swirl
The biggest mistake people make? Beating the cream cheese-peanut butter swirl too long. Once it’s thick and glossy, stop mixing. Overmixing can make the texture grainy instead of creamy.
Pro Tip: If you love extra creamy fillings, take a cue from our Sugar-Free No-Bake Cheesecake cream cheese should always be room temperature before blending for that smooth, bakery-style finish.
2. Swirl Gently Just Enough for the “Earthquake” Look
Use a butter knife or skewer and swirl in a figure-eight pattern only a few times. Overdoing it will blend the batters too much and erase the dramatic cracks. Remember, those uneven swirls create the signature “earthquake” texture that everyone loves.
3. Don’t Overbake
You want the center slightly jiggly when it comes out of the oven that’s what gives the gooey, molten middle. The residual heat continues to cook it as it cools, so pulling it out at the right time makes all the difference.
Tip from Ivy: If you like a soft, pudding-like center (similar to our 3-Ingredient No-Bake Brownies), remove it right when the edges are set but the center still moves slightly when shaken.
4. Use Full-Fat Ingredients
Low-fat cream cheese or peanut butter will alter the consistency and flavor. This dessert celebrates richness full-fat products guarantee that luscious texture and satisfying flavor.
5. Customize Your Toppings
This cake is incredibly flexible. Add crushed pretzels, salted peanuts, or a drizzle of caramel to create your own twist. For holidays, you can even top with themed candy like mini eggs for Easter or red-and-green Reese’s pieces for Christmas.
Need festive inspiration? Try topping ideas from our Christmas Chocolate Rice Krispie Balls recipe for a fun seasonal spin.
6. Slice When Slightly Warm
For clean slices with molten centers, let the cake cool for about 45 minutes before cutting. Use a sharp knife dipped in warm water for perfect squares no sticking, no tearing.
These small tweaks turn your Reese’s Peanut Butter Earthquake Cake from great to jaw-dropping. The cracks, the gooey swirls, and the candy melt all come together for an unforgettable, party-perfect finish.
If you enjoy creative, bold dessert ideas like this one, check out Ivy’s party crowd-pleasers such as Black Forest Cheesecake Delight or No-Bake Coconut Pecan Praline Cookies both guarantee the same “wow” reactions from your guests.
Storing and Reheating Tips
This Reese’s Peanut Butter Earthquake Cake keeps its gooey charm for days if stored correctly. Emma & Ella swears by a few simple tricks to make sure every slice stays soft, rich, and party-ready even after baking day.
Storing
| Storage Method | How to Do It | Shelf Life |
|---|---|---|
| Room Temperature | Cover tightly with plastic wrap or foil and keep in a cool, dry place. Perfect if eaten within a day. | Up to 24 hours |
| Refrigerator | Once cooled completely, cover the pan or store slices in an airtight container. Keeps the peanut butter swirl firm and flavorful. | Up to 5 days |
| Freezer | Wrap individual slices in plastic wrap and then foil. Freeze flat for best texture. Thaw overnight in the fridge before serving. | Up to 2 months |
Tip from Ivy: If you plan to serve leftovers at a party later in the week, refrigerate the cake, then warm slices individually before serving to bring back that soft, melty texture.
Reheating
Reheating this cake is simple and you don’t need to worry about drying it out.
| Method | Steps | Best For |
|---|---|---|
| Microwave | Heat one slice at a time for 15–20 seconds. The peanut butter swirl turns creamy again without overheating the cake. | Single servings |
| Oven | Place slices in an oven-safe dish, cover loosely with foil, and heat at 300°F for 8–10 minutes. | Whole-pan reheats |
For extra indulgence, serve it warm with a scoop of vanilla ice cream or a drizzle of melted chocolate similar to how we serve our 3-Ingredient No-Bake Brownies at events.
Bonus Storage Tip
To prevent condensation (which can make your cake soggy), let it cool completely before covering or refrigerating. You want the top to stay slightly crisp and the middle to remain soft and gooey that’s the perfect “earthquake” texture.
If you’re looking for more desserts that store well and stay delicious for days, check out the Sugar-Free No-Bake Cheesecake or No-Bake Coconut Pecan Praline Cookies both hold up beautifully in the fridge, just like this cake.
And don’t forget to follow us on Pinterest for weekly dessert storage tips and presentation tricks straight from The Cooking Twins kitchen.
FAQs
We’ve gathered the most common questions bakers have about the Reese’s Peanut Butter Earthquake Cake, straight from Emma & Ella’ kitchen.Hosting or feeding a crowd — this one always earns its place.
What makes this cake “earthquake” style?
The name comes from the dramatic cracks and swirls that form as the peanut butter filling sinks into the chocolate cake while baking. It’s meant to look rustic and gooey the imperfections are what make it gorgeous and irresistible.
Can I use homemade chocolate cake instead of a box mix?
Absolutely! You can swap the boxed cake mix with your favorite homemade chocolate cake recipe. Just make sure the batter has a slightly thick consistency. Too runny, and the peanut butter swirl won’t stay visible during baking.
Can I make this Reese’s Peanut Butter Earthquake Cake ahead of time?
Yes. You can bake the cake up to 2 days in advance. Store it covered in the fridge and reheat slices in the microwave for 15–20 seconds before serving. The flavors actually deepen overnight, making it even better the next day.
How do I keep my peanut butter swirl from sinking too much?
If your swirl mixture is too warm or overmixed, it can sink completely. Make sure the filling is thick, cool, and glossy before adding it to the batter. Drop spoonfuls gently and swirl lightly with a knife for the perfect “cracked” look.
Looking for other creative chocolate-peanut butter desserts? Don’t miss our No-Bake Coconut Pecan Praline Cookies or rich Black Forest Cheesecake Delight both make great party companions to this cake.
Conclusion
The Reese’s Peanut Butter Earthquake Cake is everything a dessert should be dramatic, delicious, and unbelievably easy. The swirls of peanut butter cream cheese create a molten center that feels like a cross between a cheesecake and a brownie. Perfect for sharing, gifting, or just digging in with a fork while it’s still warm.
If you’re hosting, pair it with crowd-pleasers like the Sugar-Free No-Bake Cheesecake or the festive Christmas Chocolate Rice Krispie Balls for a dessert spread everyone will remember.
Want more recipes like this one? Follow us on Pinterest and Facebook for Emma & Ella’ latest no-bake dessert creations, tips, and party-perfect inspiration.
Reese’s Peanut Butter Earthquake Cake
- Total Time: 55 min
- Yield: 12 servings 1x
- Diet: Vegetarian
Description
Gooey, candy-loaded Reese’s Peanut Butter Earthquake Cake with creamy peanut butter swirls baked into rich chocolate cake.
Ingredients
Chocolate cake mix (15.25 oz box)
3 large eggs
½ cup vegetable oil
1 cup water
8 oz full-fat cream cheese, softened
½ cup creamy peanut butter
¼ cup unsalted butter, melted and cooled
½ tsp pure vanilla extract
2 ½ cups powdered sugar, sifted
½ cup semi-sweet chocolate chips
¼ cup chopped Reese’s Peanut Butter Cups
Instructions
- Prepare Cake Base: Preheat oven to 350°F (175°C). Grease a 9×13-inch pan and line with parchment if desired. Mix cake batter following box directions. Pour into pan and smooth the top.
- Make Swirl: Beat cream cheese until smooth. Add peanut butter, melted butter, and vanilla. Mix until creamy. Gradually add powdered sugar until thick and glossy.
- Add Filling: Drop tablespoon-sized dollops of swirl mixture onto cake batter. Swirl gently 3–4 times in a figure-eight motion to create the “earthquake” effect.
- Add Toppings: Sprinkle chocolate chips and chopped Reese’s Peanut Butter Cups evenly over the top.
- Bake: Bake 42–46 minutes, until edges are set and center jiggles slightly.
- Cool & Serve: Cool at least 45 minutes before slicing. Serve slightly warm with vanilla ice cream or drizzle of fudge.
Notes
Use full-fat cream cheese for best texture.
Don’t overmix the peanut butter swirl — it should stay thick and glossy.
For a fun twist, add crushed pretzels or drizzle caramel on top.
Store leftovers in the fridge up to 5 days or freeze for up to 2 months.
- Prep Time: 10 min
- Cook Time: 45 min
- Category: Baked Desserts
- Method: Oven
- Cuisine: American
Nutrition
- Serving Size: 1 slice
- Calories: 420
- Sugar: 28g
- Sodium: 280mg
- Fat: 24g
- Saturated Fat: 12g
- Unsaturated Fat: 10g
- Trans Fat: 0g
- Carbohydrates: 45g
- Fiber: 2g
- Protein: 7g
- Cholesterol: 65mg

Must‑Have Kitchen Equipment for This Recipe:
- Instant Pot Duo Plus 6‑Qt 9‑in‑1 Programmable Pressure Cooker
- Instant Vortex Plus 6‑Qt Air Fryer (ClearCook + OdorErase)
- Aucma 6.5‑Qt 6‑Speed Tilt‑Head Stand Mixer
Some links may be affiliate links. Read our affiliate disclosure.


Ratings & Reviews
Leave a reviewWe'd love to hear how it turned out.