
Cherry Pistachio No Bake Cheesecake
Bright, creamy, and nutty, this Cherry Pistachio No Bake Cheesecake blends cherries, pistachios, and citrus zest over a buttery graham crust for a refreshing, make-ahead dessert.

By Emma & Ella FrostUpdated March 17, 2026
- Prep Time
- 20 min
- Cook Time
- 0 min
- Total Time
- 260 min
- Servings
- 10 servings

5-Ingredient Dump & Go Crockpot Meals
101 effortless slow cooker recipes for busy families.
View on AmazonAvailable on AmazonCherry Pistachio No Bake Cheesecake brings sunshine to your dessert table bright, creamy, and filled with bursts of cherry sweetness and pistachio crunch. Emma & Ella’s fruit-forward twist blends tangy lemon-lime zest and velvety cheesecake filling atop a buttery graham crust. No oven, no stress just pure, chilled bliss perfect for picnics, spring brunches, or lazy summer days.
Table of Contents
Table of Contents
What is Cherry Pistachio No Bake Cheesecake
When Naomi first dreamed up this Cherry Pistachio No Bake Cheesecake, she imagined a dessert that felt like summer in every bite cool, refreshing, and effortless. This cheesecake combines smooth cream cheese filling with juicy cherries, bright citrus, and nutty pistachios, giving you that perfect mix of creamy and crunchy textures.
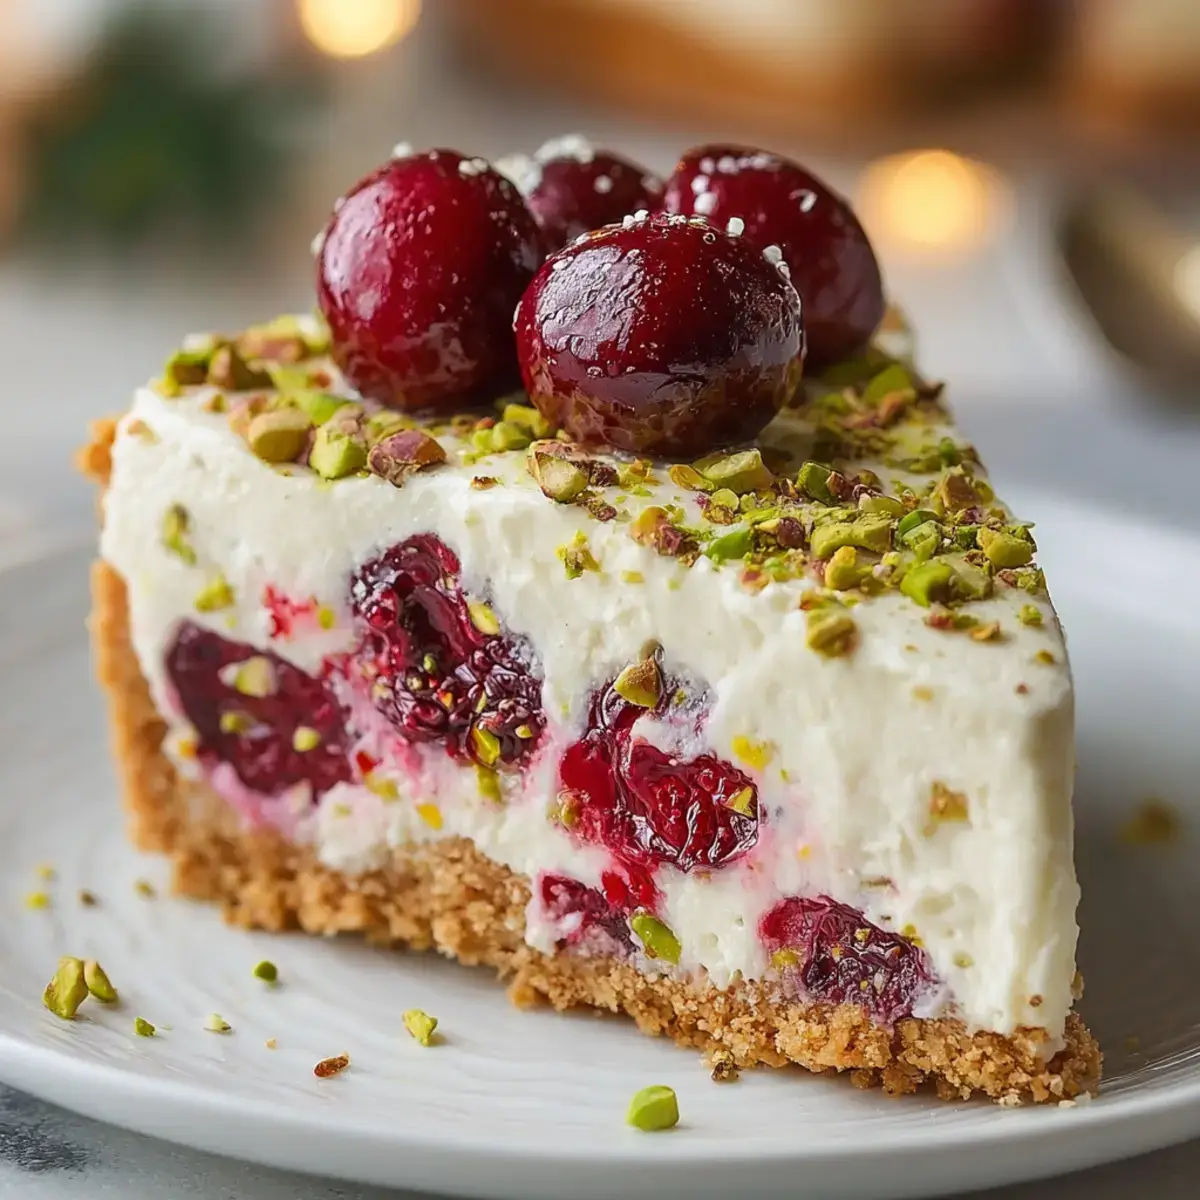
Unlike baked cheesecakes, this one requires no oven time just a little chilling and a whole lot of flavor. The base is a classic graham cracker crust pressed firm and buttery, while the filling is a luxurious blend of whipped cream, cream cheese, and citrus zest. Every slice reveals pink cherry specks and green pistachio flecks that look like confetti frozen in cream.
It’s a dessert that feels elegant but totally approachable. The tang from the lemon and lime keeps it light, while the cherries and pistachios bring bursts of color and texture. It’s an ideal make-ahead treat, especially for gatherings where you want something that looks impressive without needing hours in the kitchen.
For fans of fruity and creamy desserts, it’s a cousin to the popular Cherry Pecan Cheesecake Lush but with a fresh, nutty twist. You can even find more inspiration for flavor-packed chilled treats in our Fruity No-Bake Desserts collection.
The best part? This recipe lets you play with your ingredients. Fresh cherries shine when in season, but jarred ones work beautifully too. Naomi often adds a pinch of sea salt to the crust for balance small details that elevate every bite without any complicated steps.
If you loved the simplicity of our Sugar-Free No-Bake Cheesecake or festive No-Bake Christmas Mini Cheesecakes, this cheesecake sits right between them easy, elegant, and impossible to resist.
And because this dessert is all about sharing and savoring, you’ll often find Naomi serving it with other chilled treats like No-Bake Coconut Cream Balls at family gatherings. It’s a no-fuss crowd-pleaser that leaves everyone asking for the recipe.
Why You’ll Love This Cherry Pistachio No Bake Cheesecake
Emma & Ella’s Cherry Pistachio No Bake Cheesecake is the kind of dessert that makes everyone pause after the first bite the creamy chill, the bright cherries, the buttery crust, the citrus aroma. It’s refreshing, indulgent, and totally simple to make. Here’s why this recipe will quickly become one of your go-tos.
1. It’s a No-Bake Dream
Forget turning on the oven this cheesecake sets beautifully in the fridge, no baking required. That means no cracks, no water bath, and no stress. Perfect for summer parties or busy days when you want a dessert that impresses without effort.
If you love easy, oven-free desserts like our No-Bake Coconut Cream Balls or creamy Sugar-Free No-Bake Cheesecake, this recipe will fit right into your dessert rotation.
2. The Perfect Flavor Balance
Sweet cherries meet nutty pistachios, all lifted by lemon and lime zest. The citrus cuts through the richness of the cream cheese, while the nuts add depth and texture. Every bite feels balanced fresh, creamy, and satisfying.
Naomi loves how the pistachios bring a rustic touch that complements the brightness of the cherries. It’s a flavor pairing that feels sophisticated yet comforting, just like her signature Cherry Pecan Cheesecake Lush.
3. Gorgeous and Colorful
This cheesecake is naturally beautiful. The ruby-red cherries and soft green pistachios look stunning against the pale, whipped filling. Top it with swirls of whipped cream, a sprinkle of zest, and a few whole cherries, and you’ve got a dessert that looks straight out of a patisserie no piping bag needed.
4. Make-Ahead Friendly
You can prepare this cheesecake a day (or even two) in advance and keep it chilled until serving. It actually tastes even better after a few hours in the fridge as the flavors meld together. That makes it perfect for holidays, picnics, or family dinners when you want dessert ready to go.
Pro tip from Naomi: freeze slices individually for an easy, ready-to-eat treat that defrosts in minutes. It’s just as creamy and flavorful as day one.
5. Light but Decadent
Even though it’s rich and creamy, this cheesecake feels airy thanks to the whipped cream folded in. It’s not heavy like a baked version more like a mousse that melts on your tongue. The lemon-lime notes keep it refreshing enough that you’ll want a second slice.
For more airy, fruit-forward desserts, check out our Fruity No-Bake Desserts collection perfect for when you want something chilled and flavorful.
How to Make Cherry Pistachio No Bake Cheesecake
This Cherry Pistachio No Bake Cheesecake is simple, elegant, and comes together in just a few easy steps. Emma & Ella loves this recipe because it lets the ingredients shine no fancy tools, no oven, and no complicated process.
Quick Overview
This cheesecake starts with a buttery graham cracker crust, followed by a silky-smooth filling infused with lemon-lime zest, juicy cherries, and crunchy pistachios. After chilling for a few hours, it sets into a light, mousse-like texture that’s perfect for slicing and serving.
| Step | Action | Time |
|---|---|---|
| 1 | Make the graham cracker crust | 10 mins |
| 2 | Prepare the cheesecake filling | 10 mins |
| 3 | Assemble and chill | 4 hrs |
| 4 | Garnish and serve | 5 mins |
Ingredients
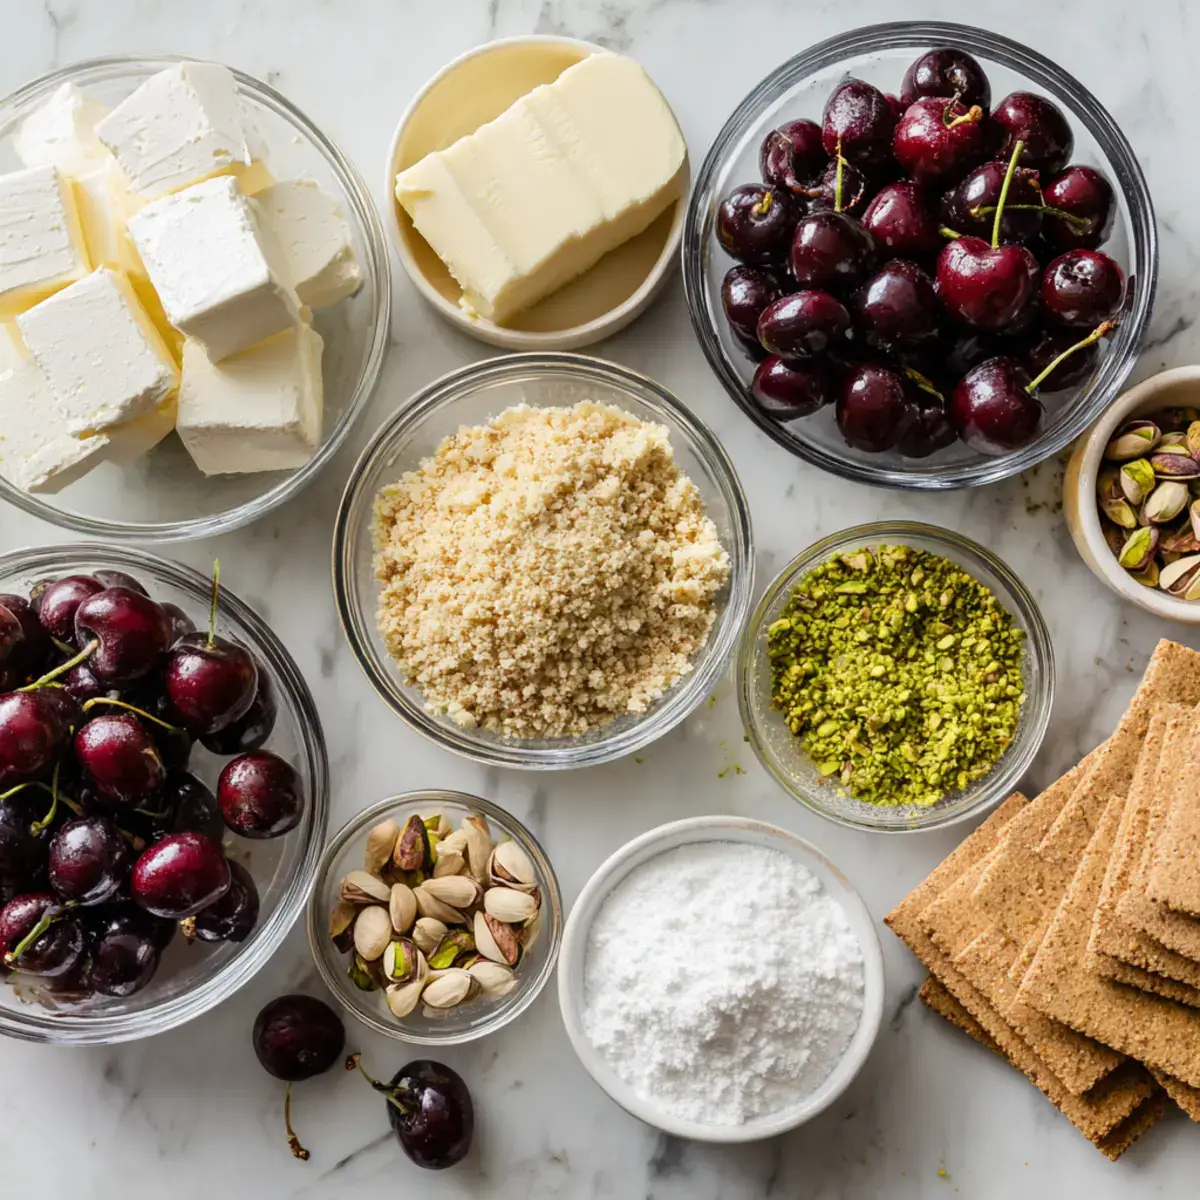
| Crust | Amount |
|---|---|
| Graham cracker crumbs | 2 cups |
| Melted butter | 6 tbsp |
| Cheesecake Filling | Amount |
|---|---|
| Cream cheese, softened | 16 oz |
| Granulated sugar | ½ cup |
| Heavy cream (whipped to soft peaks) | 1 cup |
| Lemon zest | Zest of 1 lemon |
| Lime zest | Zest of 1 lime |
| Lemon juice | 1 tbsp |
| Lime juice | 1 tbsp |
| Chopped cherries (fresh or jarred, drained) | 1 cup |
| Chopped pistachios | ½ cup |
| Vanilla extract | 1 tsp |
| Whipped cream (for folding) | 1 cup |
| Topping | Amount |
|---|---|
| Whipped cream | As desired |
| Whole cherries | For garnish |
| Finely chopped pistachios | For garnish |
Step-by-Step Instructions
Step 1: Make the Crust
In a medium bowl, combine graham cracker crumbs and melted butter. Stir until the texture resembles wet sand. Press the mixture firmly into the bottom of a lined springform pan using the back of a spoon or measuring cup. Chill for 15 minutes while preparing the filling.
Step 2: Prepare the Cheesecake Filling
Beat softened cream cheese and sugar in a large bowl until smooth and creamy. Add lemon zest, lime zest, lemon juice, lime juice, and vanilla extract. Mix until everything is evenly blended and fragrant.
In a separate bowl, whip the heavy cream to soft peaks, then gently fold it into the cream cheese mixture. Fold in the chopped cherries and pistachios last this keeps their color and crunch intact.
Step 3: Assemble and Chill
Spread the cheesecake filling evenly over the chilled crust, smoothing the top with a spatula. Cover with plastic wrap and refrigerate for at least 4 hours, or until fully set.
Naomi’s tip: For best results, chill overnight it makes the texture extra firm and sliceable.
Step 4: Garnish and Serve
Before serving, top with whipped cream swirls, whole cherries, chopped pistachios, and a light dusting of lemon-lime zest. Use a sharp knife warmed under hot water for perfectly clean slices.
This cheesecake’s bright color and smooth texture make it the centerpiece of any dessert table. Serve it alongside other creamy no-bake creations like No-Bake Christmas Mini Cheesecakes or the tropical No-Bake Coconut Cream Balls for a stunning variety.
For more citrusy and fruity creations, don’t miss our Fruity No-Bake Desserts collection each recipe captures that same fresh, chilled joy Naomi’s known for.
What to Serve Cherry Pistachio No Bake Cheesecake With
The Cherry Pistachio No Bake Cheesecake is stunning on its own, but pairing it with complementary flavors and textures can elevate your dessert spread into something unforgettable. Emma & Ella loves matching it with light drinks, fruity sauces, and contrasting sweets to create a complete dessert experience.
Sweet Companions
Pair this cheesecake with desserts that highlight its fruity and creamy balance. These combinations make your table pop with color and flavor:
| Dessert Pairing | Why It Works |
|---|---|
| No-Bake Coconut Cream Balls | Adds tropical flavor and chewy texture to balance the smooth cheesecake. |
| No-Bake Christmas Mini Cheesecakes | Fun, festive, and mini-sized for easy pairing at parties. |
| Cherry Pecan Cheesecake Lush | Doubles down on cherry flavor for a richer, nutty contrast. |
| Fruity No-Bake Desserts | A perfect lineup of refreshing fruit-forward recipes that keep things bright and cool. |
| Sugar-Free No-Bake Cheesecake | Offers a lighter option for guests watching their sugar intake. |
Naomi often serves small portions of each on a “dessert board” a chilled platter with cheesecake slices, mini fruit tarts, and chocolate-dipped nuts. It looks elegant but takes minimal effort.
Fresh & Fruity Additions
For a lighter touch, fresh fruit is your best friend. Try topping each cheesecake slice with one of these:
| Topping Idea | Best Flavor Pairing |
|---|---|
| Fresh cherry halves | Deepens the cherry flavor |
| Sliced kiwi | Adds tart brightness |
| Orange or lemon zest | Enhances citrus notes |
| Honey drizzle | Adds floral sweetness |
| Toasted pistachio dust | Adds crunch and color |
Naomi’s favorite? A cherry-lime glaze made by simmering cherry juice with lime zest then cooling it and spooning over each slice. It’s vibrant, glossy, and adds the perfect tangy finish.
Drink Pairings
To balance this cheesecake’s creamy richness, go for crisp, refreshing drinks:
| Drink | Why It Works |
|---|---|
| Iced lemon tea | Refreshing and citrus-forward |
| Sparkling water with lime | Cleanses the palate |
| Cherry Italian soda | Matches the fruit notes with a fizzy twist |
| Chilled rosé | Elegant and slightly tart |
These beverages highlight the dessert’s freshness without overpowering it ideal for garden parties or weekend brunches.
If you’re planning a full dessert lineup, add in light treats like the Sugar-Free No-Bake Cheesecake or fun seasonal sweets from our Fruity No-Bake Desserts collection. Together, they create a refreshing mix that’s as pretty as it is delicious.
And for creative plating ideas and serving inspiration, check out our dessert styling boards on Pinterest Naomi often shares ways to make no-bake cheesecakes look restaurant-worthy right at home.
Top Tips for Perfecting Cherry Pistachio No Bake Cheesecake
Emma & Ella’s Cherry Pistachio No Bake Cheesecake is all about effortless beauty cool, creamy, and bursting with color. Follow these expert tips to get that perfectly smooth texture, balanced flavor, and clean slice every time.
1. Use Full-Fat Cream Cheese
Low-fat versions don’t set as firmly and can make your cheesecake too soft. Full-fat cream cheese gives you that luscious, silky texture that holds up beautifully once chilled.
Naomi uses the same tip in her Sugar-Free No-Bake Cheesecake the extra creaminess is worth it for that bakery-style consistency.
2. Whip the Cream Separately
For the fluffiest filling, always whip your heavy cream to soft peaks before folding it into the cream cheese mixture. This creates that mousse-like texture that melts in your mouth. Overmixing after folding can deflate the air and make the filling dense, so stop as soon as it looks smooth.
3. Chill Long Enough
Patience makes perfection. While this cheesecake sets after four hours, chilling overnight gives it a firm, sliceable structure and allows the flavors to deepen. Naomi recommends making it the day before serving that way, you can relax and enjoy your gathering.
If you’ve tried the No-Bake Christmas Mini Cheesecakes, you’ll know that chill time is what transforms a good cheesecake into a great one.
4. Drain Cherries Well
Excess moisture from cherries can cause the filling to become too soft or streaky. If you’re using jarred or canned cherries, pat them dry with paper towels before folding into the batter. For fresh cherries, chop them and let them rest on a paper towel to absorb any extra juice.
5. Balance the Citrus
Both lemon and lime zest bring brightness, but too much juice can loosen the texture. Stick with one tablespoon each for that perfect tang without thinning the filling.
Naomi’s trick: zest your fruit before juicing it. The oils in the peel add extra flavor and aroma that makes the cheesecake pop.
6. Slice with a Hot Knife
For those magazine-perfect layers, dip your knife in hot water and wipe it dry before each cut. This keeps the crust firm and the filling smooth without smudging the cherries or pistachios.
She also recommends using a springform pan lined with parchment it makes removing the cheesecake a breeze.
7. Customize with Confidence
You can swap pistachios for almonds or add a swirl of cherry puree through the filling for extra flair. For a festive twist, Naomi sometimes tops hers with crushed pistachio brittle for crunch.
Get inspired by other colorful creations like our Cherry Pecan Cheesecake Lush or fruit-packed desserts in Fruity No-Bake Desserts both offer fun variations to play with.
Perfecting this cheesecake is about keeping things light, fresh, and flavorful exactly what Naomi’s fruit-forward desserts are all about. Once you master this, you’ll find endless ways to reinvent it for every season.
Storing and Reheating Tips
The Cherry Pistachio No Bake Cheesecake keeps its luscious texture and fresh flavor for days if you store it right. Emma & Ella designed this recipe to be both make-ahead and fridge-friendly perfect for parties, brunches, or whenever you want a sweet, chilled slice ready to go.
Storing
| Storage Method | How to Do It | Shelf Life |
|---|---|---|
| Refrigerator | Cover the cheesecake tightly with plastic wrap or transfer slices to an airtight container. Keep it chilled to maintain structure and flavor. | Up to 5 days |
| Freezer | Freeze individual slices on a tray, then wrap in plastic and foil. Thaw overnight in the refrigerator before serving. | Up to 2 months |
| Room Temperature | Not recommended the creamy filling softens quickly. Always keep it cold until ready to serve. | 1 hour max |
Naomi’s note: Refrigerating overnight actually enhances the flavors the citrus zest and cherries deepen, while the crust holds firm.
Serving After Storage
For the best presentation and texture, remove your cheesecake from the fridge about 10–15 minutes before serving. This allows it to soften slightly for that melt-in-your-mouth bite.
If it’s been frozen, let it thaw fully in the refrigerator. Avoid microwaving that can melt the whipped cream and alter the texture.
Serve with a fresh dollop of whipped cream, a sprinkle of pistachios, and a few bright cherry halves for that “just-made” look.
Naomi’s Favorite Make-Ahead Trick
If you’re prepping for a big gathering, make the cheesecake base and filling separately a day early. Store them chilled and assemble the next morning for the freshest finish. This method also works beautifully if you’re making minis in jars (perfect for brunch buffets).
You can find more prep-ahead desserts like this one in our No-Bake Coconut Cream Balls and Fruity No-Bake Desserts both designed for stress-free hosting.
Bonus Storage Tip
Always store uncovered for the first 15 minutes of chilling to prevent condensation from forming on top, then cover tightly afterward. This keeps your cheesecake picture-perfect and prevents sogginess.
And for even more clever dessert preservation hacks, follow us on Pinterest Naomi often shares her best no-bake storage tricks there.
FAQs
Emma & Ella’s Cherry Pistachio No Bake Cheesecake is one of those desserts that looks fancy but comes together effortlessly. Here are answers to the most common questions so your cheesecake turns out perfect every single time.
Can I use frozen cherries instead of fresh or jarred?
Yes, you can just thaw them completely and pat them dry before adding. Frozen cherries work beautifully if fresh ones aren’t in season. Removing excess liquid prevents the filling from getting watery.
How long should this cheesecake chill before serving?
At least 4 hours, but overnight is best for a firm set and deep flavor. The extra time allows the graham crust to hold together and the citrus and cherry flavors to mingle. Naomi always chills hers overnight for the smoothest slices.
Can I make this recipe nut-free?
Absolutely. Simply omit the pistachios or replace them with shredded coconut or white chocolate chips for added texture. The cheesecake will still be rich and flavorful just a little softer.
How do I get clean, professional slices?
Use a sharp knife dipped in hot water and wipe it dry between cuts. The heat slices cleanly through the creamy filling without smearing the cherry or pistachio bits. If serving at a party, slice just before guests arrive to keep edges smooth and fresh.
Conclusion
The Cherry Pistachio No Bake Cheesecake is pure summer in every bite creamy, nutty, tangy, and filled with bursts of juicy cherries. Emma & Ella’s fruit-forward twist makes it feel both elegant and comforting, perfect for gatherings or quiet afternoons with coffee.
Its balance of textures crunchy crust, velvety filling, and fresh toppings makes it one of those no-bake desserts you’ll crave again and again. Pair it with our Cherry Pecan Cheesecake Lush or explore our Fruity No-Bake Desserts collection for more chilled, colorful inspiration.
Stay connected with The Cooking Twins community on Pinterest and Facebook for Naomi’s latest no-bake creations, presentation tips, and seasonal flavor guides.
Cherry Pistachio No Bake Cheesecake
- Total Time: 260 min
- Yield: 10 servings 1x
- Diet: Vegetarian
Description
Bright, creamy, and nutty, this Cherry Pistachio No Bake Cheesecake blends cherries, pistachios, and citrus zest over a buttery graham crust for a refreshing, make-ahead dessert.
Ingredients
2 cups graham cracker crumbs
6 tbsp melted butter
16 oz cream cheese, softened
½ cup granulated sugar
1 cup heavy cream (whipped)
Zest of 1 lemon
Zest of 1 lime
1 tbsp lemon juice
1 tbsp lime juice
1 cup chopped cherries (fresh or jarred, drained)
½ cup chopped pistachios
1 tsp vanilla extract
1 cup whipped cream (for folding)
Whipped cream for topping
Whole cherries and finely chopped pistachios for garnish
Instructions
- Make Crust: Mix graham cracker crumbs with melted butter until moistened. Press into a springform pan and chill for 15 minutes.
- Mix Filling: Beat softened cream cheese and sugar until smooth. Add lemon zest, lime zest, lemon juice, lime juice, and vanilla; mix until creamy.
- Fold In: Whip heavy cream to soft peaks and fold gently into the cream cheese mixture. Add cherries and pistachios last for texture.
- Assemble: Spread the cheesecake filling evenly over the chilled crust, smoothing the top.
- Chill: Cover and refrigerate for at least 4 hours or overnight until firm.
- Garnish & Serve: Top with whipped cream, cherries, pistachios, and a dusting of citrus zest before serving.
Notes
Use full-fat cream cheese for the creamiest texture.
Drain cherries well before folding in to prevent excess moisture.
Chill overnight for best structure and flavor.
Store covered in the refrigerator up to 5 days or freeze slices for up to 2 months.
- Prep Time: 20 min
- Category: No-Bake Desserts
- Method: Chill
- Cuisine: American
Nutrition
- Serving Size: 1 slice
- Calories: 480
- Sugar: 33g
- Sodium: 310mg
- Fat: 28g
- Saturated Fat: 14g
- Unsaturated Fat: 12g
- Trans Fat: 0g
- Carbohydrates: 45g
- Fiber: 2g
- Protein: 8g
- Cholesterol: 65mg

Must‑Have Kitchen Equipment for This Recipe:
- Instant Pot Duo Plus 6‑Qt 9‑in‑1 Programmable Pressure Cooker
- Instant Vortex Plus 6‑Qt Air Fryer (ClearCook + OdorErase)
- Aucma 6.5‑Qt 6‑Speed Tilt‑Head Stand Mixer
Some links may be affiliate links. Read our affiliate disclosure.

Ratings & Reviews
Leave a reviewWe'd love to hear how it turned out.