
Chocolate Coconut Bars
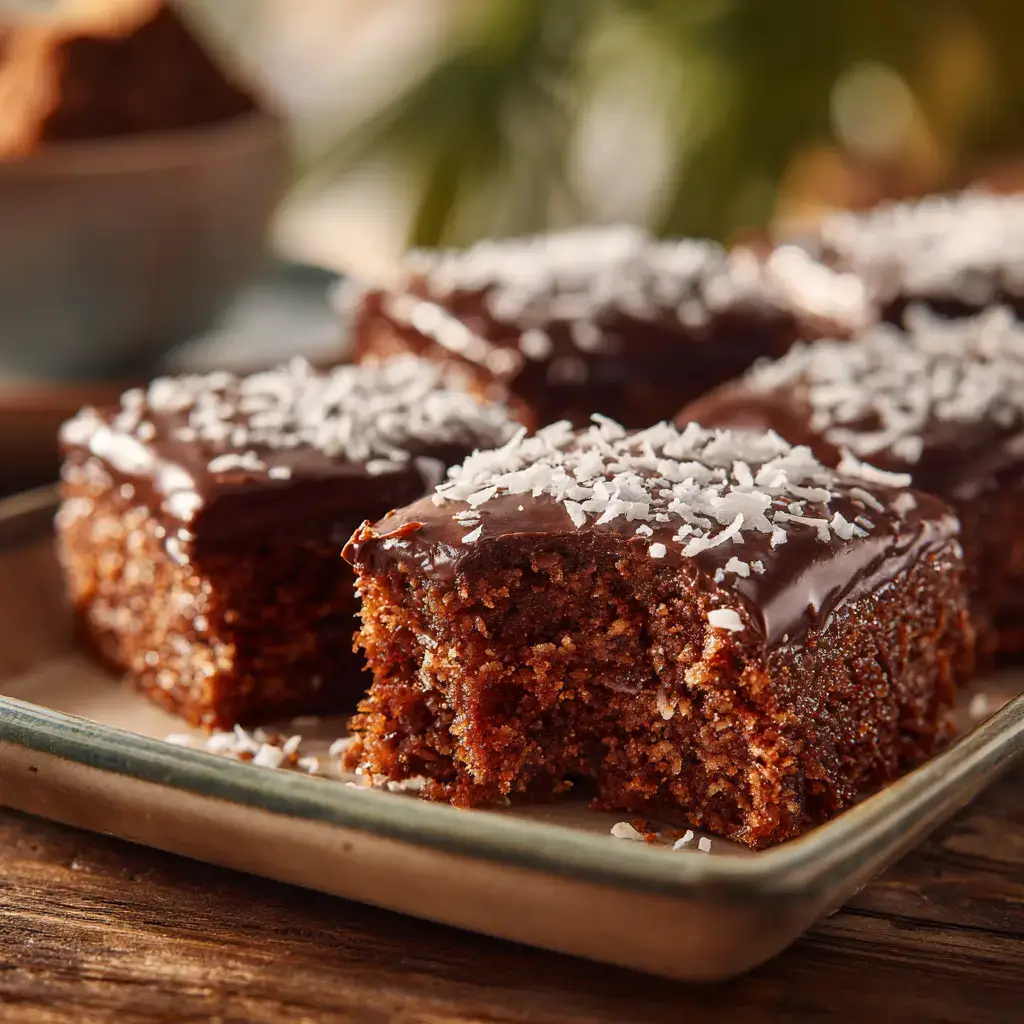
Chocolate coconut bars are rich, chewy, and nostalgic. With a buttery base, fudgy icing, and toasted coconut, they’re a classic bake everyone loves.

By Ella FrostUpdated June 12, 2026
- Prep Time
- 20 min
- Cook Time
- 20 min
- Total Time
- 40 min
- Servings
- Serves 6 to 8

5-Ingredient Dump & Go Crockpot Meals
101 effortless slow cooker recipes for busy families.
View on AmazonAvailable on AmazonChocolate coconut bars are rich, chewy, and layered with nostalgic flavor. This easy, crowd-pleasing recipe combines two irresistible ingredients in the most delightful way. Hosting or snacking straight from the pan — these always satisfy.
Table of Contents
Table of Contents
The Story & Intro
What are Chocolate Coconut Bars?
From the very first bite, chocolate coconut bars feel like a warm hug from childhood. We remember helping Mom mix the base with our hands, always sneaking a taste before it hit the oven. These bars were a constant in our lunchboxes and family parties fudgy, sweet, and always a hit. They’re made with pantry staples: cocoa, desiccated coconut, butter, sugar, and a glossy chocolate icing that firms to perfection as the bars cool.
If you’re wondering what chocolate coconut bars are exactly, think of them as a blend between brownies and lamingtons. They’ve got the structure of a firm slice, the chewiness of a coconut cake, and the indulgence of chocolate frosting no wonder they’ve been loved for generations.
Chocolate Coconut Bars
- Total Time: 40 min
- Yield: Serves 6 to 8 1x
- Diet: Vegetarian
Description
Chocolate coconut bars are rich, chewy, and nostalgic. With a buttery base, fudgy icing, and toasted coconut, they’re a classic bake everyone loves.
Ingredients
125 g (1/2 cup + 1/3 cup) plain flour
1 teaspoon baking powder
1 tablespoon cocoa powder
100 g (2/3 cup) light brown sugar
90 g (1 cup) desiccated coconut
125 g (1 stick + 1 tbsp) unsalted butter, melted
1 egg
160 g (1 cup + 2 tbsp) icing sugar, sifted
1 tbsp cocoa powder
1 tsp soft butter
1–2 tbsp full cream milk
2+ tbsp desiccated coconut (for topping)
Instructions
- Preheat the oven to: Preheat the oven to 180°C (350°F) and line a 19 x 29 cm baking tin with paper.
- Mix flour, baking powder: Mix flour, baking powder, cocoa, brown sugar, and coconut in a bowl.
- Add melted butter and: Add melted butter and egg. Stir until thick and well combined.
- Press mixture into the: Press mixture into the tin and bake for 20 minutes until firm.
- While baking, make icing: While baking, make icing by mixing icing sugar, cocoa, butter, and milk until spreadable.
- Cool the base slightly: Cool the base slightly (3–5 mins), then spread icing evenly on top.
- Sprinkle coconut over warm: Sprinkle coconut over warm icing and let the bars cool fully in the tin.
- Slice into bars or: Slice into bars or squares and serve or store.
Notes
For a twist, mix chopped nuts into the base.
Bars freeze well—wrap individually for later.
- Prep Time: 20 min
- Cook Time: 20 min
- Category: Dessert
- Method: Baked
- Cuisine: Australian
Nutrition
- Serving Size: 1 bar
- Calories: 265
- Sugar: 18g
- Sodium: 85mg
- Fat: 15g
- Saturated Fat: 10g
- Unsaturated Fat: 4g
- Trans Fat: 0g
- Carbohydrates: 30g
- Fiber: 2g
- Protein: 3g
- Cholesterol: 40mg
Why You’ll Love It
Chocolate and coconut are a match made in dessert heaven. The deep, slightly bitter cocoa balances the sweet flake of coconut perfectly. These bars deliver a texture combo you’ll crave again and again: slightly crisp edges, soft coconut-rich centers, and smooth icing that seals it all together. They’re easy to make in one bowl, and slice beautifully for parties, lunchboxes, or after-dinner bites.
And if you’re already a fan of our No-Bake Coconut Cream Pie, you’ll fall just as hard for these bars.
We love that they stay fresh for days, pack well for road trips, and freeze like a dream. Plus, they pair beautifully with a cozy cup of tea or coffee just like our Date Chocolate Bark.
Quick Overview
Why This Recipe Works
Chocolate coconut bars are one of those rare bakes that hit every craving. You’ve got rich cocoa, toasty coconut, a buttery base, and a melt-in-your-mouth frosting all in one easy traybake. The balance of sweet and depth makes these bars satisfying but not overly rich. They’re a bit like lamingtons’ chewy cousin, but simpler to prepare and slice. One bowl, one pan, endless compliments.
Plus, this recipe is naturally dairy-rich and can be easily tweaked to suit dietary needs just swap butter for a dairy-free version or use gluten-free flour. And unlike complex layered cakes, these bars come together in under an hour, making them perfect for weeknights or spontaneous dessert needs.
You might have tried our Date Brownie Balls or Peanut Butter Cup Icebox Cake, but if you’re in the mood for something baked and deeply nostalgic, this is the one to bookmark.
What Makes These Bars Different?
There are plenty of chocolate coconut bar recipes out there, but here’s what makes this one stand out:
- Uses pantry staples, no fancy ingredients.
- Delivers chewy, moist bars not dry or crumbly.
- Features a classic cocoa icing that firms up without cracking.
- Adaptable: turn them into slices, bites, or even a rustic “slab” cake.
- A beloved Aussie-style bake that fits into any dessert lineup.
The best part? Once you bake them, your kitchen will smell like a dream a mix of buttery coconut and warm chocolate that calls everyone to the table. You’ll want to enjoy them with a warm drink just like our fans do with Brownie Refrigerator Cake.
Ingredients
What You’ll Need
Chocolate coconut bars use simple, familiar ingredients, but their flavor payoff is next-level. We always recommend using the best-quality cocoa powder and real butter it makes a difference in both texture and taste.
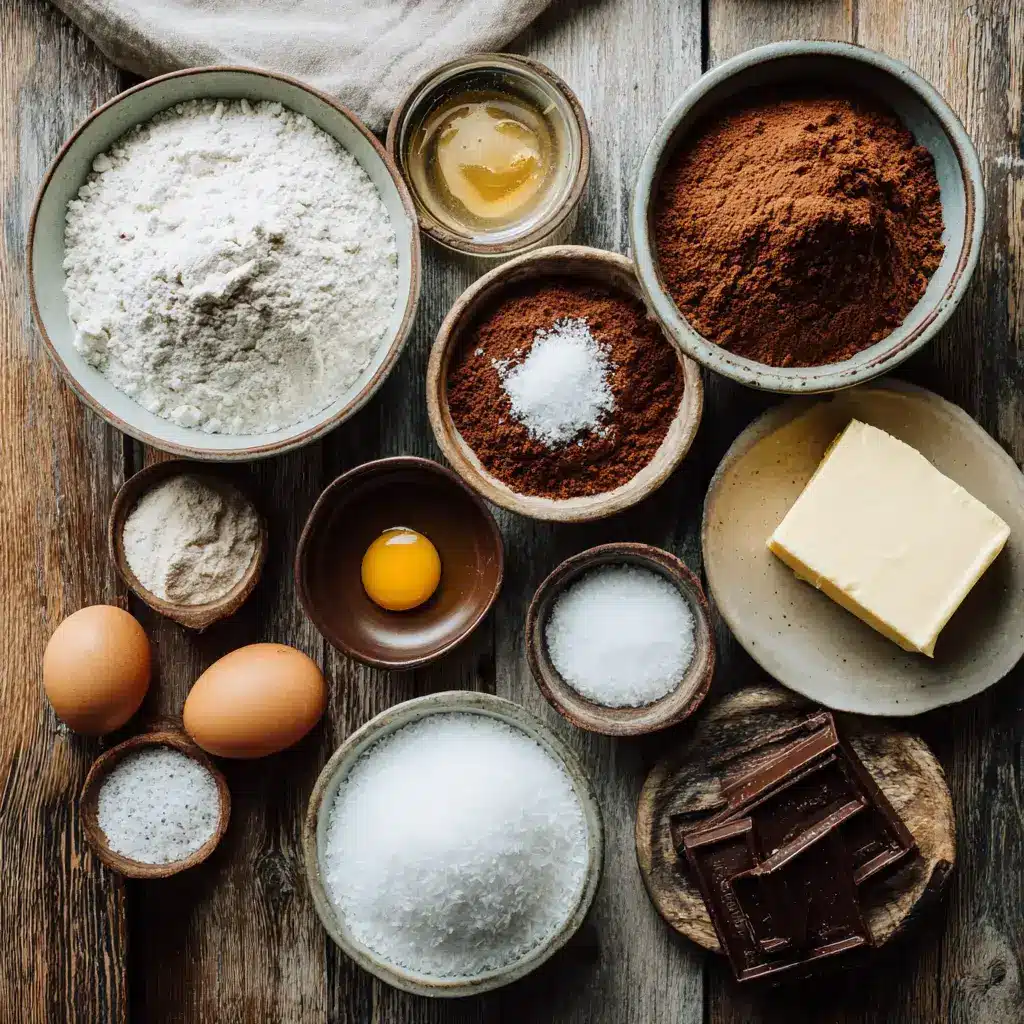
Here’s everything you’ll need for both the base and the icing:
| Ingredient | Amount |
|---|---|
| Plain flour | 125 g (1/2 cup + 1/3 cup) |
| Baking powder | 1 teaspoon |
| Good-quality cocoa powder | 1 tablespoon |
| Light brown sugar | 100 g (2/3 cup) |
| Desiccated coconut | 90 g (1 cup) |
| Unsalted butter, melted | 125 g (1 stick + 1 tablespoon) |
| Egg | 1 |
| For the icing | |
| Icing sugar, sifted | 160 g (1 cup + 2 tablespoons) |
| Cocoa powder | 1 tablespoon |
| Soft butter | 1 teaspoon |
| Full cream milk | 1–2 tablespoons |
| Extra desiccated coconut (for topping) | 2 tablespoons or more |
Ingredient Notes
- Coconut: Use unsweetened desiccated coconut for best results. Sweetened can make the bars overly rich.
- Butter: Melt it gently and cool slightly before mixing.
- Flour: Regular all-purpose (plain) flour works beautifully.
- Cocoa Powder: Choose a good-quality, unsweetened variety. It makes the chocolate flavor pop.
- Egg: Make sure it’s at room temperature it mixes better and gives a softer texture.
You’ll find many of these ingredients also featured in our Cheesecake and Brownie Cake or our silky No-Bake Orange Creamsicle Cheesecake if you’re planning a dessert table.
Step-by-Step Instructions
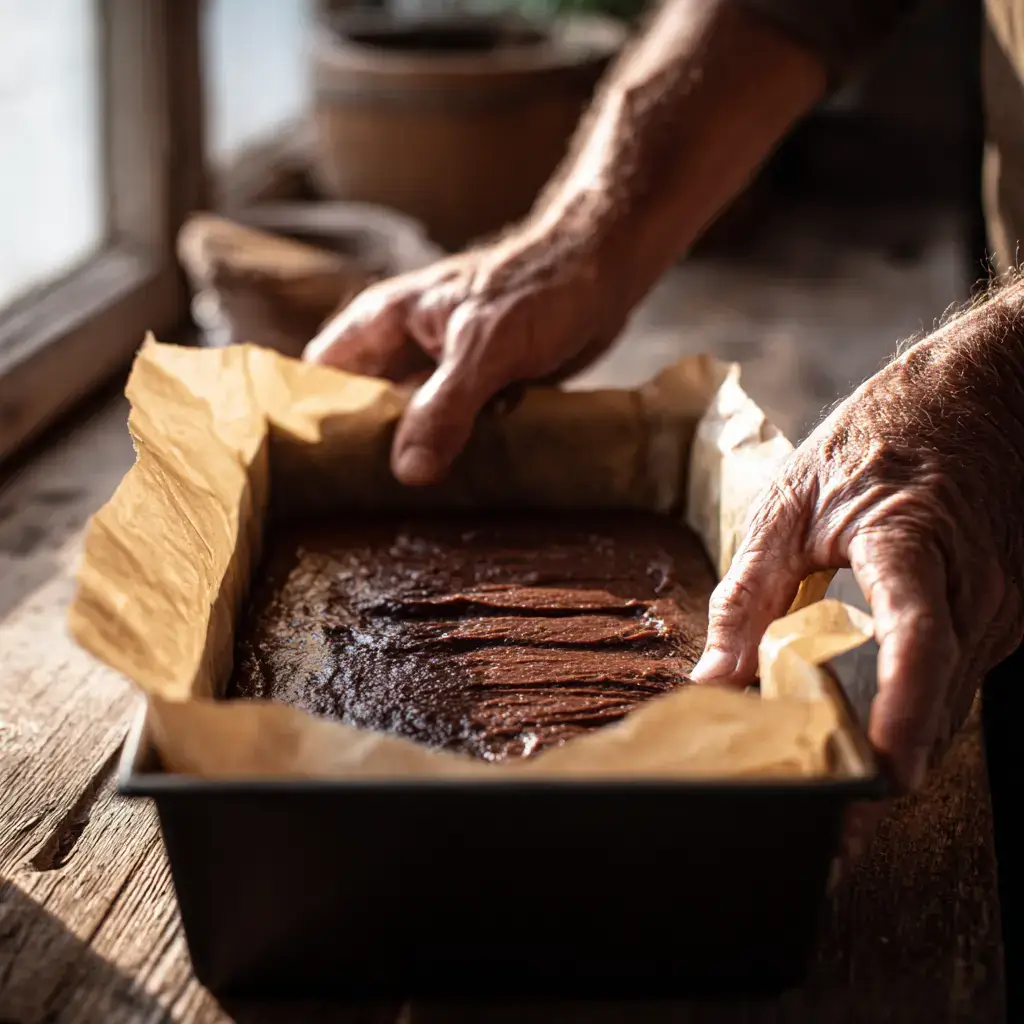
1. Preheat and Prepare
Start by preheating your oven to 180°C (350°F). Line a rectangular baking tin (about 19 x 29 cm or 7.5 x 11.4 inches) with parchment paper. This prevents sticking and makes removing the bars super easy.
2. Mix Dry Ingredients
In a large bowl, combine the plain flour, baking powder, cocoa powder, light brown sugar, and desiccated coconut. Stir everything until evenly distributed. We recommend using a whisk or spoon to break up any clumps especially in the cocoa and brown sugar.
3. Add Wet Ingredients
Pour in the melted butter and add the egg. Stir everything together until you have a thick, sticky batter. It might seem a bit crumbly at first, but keep mixing it will come together.
If you’ve baked our Cheesecake and Brownie Cake before, you’ll recognize that familiar buttery cocoa aroma here too.
4. Press and Bake
Transfer the mixture into the prepared baking tin. Use your fingertips or the back of a spoon to press it down evenly, especially into the corners.
Slide it into the oven and bake for about 20 minutes. The top should feel firm to the touch but not hard. Overbaking can dry out the bars, so keep an eye around the 18-minute mark.
5. Make the Chocolate Icing
While the bars are baking, prepare the icing. In a small bowl, mix the sifted icing sugar, cocoa powder, and soft butter. Add milk slowly a tablespoon at a time until the icing becomes thick, glossy, and spreadable. Don’t make it too runny; it should hold its shape when spread.
This method is similar to the topping in our Dubai Chocolate Strawberries Recipe, where smoothness is key.
6. Ice While Warm
Once the base is done, remove it from the oven and place the pan on a wire rack. Let it cool for about 3–5 minutes just long enough that it’s not piping hot.
While still warm, spread the chocolate icing evenly over the top. The slight heat helps the icing melt into the base and creates that signature fudgy layer.
7. Sprinkle and Cool
Immediately sprinkle with extra desiccated coconut before the icing sets. You can be generous here it adds flavor and texture.
Leave the whole tray to cool completely in the pan. This helps the icing firm up and makes cutting clean and easy.
8. Slice and Serve
Once cooled, slice into thin bars, squares, or even triangles whatever suits your occasion. Store in an airtight container, and they’ll keep beautifully for several days.
These bars pair wonderfully with coffee or tea, and if you love crowd-pleasers like our No-Bake Easter Cheesecake, this recipe’s going to be on repeat.
Serving Suggestions
How to Serve Chocolate Coconut Bars
Chocolate coconut bars are incredibly versatile. You can serve them as a casual after-school treat, a rich dessert for guests, or even a nostalgic holiday traybake. They’re perfect at room temperature and ideal for make-ahead dessert platters.
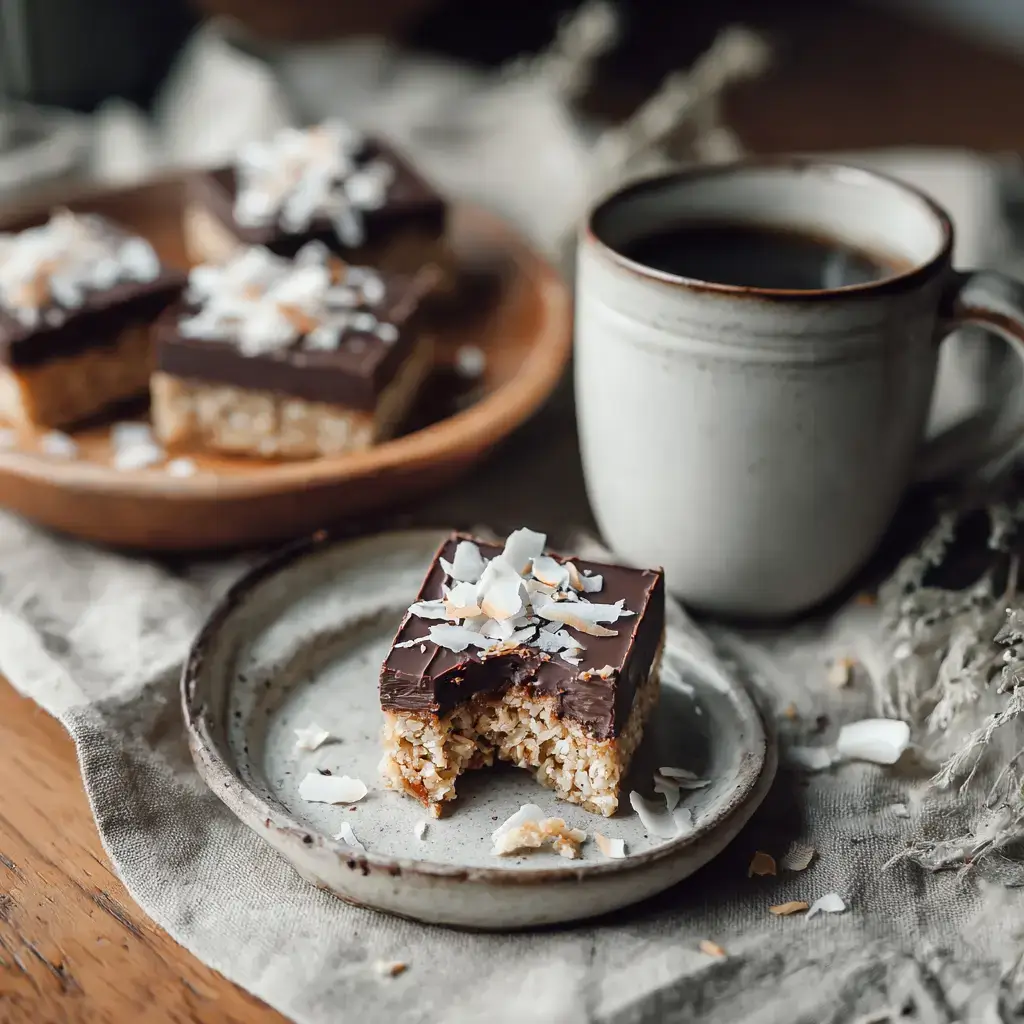
We love slicing them into thin bars or squares and arranging them alongside Date Chocolate Bark or Mint Chocolate Pudding Cookies for a chocolate-themed dessert board.
Here are a few fun ways to serve them:
- Afternoon snack: Pair with a cup of coffee or earl grey tea.
- Lunchbox treat: Wrap them individually in parchment for a sweet lunch addition.
- Dessert platter: Serve chilled next to no-bake pies or fruit for variety.
- Party squares: Cut them into mini bites and top with a dot of whipped cream or a raspberry for a fancy touch.
How to Customize for Occasions
Want to make them a little extra? Try these easy tweaks:
- Holiday bars: Add a dash of cinnamon or nutmeg to the base for a warm, seasonal flavor.
- Tropical twist: Mix in a handful of chopped dried pineapple or mango with the coconut.
- Double chocolate: Stir in mini chocolate chips before baking for extra richness.
They also make a lovely addition to spring dessert tables alongside recipes like our No-Bake Coconut Cream Pie or No-Bake Orange Creamsicle Cheesecake.
If you try one of these serving styles, don’t forget to tag us on Pinterest, or join the dessert talk over on Facebook.
Pro Tips & Storage
Expert Tips for Perfect Bars
Even though this recipe is simple, a few smart tips can take your chocolate coconut bars from great to unforgettable.
- Use room temperature egg: A cold egg can seize your melted butter. Room temp helps everything blend smoothly.
- Sift your icing sugar: This keeps the icing smooth and lump-free.
- Don’t overbake: Check at 18 minutes. The base should feel just firm but not dry.
- Ice while warm: Spreading the icing on a warm base helps it melt just enough to create that rich, fudgy top layer.
- Go bold with toppings: Want texture? Add chopped almonds or pecans on top of the coconut before the icing sets.
If you’ve ever made our Cream Puff Cake, you’ll know that timing and texture matter. These bars are no different each step affects that final fudgy bite.
How to Store and Freeze
- Room temperature: Store in an airtight container for up to 4–5 days. Keep in a cool, dry spot.
- Refrigerator: If your kitchen is warm or you like a firmer icing, refrigerate them. Just bring to room temp before serving.
- Freezer-friendly: Wrap individual bars in plastic wrap and freeze in a zip-top bag. They’ll last up to 2 months. Thaw at room temp before serving.
These bars also ship well, making them great for gifting. Include them in a homemade treat box with other chilled favorites like Brownie in a Mug or No-Bake Cheesecake Jars.
FAQs
Do chocolate and coconut go well together?
Absolutely. Chocolate and coconut are a beloved flavor duo for good reason. The creamy, slightly bitter notes of cocoa balance the sweet, nutty richness of coconut. That contrast makes desserts like these bars deeply satisfying. It’s the same harmony you’ll find in our Chocolate-Covered Date Bark and No-Bake Coconut Cream Pie, where richness meets freshness in every bite.
What are coconut chocolate bars called?
They’re known by different names depending on the region. In Australia, they’re often referred to as “chocolate coconut slices” or “tray bakes.” Elsewhere, you might hear them called “magic bars,” “lamington bars,” or simply “chocolate coconut bars.” No matter what they’re called, they usually feature a chewy base, a cocoa icing or ganache, and that signature coconut sprinkle.
Which chocolate pairs best with coconut?
Dark chocolate and semi-sweet chocolate pair beautifully with coconut thanks to their rich depth and slightly bitter edge. That contrast cuts the natural sweetness of coconut, making each bite more balanced. You’ll see this same combo in recipes like our Mint Chocolate Pudding Cookies and Brownie Refrigerator Cake, where deep chocolate flavor meets subtle sweetness.
Why add coconut to melted chocolate?
Adding coconut to melted chocolate adds texture, flavor, and visual appeal. It introduces a slightly chewy crunch, helps stabilize the chocolate in no-bake desserts, and makes each bite more dynamic. Plus, the natural oils in coconut enhance the meltiness of chocolate without overpowering it. It’s why so many of our readers love recipes like our Date Brownie Balls they combine softness with a little bite.
There’s something magical about chocolate and coconut coming together in one bite. These bars are rich, chewy, and nostalgic all while being easy to whip up in under an hour. Party bake, lunchbox treat, or a cocoa craving — chocolate coconut bars deliver every time.
You’ve got the story, the steps, and all the pro tips now it’s time to get baking. Your kitchen is about to smell amazing. And when you do try this recipe, tag us on Facebook or share your creations on Pinterest we’d love to see how your batch turns out.
Let’s bake something unforgettable today.
Must‑Have Kitchen Equipment for This Recipe:
- Instant Pot Duo Plus 6‑Qt 9‑in‑1 Programmable Pressure Cooker
- Instant Vortex Plus 6‑Qt Air Fryer (ClearCook + OdorErase)
- Aucma 6.5‑Qt 6‑Speed Tilt‑Head Stand Mixer
Some links may be affiliate links. Read our affiliate disclosure.


Ratings & Reviews
Leave a review2 reader ratings · 2 reviews
2 Reviews