
Peanut Butter Cup Icebox Cake
An easy no-bake Peanut Butter Cup Icebox Cake with layers of Oreo crust, peanut butter filling, chocolate pudding, and whipped topping.

By Ella FrostUpdated June 12, 2026

- Prep Time
- 30 min
- Cook Time
- 0 min
- Total Time
- 30 min
- Servings
- 16 servings

5-Ingredient Dump & Go Crockpot Meals
101 effortless slow cooker recipes for busy families.
View on AmazonAvailable on AmazonThis Peanut Butter Cup Icebox Cake is a creamy, chocolatey dream stacked with rich layers of peanut butter, Oreos, and pudding. No oven needed just chill, slice, and enjoy.
Table of Contents
Table of Contents
Intro & Personal Story
What is Peanut Butter Cup Icebox Cake?
Hi there! We’re Emma and Ella – the twin sisters behind The Cooking Twins. One bite of this Peanut Butter Cup Icebox Cake and you’ll know why we’re obsessed with no-bake recipes. This cool and creamy dessert layers a crunchy Oreo crust with a fluffy peanut butter cheesecake filling, silky chocolate pudding, and loads of chopped peanut butter cups. It’s everything you love about a Reese’s but chilled, scoopable, and party-ready.
A Peanut Butter Cup Icebox Cake isn’t just dessert it’s the easiest way to impress a crowd without turning on the oven. We grew up making classic icebox cakes with graham crackers and pudding, but once we discovered how well peanut butter and chocolate melt into each other, we never looked back. This version has become our go-to for birthdays, BBQs, and any day we just need a sweet, stress-free win.
Our favorite part? That moment when someone takes a bite and says, “Did you really make this?” Yes. Yes, we did. And you can too.
Love indulgent chocolate-peanut butter combos? We’ve got more like this in our 15 No-Bake Cheesecake Recipes That Taste Like Pure Summer.

Peanut Butter Cup Icebox Cake
- Total Time: 30 min
- Yield: 16 servings 1x
Description
An easy no-bake Peanut Butter Cup Icebox Cake with layers of Oreo crust, peanut butter filling, chocolate pudding, and whipped topping.
Ingredients
For the Crust:
14.3 ounce (405.4 g) package Oreo Cookies
6 tablespoons unsalted butter, melted and slightly cooled
For the Peanut Butter Layer:
8 ounces (226.8 g) cream cheese
¾ cup (193.5 g) creamy peanut butter
1 cup (120 g) powdered sugar
8 ounce (226.8 g) tub Cool Whip
6 snack size peanut butter cups, coarsely chopped
For the Pudding Layer:
5.9 ounce (167.26 g) box instant chocolate pudding
2½ cups (610 ml) milk
For the Topping:
8 ounce (226.8 g) Cool Whip
6 snack size peanut butter cups, coarsely chopped
Instructions
- Pulse Oreos into fine: Pulse Oreos into fine crumbs and mix with melted butter. Press into a 9×13-inch pan and refrigerate.
- Beat cream cheese and: Beat cream cheese and peanut butter until smooth. Add powdered sugar and mix well. Fold in Cool Whip and spread over crust. Top with chopped peanut butter cups. Chill.
- Whisk pudding mix and: Whisk pudding mix and milk. Let set for 5 minutes, then spread over peanut butter layer.
- Top with Cool Whip: Top with Cool Whip and remaining peanut butter cups.
- Cover and refrigerate at: Cover and refrigerate at least 2 hours before serving.
Notes
Let each layer chill for a few minutes before adding the next for cleaner slices.
For extra chocolate flair, drizzle the top with melted fudge.
- Prep Time: 30 min
- Category: No-Bake Desserts
- Method: No-Bake
- Cuisine: American
Nutrition
- Serving Size: 1 square
- Calories: 475
- Sugar: 38g
- Sodium: 449mg
- Fat: 26g
- Saturated Fat: 11g
- Carbohydrates: 53g
- Fiber: 2g
- Protein: 8g
- Cholesterol: 35mg
Why You’ll Love It
You’ll love this Peanut Butter Cup Icebox Cake for more reasons than we can count, but here are our top few:
- It’s no-bake, meaning you skip the heat and head straight for dessert.
- It combines all your favorite flavors Oreos, peanut butter, chocolate, and Cool Whip in a perfect chilled stack.
- It’s easy to prep and make ahead, and actually tastes better the longer it sits.
- Everyone (and we mean everyone) asks for the recipe.
- No fancy skills required just a bowl, a spatula, and your sweet tooth.
Summer party or a quick potluck contribution — this Peanut Butter Cup Icebox Cake is the secret weapon. It’s sweet, salty, rich, and light all at once and you’ll want seconds.
Looking for other dreamy no-bake desserts? Check out our Strawberry Shortcake Cheesecake Rolls and No Bake Coconut Cream Pie while you’re here.
Quick Overview
What to Expect
This Peanut Butter Cup Icebox Cake is everything you want in a no-bake dessert cool, creamy, rich, and layered with love. Each bite delivers a smooth peanut butter cheesecake filling, silky chocolate pudding, and sweet chunks of peanut butter cups, all resting on a buttery Oreo base. It’s the kind of dessert that makes people pause mid-bite.
Because this cake sets in the fridge, the flavors get time to settle and mingle. The chocolate and peanut butter soften into each other, the Cool Whip firms up just enough, and the Oreo crust turns into the perfect base. The result? A chilled slice of nostalgia and indulgence in one.
Don’t be surprised if this Peanut Butter Cup Icebox Cake disappears before you even grab your second piece. It’s just that good and it’s perfect for when you need a reliable crowd-pleaser that looks and tastes way more impressive than it is hard to make.
You’ll also love pairing it with our other easy favorites like Strawberry Shortcake Cheesecake Rolls or a chilled Cream Puff Cake that layers just as beautifully.
Tools You’ll Need
The magic of this Peanut Butter Cup Icebox Cake is in its simplicity. You don’t need anything fancy just a few kitchen basics:
- 9×13-inch baking pan – the perfect size to layer and serve
- Mixing bowls – one for each layer
- Hand mixer or stand mixer – for a fluffy peanut butter filling
- Rubber spatula – ideal for folding and spreading
- Offset spatula – for smooth, bakery-style layers
- Food processor or blender – to pulse those Oreos into fine crumbs
You probably have all these tools already, which makes this cake even easier to pull together. And yes, you can absolutely use a plastic spoon and a butter knife in a pinch we’ve been there.
Ingredients
The Key Layers in This Peanut Butter Cup Icebox Cake
One of the best things about this Peanut Butter Cup Icebox Cake is that it uses simple, familiar ingredients but when combined, they become something magical. Every layer brings its own texture and flavor, so don’t skip a thing.
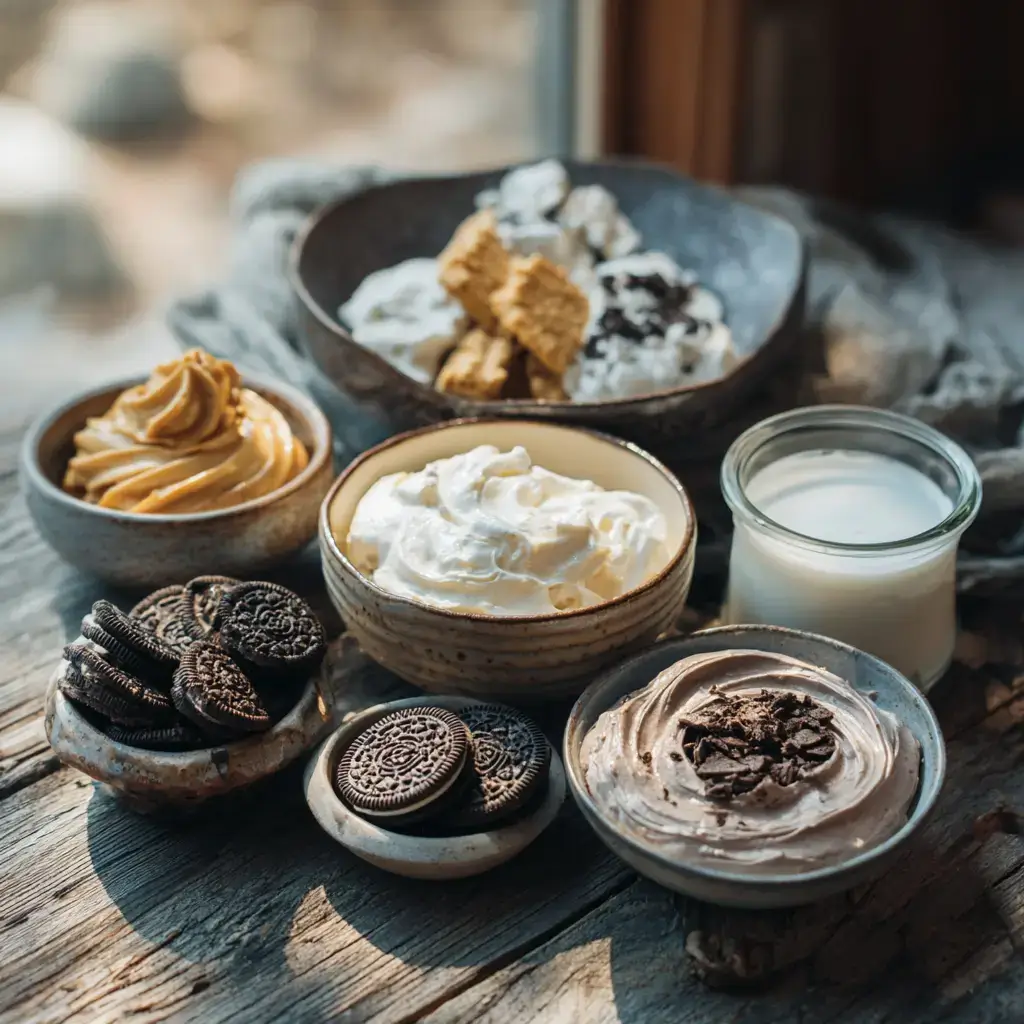
Let’s break it down so you can see exactly what you’ll need to make this dessert as dreamy as it looks.
For the Crust
- 1 (14.3 oz / 405.4 g) package Oreo Cookies – classic or double-stuffed both work
- 6 tablespoons unsalted butter, melted – helps form the cookie base
This crust sets the stage with deep, chocolatey flavor and a touch of crunch that softens beautifully as the cake chills.
For the Peanut Butter Layer
- 8 ounces (226.8 g) cream cheese, softened
- ¾ cup (193.5 g) creamy peanut butter – go for classic Jif or Skippy, not natural
- 1 cup (120 g) powdered sugar
- 8-ounce (226.8 g) tub Cool Whip – thawed in the fridge, not the counter
- 6 snack-size peanut butter cups, chopped – fold these in for a surprise in every bite
This layer is the heart of the Peanut Butter Cup Icebox Cake sweet, tangy, nutty, and irresistibly creamy.
For the Pudding Layer
- 1 (5.9 oz / 167.26 g) box instant chocolate pudding mix
- 2½ cups (610 ml) cold milk – whole milk works best for rich flavor
This smooth layer adds that classic chocolate flavor that pairs perfectly with peanut butter and makes the whole dessert feel like a chilled Reese’s bar.
For the Whipped Topping
- 8-ounce (226.8 g) tub Cool Whip
- 6 more snack-size peanut butter cups, chopped – for garnish and bonus crunch
The final layer turns the whole Peanut Butter Cup Icebox Cake into a showstopper. Fluffy topping, flecks of peanut butter cups, and all the sweet anticipation of that first chilled bite.
Want to swap or build your own twist? Try adding mini chocolate chips, drizzling with chocolate syrup, or tossing on some Reese’s Pieces. For a crust variation, take inspiration from our Cream Puff Cake its soft base pairs perfectly with creamy fillings.
Step-by-Step Instructions
Layer by Layer: How to Build the Ultimate Peanut Butter Cup Icebox Cake
The magic of a perfect Peanut Butter Cup Icebox Cake is all in the layering. Each step is super simple, and the final result is a chilled, dreamy dessert that feels like something straight from a bakery but made in your own kitchen. Let’s walk you through the process, one delicious layer at a time.
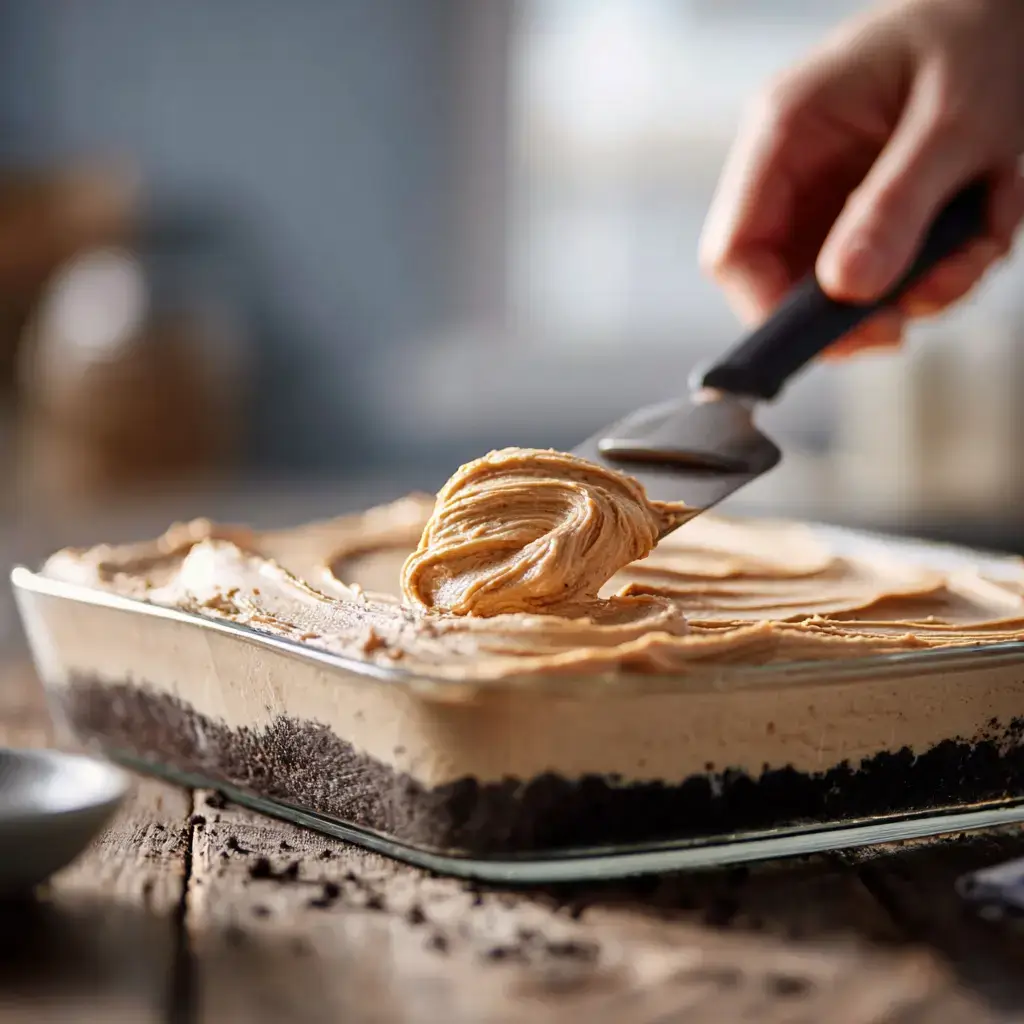
Step 1: Make the Crust
Start by pulsing the Oreo cookies in a food processor or high-speed blender until they become fine crumbs. You want them ground, but not greasy. Pour in the melted butter and pulse a few more times until the crumbs are evenly coated. Press this mixture into the bottom of a 9×13-inch pan using the back of a spoon or your hands. Once it’s flat and firm, pop the crust in the fridge while you work on the next layer.
Step 2: Mix the Peanut Butter Layer
In a large bowl, beat the softened cream cheese and creamy peanut butter until smooth and fully combined. This is your base for that rich, dreamy layer in your Peanut Butter Cup Icebox Cake. Slowly add powdered sugar and mix until fluffy. Once that’s done, gently fold in the Cool Whip with a spatula don’t stir too hard or you’ll deflate it. Spread this over the chilled crust and sprinkle on the chopped peanut butter cups. Return to the fridge to chill.
Step 3: Prepare the Chocolate Pudding
In a new bowl, whisk together the chocolate pudding mix and cold milk for about 2 minutes until thick. Let it sit for 5 more minutes to set completely. Once ready, use an offset spatula to gently spread it over your peanut butter layer. Don’t press too hard you want clean layers for your Peanut Butter Cup Icebox Cake, not a swirl.
Step 4: Add the Whipped Topping and Final Garnish
Now, spread the second tub of Cool Whip evenly over the pudding. It’s the final cloud-like layer that makes this cake so light and airy. Then top everything with the remaining chopped peanut butter cups. Cover the entire dish tightly and refrigerate it for at least 2 hours longer is even better.
This is when your Peanut Butter Cup Icebox Cake transforms from a stack of layers into one unified, sliceable masterpiece.
If you’re looking for other chilled masterpieces, try our No Bake Coconut Cream Pie or Strawberry Shortcake Cheesecake Rolls too.
Serving Suggestions
The Best Ways to Serve Peanut Butter Cup Icebox Cake
Once your Peanut Butter Cup Icebox Cake is fully chilled and ready, it’s time for the fun part serving it up! This dessert is rich, creamy, and packed with texture, so a clean cut and a thoughtful garnish make it even more irresistible.
Grab a sharp knife, run it under warm water, and wipe it clean between slices. That gives you smooth, bakery-style pieces with distinct layers. For an extra treat, drizzle the top of each slice with chocolate syrup or melted peanut butter before serving.
Hosting a party? Cut your Peanut Butter Cup Icebox Cake into small, bite-sized squares and add mini forks or dessert spoons. It makes for the perfect handheld sweet that guests can grab and enjoy, no plates required.
Pair It With Something Simple
Because this dessert is rich and decadent, we like to pair it with something light and refreshing on the side. A tall glass of cold milk, vanilla iced coffee, or even a scoop of plain whipped cream can balance out the sweetness.
For presentation, add a few extra chopped peanut butter cups or even a dusting of crushed Oreos around the plate. These little touches go a long way, especially if you’re serving it at a gathering or potluck.
This Peanut Butter Cup Icebox Cake also looks gorgeous on a cake stand, garnished with swirls of whipped topping and a few decorative candy pieces. Want a little twist? Try it with a drizzle of hot fudge or a side of Strawberry Cheesecake Rolls for variety on your dessert table.
Pro Tips & Storage
Tips for the Perfect Peanut Butter Cup Icebox Cake Every Time
We’ve tested this Peanut Butter Cup Icebox Cake more times than we can count and along the way, we picked up a few tricks to make it even better. Whether it’s your first time making it or your fiftieth, these tips will help you nail every layer.
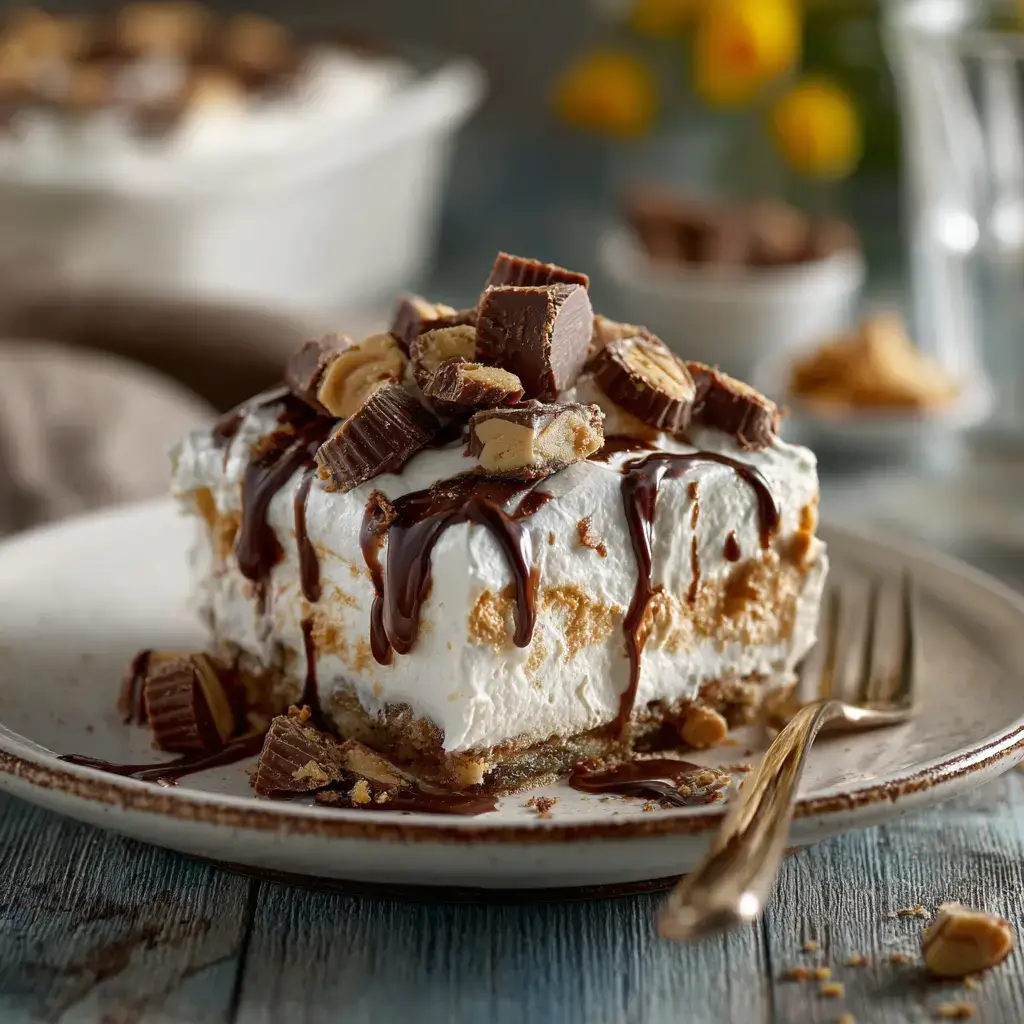
- Soften your cream cheese fully. Cold cream cheese leads to lumps. Let it come to room temperature before mixing.
- Chill between layers. After each major step, refrigerate the cake briefly to help the next layer sit cleanly on top. It also makes slicing much easier.
- Use full-fat products. For the best flavor and structure, don’t go light on the Cool Whip, cream cheese, or milk. The richness makes this dessert stand out.
- Fold gently. When combining Cool Whip into your peanut butter mixture, fold not stir to keep it light and fluffy.
Little techniques like these take your Peanut Butter Cup Icebox Cake from good to amazing, and make it look like something you’d see in a bakery window.
How to Store and Make Ahead
The beauty of this Peanut Butter Cup Icebox Cake is how well it stores meaning it’s perfect for prepping ahead, traveling, or keeping leftovers for the next day.
In the fridge:
Cover the dish tightly with foil or plastic wrap. It’ll stay fresh for up to 4 days. The layers actually settle in and become even smoother overnight.
In the freezer:
Wrap the entire dish or individual slices in plastic wrap, then foil. Freeze for up to 1 month. Thaw overnight in the fridge before serving. The texture stays creamy and delicious, making this an ideal make-ahead dessert.
You can even prep the layers the night before and assemble them the next morning. Or, assemble the entire Peanut Butter Cup Icebox Cake and refrigerate it for 24 hours it only gets better.
For another dessert that stores like a dream, try our No Bake Coconut Cream Pie another chilled favorite we keep on repeat.
FAQs
How long can you store a Peanut Butter Cup Icebox Cake?
You can store a Peanut Butter Cup Icebox Cake in the refrigerator for up to 4 days, tightly covered with plastic wrap or foil. The layers stay intact and even improve in flavor over time. Want to save it for longer? Freeze individual slices for up to 1 month and thaw them in the fridge overnight.
Can I use crunchy peanut butter instead of creamy?
Absolutely! While we prefer creamy for the smooth texture it brings to the peanut butter layer, using crunchy peanut butter will add a bit of bite. Just know it might be slightly harder to spread, but your Peanut Butter Cup Icebox Cake will still taste amazing.
What other cookies can I use for the crust?
Oreos are classic, but you’ve got options! Try chocolate graham crackers, peanut butter sandwich cookies, or even vanilla wafers for a unique spin. Just make sure to use enough butter to bind the crumbs together into a firm crust that supports the chilled layers of your Peanut Butter Cup Icebox Cake.
Can I make this ahead for a party?
Yes, and we highly recommend it. This dessert actually tastes better after sitting for a while. You can make the full Peanut Butter Cup Icebox Cake 24 hours in advance, cover it tightly, and store it in the fridge until ready to serve. It’s the ultimate low-stress, high-reward dessert.
Looking for another make-ahead favorite? Our Strawberry Shortcake Cheesecake Rolls are also perfect to prep early and chill.
This Peanut Butter Cup Icebox Cake is everything a no-bake dessert should be rich, creamy, chocolatey, and absolutely effortless.Party, solo treat, or a family surprise — this chilled dessert delivers big flavor with minimal work. Layer it, chill it, slice it and get ready to impress.
Now that you’ve got all the steps, it’s time to grab your mixing bowl and make some magic. Your next sweet memory is just a few layers away!
Follow us on Facebook and Pinterest for more sweet no-bake inspiration.
Must‑Have Kitchen Equipment for This Recipe:
- Instant Pot Duo Plus 6‑Qt 9‑in‑1 Programmable Pressure Cooker
- Instant Vortex Plus 6‑Qt Air Fryer (ClearCook + OdorErase)
- Aucma 6.5‑Qt 6‑Speed Tilt‑Head Stand Mixer
Some links may be affiliate links. Read our affiliate disclosure.
Keep good recipes close
Add The Cooking Twins to your preferred sources on Google for more easy dinners, no-bake desserts and kitchen inspiration.



Ratings & Reviews
Leave a reviewWe'd love to hear how it turned out.