
Sweet Sin Jelly Shots
Sweet Sin Jelly Shots are colorful, fruity, and alcohol-free treats made with juice and gelatin. A fun, easy no-bake dessert that’s perfect for parties, birthdays, and celebrations.

By Emma & Ella FrostUpdated June 13, 2026

- Prep Time
- 10 min
- Cook Time
- 0 min
- Total Time
- 190 min
- Servings
- 20 mini cups

5-Ingredient Dump & Go Crockpot Meals
101 effortless slow cooker recipes for busy families.
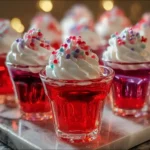
View on AmazonAvailable on AmazonBright, bouncy, and totally irresistible Sweet Sin Jelly Shots are the ultimate party dessert made fun for everyone. Forget alcohol; these colorful fruit-gel treats use juice instead, so every guest can join the cheers. Ruby here these no-bake beauties wiggle, sparkle, and taste like pure celebration. They’re your next must-make for birthdays, holidays, or sleepovers.
Table of Contents
What is Sweet Sin Jelly Shots
Sweet Sin Jelly Shots are a playful twist on traditional gelatin shots without the booze, but packed with flavor and flair. These non-alcoholic jelly cups combine fruit-flavored gelatin with cold juice or soda, creating wobbly, jewel-toned bites that look like they belong at a TikTok-worthy party table.
When we were younger, I loved watching my mom make “grown-up” gelatin shots for the holidays, but I always wanted a version that kids could enjoy too. That’s where this recipe was born a colorful, mocktail-inspired version that captures the same vibe without any of the alcohol. Instead of vodka, you’ll use cold fruit juice, sparkling soda, or even flavored seltzer for a bubbly texture that’s as fun as it is tasty.
Each little cup bursts with cherry, raspberry, or strawberry flavor, depending on your chosen gelatin mix. They’re chilled to perfection, so every bite melts into a cool, fruity sweetness. If you’re planning a party, these pair perfectly with treats like Crispy Candy Chips for crunch or Halloween Popcorn Balls for extra festive fun.
These jelly shots are more than just cute they’re quick, no-bake, and totally customizable. Want pastel shades for Easter? Use lemonade and berry gelatin. Going neon for a summer bash? Mix blue raspberry and lemon-lime soda. Every batch becomes a canvas for your creativity.
They’re also perfect for themed parties or sleepovers where kids and teens want something “cool” that feels like a celebration. Pair them with colorful straws, mini spoons, or even whipped cream and gummy candy on top for a next-level presentation.
If you’re craving other bright and fruity desserts, you’ll love browsing our Fruity No-Bake Desserts collection or making tropical treats like Avocado Ice Candy for a frozen finish.
These jelly cups prove you don’t need alcohol to make a statement just color, chill, and creativity.
Why You’ll Love This
If you’re all about quick prep, bold colors, and desserts that make people stop and stare, Sweet Sin Jelly Shots are your new go-to. Ruby-style desserts are meant to wow, and these little gems do exactly that bright, shiny, and ready to steal the spotlight at any party.
Party-Perfect and Crowd-Approved
Whether it’s a school event, sleepover, or birthday bash, these jelly shots bring instant fun. They’re completely alcohol-free, so everyone from kids to grandparents can join in. You can serve them in clear mini cups or silicone molds for a candy-like finish that looks straight off your For You page.
Plus, they chill fast and can be made a day ahead, leaving you free to enjoy the party. Just like our Easy Halloween Food Ideas, this recipe is perfect for busy days when you still want that wow factor.
Endless Flavor Combos
Want cherry blast? Go with fruit punch juice. Tropical vibes? Try pineapple gelatin with coconut water. Or mix lemonade with strawberry gelatin for a pink dream come true. You can even layer two colors for a “double trouble” look half blue raspberry, half strawberry.
Every batch feels like a flavor experiment you’ll actually enjoy testing. And if you’re a texture fan, topping each one with whipped cream, sour candy belts, or sprinkles adds an extra pop.
Instagram-Worthy Presentation
Let’s be real half the fun of making these is showing them off. When light hits the jiggly surface, it sparkles like glass. Arrange them on a white tray or mirrored board for that scroll-stopping shot. For extra style, match your jelly colors to your party theme.
If you’re into recipes that look as good as they taste, check out my other bold treats like Crispy Candy Chips or the dazzling Halloween Popcorn Balls.
No Oven, No Stress
No-bake desserts are what I live for just mix, pour, chill, and flex your creativity. This recipe takes less than 10 minutes of actual prep and looks like you spent hours. The hardest part? Waiting for them to set in the fridge!
Kid-Friendly and Parent-Approved
You can make a big batch for family movie night or portion them into mini cups for lunchbox surprises. Want a healthy twist? Use natural fruit juice and low-sugar gelatin. Either way, it’s the kind of treat that keeps everyone smiling.
Zero Waste, 100% Fun
No wrappers, no baking mess just rinse the cups, and you’re done. And since they last for days in the fridge, you can prep ahead for any occasion.
Sweet Sin Jelly Shots prove that dessert can be playful, effortless, and completely addictive. Once you make them, they’ll become your go-to move for every gathering that needs a splash of color and sweetness.
How to Make Sweet Sin Jelly Shots
Ruby here, and this is where the fun begins! Sweet Sin Jelly Shots are all about color, flavor, and simplicity. No ovens, no mixers just a few ingredients, a little chill time, and you’ll have shiny, fruity cubes of joy that bounce with every bite.
Quick Overview
Prep Time: 10 minutes
Chill Time: 3 hours
Total Time: 3 hours 10 minutes
Servings: About 20 mini cups (2 oz each)
Difficulty: Super Easy
Category: No-Bake Desserts
These jelly cups start with a flavored gelatin mix, hot water, cold juice (or soda), and your imagination. Perfect for parties, brunches, or after-school snacks.
For more colorful inspiration, check out our Fruity No-Bake Desserts you’ll find tropical combos and layered treats that fit right in with these bright bites.
Ingredients

| Ingredient | Amount |
|---|---|
| Flavored gelatin mix (cherry, raspberry, or strawberry) | 1 box (3 oz / 85 g) |
| Boiling water | 1 cup |
| Cold fruit juice or sparkling soda | 1 cup (or ½ cup juice + ½ cup soda) |
| Whipped cream or candy (optional garnish) | As desired |
Step-by-Step
Step 1: Dissolve the Gelatin
Pour 1 box of flavored gelatin into a heat-safe bowl. Add 1 cup of boiling water and stir for about 2 minutes until completely dissolved.
Step 2: Add the Cold Liquid
Mix in 1 cup of cold juice, soda, or a combination of both. Stir gently to keep it bubbly if using soda.
Step 3: Pour into Cups or Molds
Carefully pour the mixture into mini plastic shot cups, silicone molds, or even an ice cube tray for smaller bites.
Step 4: Chill Until Firm
Refrigerate for 2–4 hours, or until the jelly is firm to the touch. The longer it chills, the cleaner the pop-out.
Step 5: Garnish and Serve
Top each jelly shot with a swirl of whipped cream, sour gummy strips, or small candies before serving. Add edible glitter for an extra festive touch!
Ruby’s Pro Table
| Tip | Why It Matters |
|---|---|
| Use boiling water first | Ensures the gelatin dissolves completely for smooth texture |
| Juice over soda | Gives a richer, fruitier flavor |
| Chill longer for cleaner edges | Keeps each piece glossy and perfect for serving |
| Add toppings before chilling (optional) | Helps candy “sink” slightly for a layered look |
Optional Variations
- Tropical Vibes: Use pineapple gelatin with coconut water.
- Sunset Layers: Pour half strawberry and half orange gelatin for a color fade.
- Berry Burst: Mix cherry and blueberry gelatin for a bold combo.
You can even match colors to party themes pastels for spring, red and green for Christmas, or neon brights for a birthday bash.
Pair these with colorful snacks like Crispy Candy Chips or Easy Halloween Food Ideas for a dessert table that shines. And don’t forget to save this recipe to your Pinterest board or share your creations on our Facebook page we love seeing your spins on our no-bake favorites!
What to Serve Sweet Sin Jelly Shots With
When it comes to Sweet Sin Jelly Shots, the possibilities for pairing are just as colorful as the dessert itself. These wiggly, fruity treats love to share the spotlight, so let’s talk about what makes them pop on your party table.
Party Snack Combos
These vibrant jelly cups pair perfectly with crunchy, sweet, or salty treats. For a fun contrast in texture, serve them alongside Crispy Candy Chips or popcorn clusters like Halloween Popcorn Balls. The smooth, glossy jelly next to the crispy, airy crunch makes each bite feel exciting and playful.
You can also layer them in small dessert shooters one spoonful of crushed cookies or brownie crumbs on the bottom, jelly in the middle, and whipped cream on top. It’s like a party parfait that looks gorgeous and tastes even better.
Drinks That Match the Mood
Keep things cool and refreshing by pairing your Sweet Sin Jelly Shots with fruity mocktails or sparkling lemonades. If you want something extra colorful, try mixing up rainbow sodas layer blue raspberry soda with cherry and pineapple juice for a multicolor effect.
If you’re throwing a themed event, match your jelly shot colors with your drinks. Cherry shots + strawberry lemonade? Classic. Blue raspberry shots + lemon-lime soda? Total TikTok hit.
For summer parties, serve them straight from the fridge alongside frozen treats like our Avocado Ice Candy Recipe. The icy pops and cool jellies make the perfect heat-beating duo.
Dessert Table Goals
Want your dessert table to look like a dream? Combine your jelly shots with other no-bake desserts from our Fruity No-Bake Desserts collection. Pair them with mini cheesecakes, pudding cups, or candy bark to build a rainbow dessert spread.
Arrange everything on clear trays, use LED string lights underneath, and sprinkle edible glitter for a “Sweet Sin Galaxy” vibe. Your guests won’t just eat they’ll snap photos first.
Kid-Friendly Fun
For school events or birthdays, serve these jelly shots with small cups of fruit salad, yogurt parfaits, or pretzel sticks. Kids love choosing different colors, and since these are non-alcoholic, they can safely join the party fun.
Quick Serving Ideas Table
| Pairing | Why It Works |
|---|---|
| Crispy Candy Chips | Adds crunchy texture contrast |
| Sparkling Lemonade | Complements fruity flavors |
| Fruity No-Bake Desserts | Creates a colorful dessert board |
| Whipped Cream & Candy | Adds visual appeal and sweetness |
| Avocado Ice Candy | Perfect chilled duo for summer |
These jelly shots are the centerpiece of the party fun, eye-catching, and endlessly versatile.Hosting or feeding a crowd — this one always earns its place.
Top Tips for Perfecting Sweet Sin Jelly Shots
Making Sweet Sin Jelly Shots is quick and easy but getting them perfectly glossy, firm, and flawless takes a few simple tricks. Ruby’s got you covered with her favorite pro moves that make every batch photo-ready and party-perfect.
1. Use Boiling Water Not Just Hot
This one’s key! Your gelatin won’t fully dissolve unless the water is boiling hot. If you skip this, you might end up with grainy spots or uneven texture. Pour slowly and stir for a full minute until the mixture looks crystal clear.
2. Add Cold Juice Gradually
When adding your cold liquid, pour it slowly while stirring. This helps the mixture cool evenly so it sets consistently. If you’re using sparkling soda, add it last to keep those fun bubbles intact.
3. Choose the Right Molds
Mini shot cups or silicone molds work best for neat, easy release. Avoid paper or thin plastic they can stick or tear. Want something extra fancy? Use heart, star, or flower molds for themed parties.
4. Chill Long Enough
Two hours might work for small cups, but three to four hours gives the best firm, shiny texture. Overnight chilling is perfect if you’re prepping for an event. It’s the same method we use for other chilled treats like our Avocado Ice Candy Recipe.
5. Keep It Colorful, Not Cloudy
If you want those vibrant, see-through tones, don’t overmix after adding the cold liquid. Gently stir just until blended. Too many bubbles make the jelly cloudy.
6. Add Toppings Smartly
Wait until the jelly has almost set before topping it with candy or fruit this way, your toppings will rest perfectly on the surface instead of sinking. For whipped cream, add just before serving to keep the look fresh.
7. Match Colors and Flavors
Think pink strawberry with lemonade, cherry with cranberry juice, or lime gelatin with lemon-lime soda. Complementary flavors pop the most and keep each bite balanced.
8. Layer Like a Pro
Want a multicolor effect? Chill the first layer until slightly firm (about 45 minutes), then pour the second layer on top. Repeat for as many layers as your creativity allows!
9. Keep Them Chilled Until Party Time
Jelly needs to stay cold to hold its bounce. Transport them in a cooler bag with ice packs if serving outdoors. Like our Fruity No-Bake Desserts, these treats are best served chilled for that refreshing, melt-in-your-mouth feel.
10. Have Fun With Presentation
Use mini spoons, candy stirrers, or even edible glitter on top. Party treats should be fun and fabulous because if it doesn’t sparkle, did Ruby even make it?
| Tip | Why It Matters |
|---|---|
| Boiling water | Prevents grainy texture |
| Chill longer | Gives clean, glossy finish |
| Gentle stirring | Keeps jelly clear |
| Add toppings late | Prevents sinking |
| Serve cold | Keeps texture perfect |
These small tweaks make a huge difference, taking your Sweet Sin Jelly Shots from basic to bold and beautiful. They’re not just desserts they’re little party jewels that bounce, shine, and taste like happiness in a cup.
Storing and Reheating Tips
One of the best things about Sweet Sin Jelly Shots is how low-maintenance they are. They set beautifully, last for days, and keep their glossy look with minimal effort. Follow these storage tips to make sure every cup stays bouncy, bright, and picture-perfect until the last one disappears.
Storing in the Refrigerator
Once your jelly shots are set, cover them tightly with plastic wrap or snap-on lids if using mini cups. This prevents them from drying out or absorbing other fridge smells. Store them in the fridge for up to 5 days they’ll stay just as wiggly and delicious.
If you plan to serve them at an event, store them in a shallow tray so you can easily transport them to your dessert table. Just before serving, top them with whipped cream or candy for that extra “wow” moment.
These storage steps are the same method we use for recipes like our Fruity No-Bake Desserts to keep them fresh, vibrant, and camera-ready.
Freezing Jelly Shots (Yes, You Can!)
Believe it or not, you can freeze these but only if you plan to eat them as a chilled, icy treat. The texture changes a little (more slushy than bouncy), but they taste amazing frozen on a summer day. To freeze:
- Place the set jelly shots in a single layer on a tray.
- Freeze for 2 hours until firm.
- Transfer to an airtight container or freezer bag for up to 1 month.
Thaw them in the fridge for a few hours before serving, or eat straight from the freezer like fruity jelly pops.
Avoiding Texture Loss
The key to perfect jelly texture is keeping it consistently cold. Avoid leaving them out for too long after about 2 hours at room temperature, they’ll start to soften and lose that satisfying bounce. If you’re hosting outdoors, place the cups on a tray lined with crushed ice or freeze small gel packs under your serving plate.
Quick Storage Table
| Storage Method | Duration | Notes |
|---|---|---|
| Refrigerator | Up to 5 days | Cover tightly to prevent drying |
| Freezer | Up to 1 month | Thaw in fridge for soft texture |
| Room Temperature | 2 hours max | Keep cold to hold shape |
Transporting for Parties
If you’re bringing these to a friend’s house or event, pack them in a sealed container and keep them cool with ice packs. They travel well and stay intact just don’t stack too many layers or the cups might press against each other.
For fun outdoor setups, serve them in small mason jars or mini dessert cups with lids. It keeps them cute and portable, like we do for Easy Halloween Food Ideas.
Do They Need Reheating?
Nope! Jelly shots are best served cold. If you’ve kept them in the fridge and they’re too firm, let them sit out for 5–10 minutes before serving. That softens them just enough for a perfect jiggle and easy spoonful.
Keep these tips in mind, and your Sweet Sin Jelly Shots will always look as fresh as the day you made them shiny, colorful, and totally irresistible.
FAQs About Sweet Sin Jelly Shots
Can I make Sweet Sin Jelly Shots without alcohol?
Absolutely! These Sweet Sin Jelly Shots are designed to be fun and completely alcohol-free. Just swap the vodka from traditional recipes with cold fruit juice or sparkling soda. Cherry juice, lemonade, or berry punch all make bright, flavorful alternatives that keep the shots festive and family-friendly.
How long should Sweet Sin Jelly Shots chill before serving?
They need at least 2 to 4 hours in the fridge to fully set. If you’re making them ahead for a party, chill overnight for the best firm texture and clean edges. Similar to our Fruity No-Bake Desserts, the longer they rest, the more vibrant and stable the finish.
What’s the best way to make layered jelly shots?
To create layered colors, pour your first flavor and refrigerate it until it’s just firm around 45 minutes. Then carefully pour the second flavor on top. Repeat for as many layers as you like. The secret is patience wait until each layer sets slightly before adding the next to prevent blending.
Can I make different flavors in one batch?
Definitely! Divide your dissolved gelatin into separate bowls and mix in different juices or sodas for color variety. You can even alternate flavors in your tray or mold. Think cherry, blueberry, and lemon for a “rainbow party” effect.
How can I decorate Sweet Sin Jelly Shots for parties?
There’s no limit to the creativity here! Add whipped cream, sour gummy worms, or edible glitter right before serving. For themed events, match the colors orange and black for Halloween, red and green for Christmas, or pastel shades for birthdays. Try pairing with our Crispy Candy Chips for added sparkle.
Can I use natural or sugar-free gelatin?
Yes, you can! Sugar-free gelatin or agar-agar works great if you want a lighter or vegetarian option. The texture may be slightly firmer, but it still holds that perfect jelly bounce.
How far ahead can I make these for an event?
You can prep Sweet Sin Jelly Shots up to 3 days before your party. Keep them covered in the fridge, then decorate just before serving. They’ll look fresh, taste bright, and save you tons of last-minute stress.
What if my jelly doesn’t set properly?
If your jelly turns out too soft or watery, it usually means the gelatin didn’t dissolve fully or the liquid ratio was off. Always use boiling water for dissolving and measure carefully. For next time, chill them longer or add a bit less liquid for a firmer texture.
How can I make them look extra fancy?
Serve them in glass shot cups or silicone molds for clean shapes. You can even top them with whipped cream and crushed candy canes for a “Sweet Sin Sundae” twist. For display, place them on mirrored trays with fairy lights for a magical glow-up just like we do for our Easy Halloween Food Ideas.
Conclusion
Sweet Sin Jelly Shots are proof that desserts don’t need to be complicated to look stunning and taste incredible. With just a handful of ingredients and a little chill time, you’ll create colorful, fruity jelly bites that make every party sparkle.Hosting or feeding a crowd — this one always earns its place.
From bold cherry reds to vibrant neon blues, every cup is a tiny, wiggly masterpiece that looks straight out of Ruby’s dessert lab. The best part? No oven, no stress just pure creativity in every spoonful.
For even more bright and easy treats, check out our Fruity No-Bake Desserts and Crispy Candy Chips. And don’t forget to share your colorful creations with us on Facebook or save your inspo boards on Pinterest we love seeing how you make our recipes your own!
Sweet Sin Jelly ShotsWhat if my jelly doesn’t set properly?Sweet Sin Jelly Shots
- Total Time: 190 min
- Yield: 20 mini cups 1x
- Diet: Vegetarian
Description
Sweet Sin Jelly Shots are colorful, fruity, and alcohol-free treats made with juice and gelatin. A fun, easy no-bake dessert that’s perfect for parties, birthdays, and celebrations.
Ingredients
1 box (3 oz / 85 g) flavored gelatin mix (cherry, raspberry, or strawberry)
1 cup boiling water
1 cup cold fruit juice or sparkling soda
Whipped cream or candy for garnish (optional)
Instructions
- Dissolve Gelatin: Add gelatin mix to boiling water and stir for 2 minutes until dissolved.
- Add Liquid: Mix in cold juice or soda and stir gently to combine.
- Pour Into Cups: Pour mixture into mini cups or silicone molds.
- Chill: Refrigerate 2–4 hours until firm.
- Garnish: Top with whipped cream or candy before serving.
Notes
Use boiling water for best texture. Chill overnight for firmer results. For layered jelly shots, allow each layer to partially set before adding the next.
- Prep Time: 10 min
- Category: No-Bake Desserts
- Method: No-Bake
- Cuisine: American
Nutrition
- Serving Size: 1 mini cup
- Calories: 80
- Sugar: 15g
- Sodium: 40mg
- Fat: 0g
- Saturated Fat: 0g
- Unsaturated Fat: 0g
- Trans Fat: 0g
- Carbohydrates: 18g
- Fiber: 0g
- Protein: 2g
- Cholesterol: 0mg

Must‑Have Kitchen Equipment for This Recipe:
- Instant Pot Duo Plus 6‑Qt 9‑in‑1 Programmable Pressure Cooker
- Instant Vortex Plus 6‑Qt Air Fryer (ClearCook + OdorErase)
- Aucma 6.5‑Qt 6‑Speed Tilt‑Head Stand Mixer
Some links may be affiliate links. Read our affiliate disclosure.

Ratings & Reviews
Leave a reviewWe'd love to hear how it turned out.