
Dill Pickle Bread Twists
Crispy, cheesy, and tangy, these Dill Pickle Bread Twists are made with pizza dough, mozzarella, garlic butter, and chopped pickles baked to golden perfection in under 25 minutes.

By Emma & Ella FrostUpdated June 13, 2026

- Prep Time
- 10 min
- Cook Time
- 15 min
- Total Time
- 25 min
- Servings
- 8–10 twists

5-Ingredient Dump & Go Crockpot Meals
101 effortless slow cooker recipes for busy families.
View on AmazonAvailable on AmazonDill Pickle Bread Twists bring the ultimate rustic comfort to your table. With buttery layers, tangy chopped pickles, and golden, cheesy dough, these twists are pure homemade joy.Hosting a crowd or a casual get-together — this always earns compliments.
Table of Contents
Table of Contents
The Story & Intro
Growing up in our small kitchen, my grandmother always had a jar of homemade dill pickles tucked behind the flour bin. When I first made Dill Pickle Bread Twists, that same briny aroma filled the room instantly pulling me back to those childhood afternoons when we’d tear apart warm rolls straight from the oven. The balance of garlic, butter, and those tangy bits of chopped pickles makes this twist irresistibly nostalgic yet modern.
These bread twists are ideal for pickle lovers and perfect for quick gatherings. Unlike complex breads, this one starts with refrigerated dough a lifesaver when time’s tight. If you’ve ever made something like our no oven stovetop bread, you’ll love how easily this comes together.
For the filling, a mix of melted butter, mozzarella, and dill pickles adds a savory kick that’s both creamy and sharp. Pair them with ranch or cheese dip for that extra indulgence a comfort that reminds me of lazy weekends baking in my farmhouse kitchen.
When I shared these twists with my neighbors, the platter disappeared faster than my crack potatoes at a potluck! Their reaction? “It tastes like a grilled cheese met a pickle in the best way.” That’s exactly the vibe here simple, crowd-pleasing, and a little unexpected.
If you’ve ever tried our garlic parmesan cheeseburger bombs, you’ll appreciate the same melty, golden edge with that extra zing of dill. These are the kind of bites you can make ahead, freeze, and warm up anytime you need a salty, buttery treat.
Before we move into the how-to, here’s a quick peek at the texture and taste you can expect: flaky, cheesy layers, a soft buttery middle, and a crisp, golden exterior kissed with dried dill. You can even experiment by pairing them with something bright like our bread and butter pickle recipe for a sweet-tart contrast.
And if you’re making your own brine, check out this classic dill pickle recipe to capture that authentic flavor right from your pantry.
If you love farmhouse-inspired snacks or rustic appetizers, these twists are right up your alley and perfect to share on our Pinterest page or tag us on Facebook.
For more background on how pickles can actually benefit gut health, visit this informative Healthline article because yes, your favorite snack can be good for you too!
Why You’ll Love This Dill Pickle Bread Twists Recipe
There’s something purely comforting about warm, buttery bread but when you add tangy dill pickles, melty cheese, and a hint of garlic? It becomes an irresistible treat that bridges snack and comfort food. Here’s why you’ll fall in love with Dill Pickle Bread Twists from the very first bite.
Homemade Flavor, Zero Fuss
These twists capture everything you crave in a homemade snack without the hassle of kneading or proofing. Thanks to pre-made dough, you can whip them up in minutes. The aroma of butter, garlic, and dill fills your kitchen just like our pesto recipe with no pine nuts brings out that same instant warmth and comfort.
A Perfect Pickle Lover’s Dream
If you’re a pickle enthusiast, these bread twists might just become your new obsession. The tangy, briny bites of chopped dill pickles melt right into the cheese, creating that crave-worthy balance of salty and savory. You can even use your own homemade version from our dill pickle recipe for a bold, fresh flavor.
Great for Every Occasion
Serve them as an appetizer, game-day snack, or a quirky side dish. Just like our garlic parmesan cheeseburger bombs, they’re crowd-pleasers that disappear quickly.
Freezer-Friendly & Easy to Reheat
Dill Pickle Bread Twists can be frozen for up to two months and reheated in minutes perfect for busy families or spontaneous cravings. Check out the upcoming section on storing and reheating tips for step-by-step details.
Delicious Dipping Companions
These twists shine with creamy dips. Ranch dressing, cheese sauce, or even garlic butter make the perfect match. You can even try pairing them with something fresh and tangy like our bread and butter pickle recipe for a fun contrast.
Visually Stunning & Crowd-Ready
There’s something about golden, twisted dough flecked with dill that looks stunning on any snack platter.Quick weeknight or a proper family dinner — this delivers both ways.
For a bit of variety, serve them with a side of creamy potato dishes like our crack potatoes for the ultimate comfort combo.
And of course, don’t forget to share your twisty creations with us tag your photos on Facebook or upload them on our Pinterest board so we can feature your delicious takes!
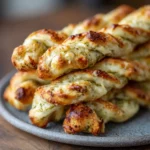
Dill Pickle Bread Twists
- Total Time: 25 min
- Yield: 8–10 twists 1x
- Diet: Vegetarian
Description
Crispy, cheesy, and tangy, these Dill Pickle Bread Twists are made with pizza dough, mozzarella, garlic butter, and chopped pickles baked to golden perfection in under 25 minutes.
Ingredients
1 can refrigerated pizza dough or crescent roll sheet
½ cup shredded mozzarella cheese (or cheddar)
¼ cup finely chopped dill pickles (well-drained)
1 tablespoon melted butter
½ teaspoon garlic powder
½ teaspoon dried dill (optional)
Instructions
- Prep: Preheat oven to 375°F (190°C). Line a baking sheet with parchment paper.
- Roll: Roll out dough and brush lightly with melted butter.
- Fill: Sprinkle with garlic powder, cheese, and pickles.
- Fold: Fold in half lengthwise; press gently to seal.
- Cut: Slice into 1-inch strips and twist each piece.
- Bake: Brush with butter, sprinkle dill, and bake 12–15 minutes until golden.
- Serve: Cool slightly and enjoy warm with ranch or garlic butter.
Notes
Drain pickles well to prevent sogginess. Freeze up to 2 months and reheat in the oven for best results.
- Prep Time: 10 min
- Cook Time: 15 min
- Category: Appetizer
- Method: Baking
- Cuisine: American
Nutrition
- Serving Size: 1 twist
- Calories: 120
- Sugar: 1g
- Sodium: 280mg
- Fat: 6g
- Saturated Fat: 3g
- Unsaturated Fat: 2g
- Trans Fat: 0g
- Carbohydrates: 12g
- Fiber: 0g
- Protein: 4g
- Cholesterol: 10mg
How to Make Dill Pickle Bread Twists
These Dill Pickle Bread Twists come together in just 25 minutes, with minimal effort and maximum flavor. Follow Naomi’s rustic approach simple steps, real ingredients, and that homemade touch that fills your kitchen with buttery, garlicky goodness.
Quick Overview
Here’s how it goes: roll, fill, fold, twist, and bake. That’s it! You’ll use refrigerated pizza dough or crescent dough as the base, layer it with melted butter, garlic, dill pickles, and cheese, then twist them into perfect golden strips.
If you’ve ever tried the no oven stovetop bread, this recipe follows a similar easy-bake charm but with a tangy twist.
Ingredients
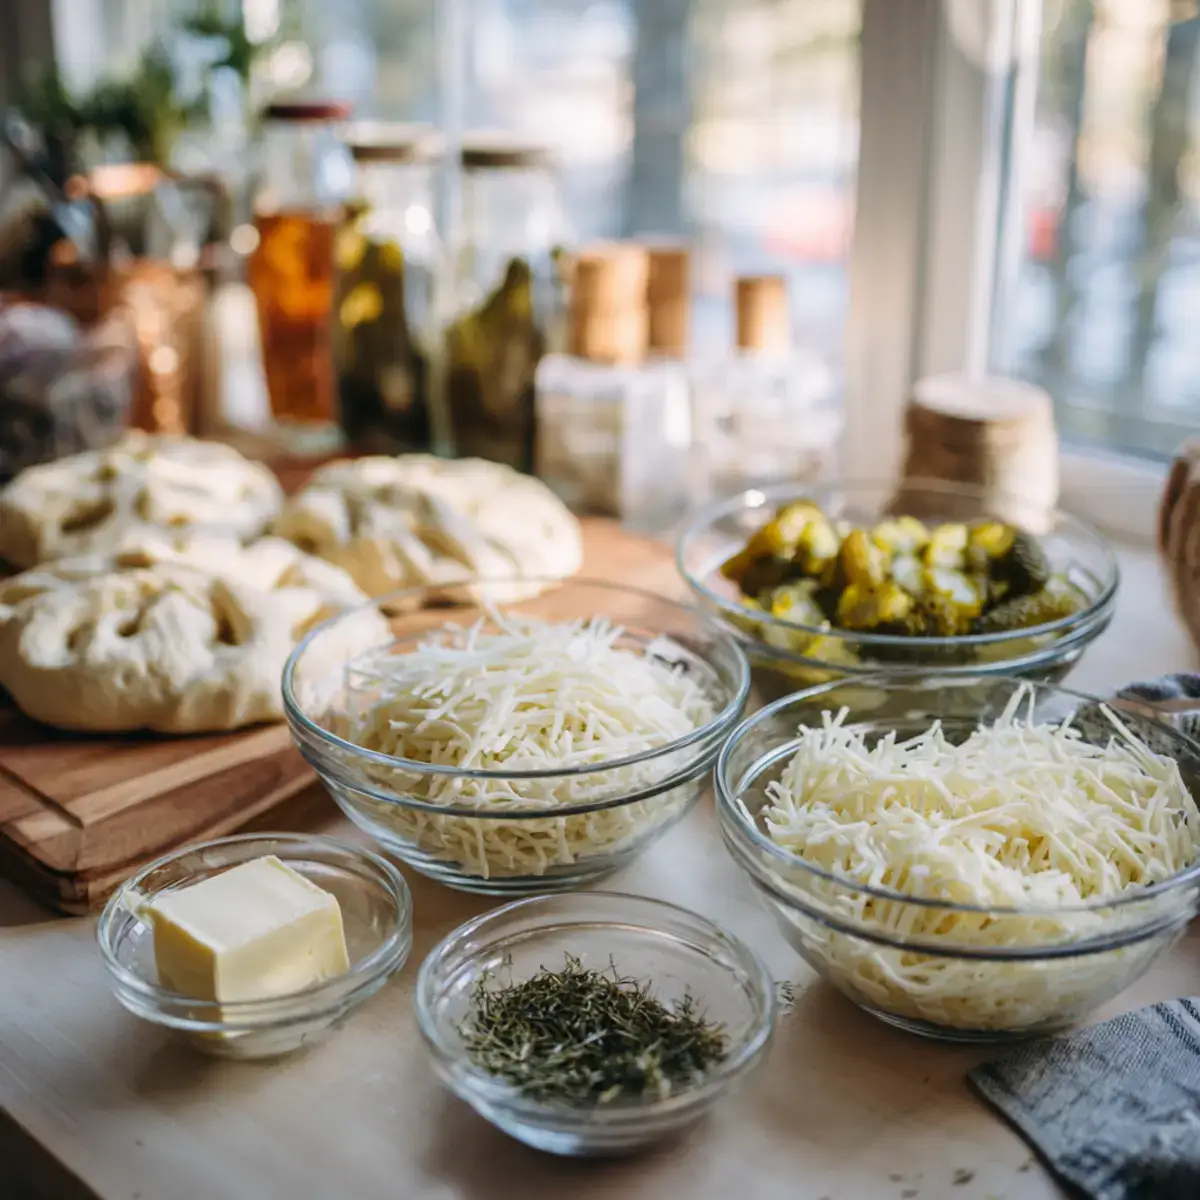
| Ingredient | Amount |
|---|---|
| Refrigerated pizza dough or crescent roll sheet | 1 can |
| Shredded mozzarella cheese (or cheddar) | ½ cup |
| Finely chopped dill pickles (well-drained) | ¼ cup |
| Melted butter | 1 tablespoon |
| Garlic powder | ½ teaspoon |
| Dried dill (optional) | ½ teaspoon |
Step-by-Step
1. Prep the oven: Preheat to 375°F (190°C) and line a baking sheet with parchment paper.
2. Roll the dough: On a lightly floured surface, roll out your dough. Brush with melted butter to help seasonings stick.
3. Add your toppings: Sprinkle garlic powder evenly across, followed by shredded cheese and chopped dill pickles.
4. Fold and seal: Fold the dough in half lengthwise and press down gently to keep everything inside.
5. Cut into strips: Using a sharp knife or pizza cutter, slice into 1-inch wide strips.
6. Twist: Take each strip and twist 2–3 times for that signature bakery-style look.
7. Butter & season: Brush tops with more melted butter and, if you love dill flavor, a sprinkle of dried dill or cheese.
8. Bake: Place on your prepared sheet and bake for 12–15 minutes, until golden brown and bubbling.
9. Cool & serve: Let the twists rest for 5 minutes, then enjoy warm with ranch, cheese sauce, or garlic butter.
These golden twists are even better when paired with creamy dips or tangy sides like our bread and butter pickle recipe.
Baker’s Tip:
For extra crispiness, brush with butter halfway through baking. If you prefer softer twists, tent them loosely with foil during the last few minutes.
If you’re experimenting, try swapping mozzarella for cheddar it gives a deeper flavor that complements the tang of pickles perfectly.
You can also get creative by combining this with our garlic parmesan cheeseburger bombs together they make an irresistible game-day spread.
For more inspiration, peek at our crack potatoes another comfort classic that pairs beautifully with these twists for a full rustic snack board.
What to Serve Dill Pickle Bread Twists With
When your Dill Pickle Bread Twists come out golden and bubbling, you’ll want to serve them alongside flavors that make their tangy, cheesy personality shine.A reliable recipe worth keeping in the regular rotation.
Classic Dipping Sauces
Ranch Dressing: A cold, creamy dip like ranch perfectly balances the buttery warmth of these twists. It’s that reliable, crowd-favorite pairing every party needs.
Garlic Butter Sauce: Melted butter, minced garlic, and a dash of parsley simple, but utterly comforting. It echoes the base flavors already in the twists.
Cheese Sauce: If you love an extra dose of gooey, rich flavor, serve these with homemade cheddar or nacho-style cheese dip. You’ll get that incredible pull with each bite.
Honey Mustard: A hint of sweetness with a touch of tang? It’s a flavor combination that plays beautifully with the saltiness of pickles.
If you love experimenting with dips, try pairing these with the creamy sauce from our crack potatoes it doubles as an indulgent dunk for bread.
Hearty Pairings for Meals
These twists aren’t just for snacking they shine next to hearty dishes, too.
Soup Companions: Pair your Dill Pickle Bread Twists with tomato soup, potato chowder, or a thick chicken stew. The tangy dill flavor cuts through richness, refreshing every bite.
Salad Partners: For a lighter meal, serve alongside a crisp cucumber or pasta salad. Our cucumber salad recipe is a refreshing contrast that enhances every garlicky twist.
Sandwich Sidekick: Swap out traditional rolls for these twists when serving sandwiches or sliders. They add that extra zesty flavor to a classic BLT or pulled pork.
Charcuterie Boards: Mix them into a rustic spread of cheeses, meats, and pickles. They’re a creative way to add a warm, flaky element to any appetizer board. See also: galentines-charcuterie-board-ideas.
Dinner Upgrade: For something hearty, pair them with chicken bruschetta pasta. The flavors of tomato, garlic, and dill blend beautifully together.
If you’re a fan of bolder sides, these twists also make a fantastic partner for bread and butter pickles the sweet-and-sour contrast is divine.
Rustic Hosting Idea
When hosting, I like arranging these twists in a basket lined with parchment paper, topped with sprigs of fresh dill. Serve them warm with small bowls of ranch, garlic butter, and spicy cheese dip on the side. It’s a show-stopping yet effortless presentation.
They also freeze beautifully so you can bake them ahead, reheat, and serve them at your next brunch or picnic. I often do this when preparing comfort recipes like our dill pickle recipe which complements this bread perfectly.
Top Tips for Perfecting Dill Pickle Bread Twists
Making Dill Pickle Bread Twists is simple but turning them into bakery-worthy bites takes a few clever tricks. Here’s how to achieve Naomi’s signature rustic crispness, melty texture, and that unforgettable pickle punch every single time.
Use Cold Dough for Easy Twisting
Start with cold refrigerated dough straight from the can. When it’s slightly chilled, it’s easier to cut and twist without sticking together. Once twisted, the dough puffs up evenly as it bakes, creating that golden, flaky finish that rivals our no oven stovetop bread.
Drain Pickles Thoroughly
Wet pickles = soggy bread. Before adding them, place your chopped dill pickles on a paper towel and press out the excess brine. This keeps your twists crisp and beautifully browned instead of doughy.
If you’re using homemade pickles, try our dill pickle recipe it’s balanced and tangy, perfect for baking recipes like this.
Add Cheese in Layers
Don’t just sprinkle cheese once layer it both before and after folding your dough. This gives the twists that gooey interior and a crisp, cheesy crust. Mozzarella creates that signature stretch, while cheddar adds a bolder flavor.
You can mix this concept with the cheesy goodness of our garlic parmesan cheeseburger bombs for the ultimate savory bake.
Season Every Step
For maximum flavor, brush butter not only before baking but also right after pulling them from the oven. Sprinkle with garlic salt, parmesan, or dried dill. The residual heat melts the seasoning beautifully into the surface.
Bake on Parchment or a Pizza Stone
For even crispiness, bake your twists on parchment paper or a preheated pizza stone. It helps distribute heat evenly and prevents sticking ideal for achieving that bakery-style crust.
Twist Them Tight
When shaping, twist your dough strips a little tighter than you think you should. This keeps the shape defined during baking and prevents them from unraveling.
If you’re planning ahead, shape and freeze the raw twists on a tray first. Then, transfer them to a freezer bag for easy baking later a trick inspired by how we prep our crack potatoes for gatherings.
Brush With Egg Wash for Shine
For that glossy, golden top you see in bakery bread, whisk one egg with a tablespoon of water and brush lightly before baking. This gives your twists a beautiful sheen and helps cheese stick to the surface.
Bonus Tip – Make It a Party Snack
Turn your twists into bite-size nibbles by slicing the dough into ½-inch strips before baking. They’re perfect for dipping into ranch or creamy mustard, especially when paired with other tangy appetizers like our bread and butter pickle recipe. See also our Nibbles Potatoes Recipe with Herb Butter.
For more food science on why dairy and fermented foods enhance flavor depth, see this BBC Good Food guide.
Naomi’s Secret: Contrast Is Key
Every great rustic dish plays on balance buttery richness vs. pickle tang, crisp crust vs. soft interior. That contrast is what makes each bite satisfying. These twists deliver exactly that harmony in under 25 minutes.
Storing and Reheating Tips
The beauty of Dill Pickle Bread Twists lies not only in their fresh-from-the-oven aroma but also in how well they store and reheat. Naomi’s rustic kitchen is all about keeping things simple, so these tips will help you enjoy that same buttery crunch and pickle tang even days later.
Storing Your Dill Pickle Bread Twists
Room Temperature (1–2 Days):
Let the twists cool completely before storing them. Place them in an airtight container lined with parchment paper. Keep them at room temperature for up to two days. If you’ve made recipes like our no oven stovetop bread, this method will feel familiar.
Refrigerator (Up to 5 Days):
For longer storage, refrigerate the twists in a sealed container. Add a paper towel layer to absorb any excess moisture and keep the texture from softening too much.
Freezer (Up to 2 Months):
These twists freeze beautifully. Arrange them in a single layer on a baking sheet until solid, then transfer to a freezer-safe bag. Label with the date and store for up to two months a trick that works just as well for our crack potatoes).
Reheating Tips
Oven Method (Best for Crispiness):
Preheat your oven to 350°F (175°C). Place twists on a baking sheet and cover loosely with foil to prevent over-browning. Heat for 8–10 minutes until warm and crisp again.
Air Fryer Method (Quick & Crunchy):
Reheat twists in an air fryer at 350°F for 3–5 minutes. This brings back that bakery-fresh texture without drying them out.
Microwave Method (Fastest):
For a softer, quicker option, microwave each twist for 15–20 seconds. It’s perfect for a fast snack, though the crust will be softer than baked versions.
If you like to reheat baked goods often, the method used in our garlic parmesan cheeseburger bombs post works perfectly here too warm, gooey, and still crisp on the edges.
Flavor-Boosting Reheat Tip
When reheating, brush the twists lightly with melted butter and sprinkle with a pinch of garlic salt or dried dill. This simple touch revives the flavor and gives that just-baked aroma.
If you love adding dips, pair reheated twists with homemade ranch or something tangy like our bread and butter pickle recipe) for a fresh contrast.
Make-Ahead Trick
You can even assemble the twists ahead of time (before baking) and refrigerate overnight, covered. Bake them fresh the next day when guests arrive a tip Naomi uses often for brunches.
If you want to preserve their soft center, wrap the twists in foil while reheating. It keeps moisture locked in, ensuring that tender, cheesy middle stays perfect.
Why It Works
Bread twists store and reheat well because of their butter and cheese content natural moisture barriers that keep the dough soft inside. Pickles, when drained well, retain their tang without making the dough soggy. For more on food storage safety, you can check USDA Food Safety Guidelines for expert advice.
FAQs About Dill Pickle Bread Twists
We’ve gathered the top “People Also Ask” questions about Dill Pickle Bread Twists, so you can bake (and snack) with total confidence.A reliable recipe worth keeping in the regular rotation.
Can you freeze dill pickle bread?
Absolutely! Once cooled, place your Dill Pickle Bread Twists on a baking sheet in a single layer and freeze until solid. Then transfer them to a freezer bag or airtight container. They’ll stay fresh for up to 2 months. When ready to eat, reheat in the oven at 350°F (175°C) for about 8–10 minutes.
Naomi loves this trick for saving time before gatherings it’s the same method she uses for prepping her crack potatoes.
What are the ingredients for dill pickles?
Traditional dill pickles are made using cucumbers, water, vinegar, salt, and dill weed or dill seed. Many recipes, including our own dill pickle recipe, add garlic, mustard seed, and peppercorns for depth. The dill is what gives them their signature herby aroma and tang.
What are the ingredients in Strub’s dill pickles?
Strub’s dill pickles typically include cucumbers, water, vinegar, salt, garlic, dill seed, and spices. They’re known for their classic Canadian-style crunch and flavor perfect if you prefer a sharper, more vinegary bite in your bread twists. You can even chop them into this recipe for an authentic, store-bought shortcut.
What’s the difference between dill pickles and bread and butter pickles?
The biggest difference is flavor profile.
Dill pickles are tangy and savory, flavored with garlic and dill.
Bread and butter pickles are sweet and sour, with added sugar and spices like mustard seed and turmeric.
If you love sweet-savory combinations, try our bread and butter pickle recipe it’s a fun contrast to the tangy kick of these twists.
Conclusion
And there you have it buttery, tangy, perfectly twisted goodness that delivers a satisfying bite every time. These Dill Pickle Bread Twists combine everything we love about homemade comfort: flaky bread, melted cheese, and a punch of pickle flavor that keeps you reaching for more.
Hosting a crowd or a casual get-together -- this always earns compliments. Pin it on your Pinterest board or share your version on Facebook we’d love to see your twists!If you’re craving more rustic inspiration, pair these with our no oven stovetop bread or explore savory classics like garlic parmesan cheeseburger bombs.
Now, grab your dough, chop those pickles, and bake up the most addictive appetizer you’ll ever make simple, rustic, and full of heart.
Must‑Have Kitchen Equipment for This Recipe:
- Instant Pot Duo Plus 6‑Qt 9‑in‑1 Programmable Pressure Cooker
- Instant Vortex Plus 6‑Qt Air Fryer (ClearCook + OdorErase)
- Aucma 6.5‑Qt 6‑Speed Tilt‑Head Stand Mixer
Some links may be affiliate links. Read our affiliate disclosure.
Keep good recipes close
Add The Cooking Twins to your preferred sources on Google for more easy dinners, no-bake desserts and kitchen inspiration.


Ratings & Reviews
Leave a reviewWe'd love to hear how it turned out.