
Halloween Zombie Vein Fudge
Creepy, gooey, and easy this Halloween Zombie Vein Fudge mixes rich white chocolate with raspberry “blood” swirls for the perfect Halloween party treat.

By Emma & Ella FrostUpdated June 13, 2026

- Prep Time
- 25 min
- Cook Time
- 0 min
- Total Time
- 145 min
- Servings
- 36 squares

5-Ingredient Dump & Go Crockpot Meals
101 effortless slow cooker recipes for busy families.
View on AmazonAvailable on AmazonHalloween Zombie Vein Fudge is the ultimate spooky treat a wild mix of green fudge and red “veins” that looks straight out of a haunted kitchen! It’s creepy, gooey, and ready in minutes. Perfect for Halloween parties, movie nights, or TikTok-worthy dessert spreads. No oven, no mess just gory, sweet perfection in every bite.
Table of Contents
Table of Contents
What Is Halloween Zombie Vein Fudge
If you’ve ever dreamed of turning your kitchen into a mad scientist’s candy lab, Halloween Zombie Vein Fudge is your experiment gone right. Think creamy white chocolate fudge tinted an eerie zombie green, streaked with blood-red raspberry jam that swirls like pulsing veins. It’s as unsettling as it is irresistible spooky dessert goals achieved.
This viral-style fudge isn’t just about looks. Each square delivers a silky-smooth melt from the white chocolate and condensed milk, contrasted by the tangy raspberry veins. It’s that perfect balance of “gross but delicious” that makes people gasp and grab seconds.
Emma & Ella, our trend-savvy dessert creator, calls it “the sweet spot between horror movie and sugar rush.” It’s quick, thrilling, and totally fits into the no-bake lifestyle we love here at The Cooking Twins. Just like the legendary no-bake caramel pretzel crack bars, this fudge proves you don’t need an oven to go all out.
Want the secret behind that insane color combo? It’s all about layering. The green fudge base (tinted with gel coloring) sets the stage, while raspberry jam gets slightly warmed and swirled to mimic bloody veins. For extra gore, a touch of red gel coloring turns the look from “cute Halloween” to full “zombie apocalypse.”
Even better? It’s a total crowd-pleaser.Hosting or feeding a crowd — this one always earns its place.
For those who adore all things hauntingly sweet, you might also fall in love with our no-bake moose farts recipe weird name, insanely good flavor, and another no-oven wonder.
Let’s be honest: this fudge isn’t just a recipe; it’s a Halloween statement piece. One that’s as easy as our no-bake cookies without peanut butter but visually shocking enough to make your guests double-take. You’ll be the hero (or the mad scientist) of any Halloween bash.
According to Healthline, moderation in sugar-heavy desserts like this can still fit into a balanced lifestyle meaning yes, you can absolutely enjoy this fudge without guilt if you savor it mindfully.
When you’re done with your batch, don’t forget to show it off we love seeing your creations on our Facebook page and Pinterest boards. Tag us, and we might just feature your spooky masterpiece next!
Why You’ll Love This Halloween Zombie Vein Fudge
There’s something hypnotic about Halloween Zombie Vein Fudge that glossy red jam swirling through a bright green base makes it both eerie and mouthwatering. But it’s not just about the scare factor. Every bite melts like velvet, blending white chocolate sweetness with a tart, fruity zing. Here’s why this recipe is stealing the spotlight this spooky season.
It’s Creepy Yet Totally Delicious
This fudge nails the Halloween aesthetic zombie veins, radioactive green tones, and blood-red drizzles yet underneath that monstrous look lies pure creamy sweetness. It’s smooth, rich, and indulgent without being cloying. The raspberry jam adds just enough tang to balance the fudge’s sugary bite, keeping every square dangerously addictive.
Fans of our no-bake coconut cream pie will love how this dessert hits that same melt-in-your-mouth texture but adds a shocking twist perfect for October.
You can serve it as:
- A show-stopping centerpiece for your Halloween dessert board
- A sweet trick in your party favor bags
- Or the ultimate “gross-but-good” challenge for your kids’ party
It’s a guaranteed conversation starter one of those desserts people photograph before they eat.
Frightfully Fast to Make
Let’s talk convenience because Halloween nights get busy fast. You’ll only need 25 minutes of prep time and two hours to chill, which means this treat fits right into even the craziest party prep.
Like our viral no-bake Oreo lasagna, this fudge is a set-it-and-forget-it masterpiece. Once it chills, all that’s left to do is slice into 36 creepy-perfect squares.
No ovens. No fancy tools. No stress. Just one saucepan, one swirl, and a hauntingly beautiful dessert.
You can even make it a day ahead and store it in the fridge the colors stay bright, and the texture gets even silkier overnight.
A “Bloody” Work of Edible Art
What makes this fudge go viral every October? The way it looks. Each piece tells its own little horror story with veins that look alive. When you swirl that raspberry jam through the molten green fudge, it’s like watching a creepy experiment come to life.
Try pairing it with something dark and contrasting on your table like our deep brown no-bake caramel pretzel crack bars for a dessert display that pops. Your guests won’t know whether to be amazed or terrified.
A Family-Friendly Kitchen Project
Despite its gory vibe, this recipe is totally family-safe and fun to make with kids. Let them drizzle the “blood” or help stir in the food coloring. It’s messy in the best way.
The colors mix in unpredictable, spooky patterns just like pumpkin carving or slime-making, but you get to eat this one afterward!
Pro tip from Emma & Ella: “Use a dropper or a thin spoon to control the blood jam swirls for maximum zombie-realism.”
Once you’ve made your masterpiece, capture that perfect drizzle moment and share it on our Pinterest boards.
Healthy(ish) Indulgence
Even if it looks like pure sugar chaos, Halloween Zombie Vein Fudge isn’t as bad as it seems. White chocolate and condensed milk are calorie-dense, sure but portion control is your secret weapon. Cut smaller squares, and you’ve got a sweet that satisfies without overdoing it.
For a lighter dessert table, balance this fudge with something creamy and fruity like our no-bake moose farts recipe. It adds variety and keeps the sugar load manageable.
According to Healthline, white chocolate can even provide small amounts of calcium and phosphorus so your indulgence has some perks after all.
Perfect for TikTok & Halloween Parties
Ruby’s desserts always come with “wow” factor, and this one’s no exception. When you slice the chilled fudge and reveal those vivid red veins against the green, it’s pure share-worthy gold. The dramatic contrast looks amazing under neon lights or candle glow.
This treat’s texture and visual flair make it ideal for viral dessert videos so if you’re chasing likes this Halloween, this is your moment.
Pair it on your table with other no-bake hits like our no-bake Oreo lasagna for a scene that screams Halloween luxury.
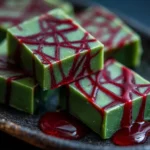
Halloween Zombie Vein Fudge: Creepy, Gooey, and Addictively Sweet
- Total Time: 145 min
- Yield: 36 squares 1x
- Diet: Vegetarian
Description
Creepy, gooey, and easy this Halloween Zombie Vein Fudge mixes rich white chocolate with raspberry “blood” swirls for the perfect Halloween party treat.
Ingredients
3 cups white chocolate chips
1 can (14 oz) sweetened condensed milk
2 tbsp butter
1 tsp vanilla extract
Green gel food coloring
½ cup raspberry jam (or strawberry jam)
Red gel food coloring (optional)
Instructions
- 1. Line: Line an 8×8-inch dish with parchment paper.
- 2. Melt: Combine white chocolate, condensed milk, and butter over low heat until smooth.
- 3. Tint: Add vanilla and green gel coloring until bright.
- 4. Pour: Spread mixture into the dish and smooth.
- 5. Swirl: Warm jam, add red coloring, drizzle and swirl with a knife.
- 6. Chill: Refrigerate for 2 hours, slice, and serve.
Notes
Store in the fridge for up to one week. Add extra jam drizzle before serving for the ultimate creepy effect.
- Prep Time: 25 min
- Category: Dessert
- Method: No-Bake
- Cuisine: Halloween
Nutrition
- Serving Size: 1 square
- Calories: 140
- Sugar: 17g
- Sodium: 25mg
- Fat: 7g
- Saturated Fat: 4g
- Unsaturated Fat: 2g
- Trans Fat: 0g
- Carbohydrates: 18g
- Fiber: 0g
- Protein: 2g
- Cholesterol: 10mg
How to Make Halloween Zombie Vein Fudge
Creating Halloween Zombie Vein Fudge feels like mixing up a mad scientist’s potion in your kitchen except your experiment ends with rich, creamy fudge instead of chaos. This spooky, no-bake dessert is surprisingly simple, with bold colors and dramatic swirls that make it look way harder than it really is. Here’s how to master it.
Quick Overview
| Step | Task | Time |
|---|---|---|
| 1 | Prepare an 8×8-inch pan with parchment paper | 2 mins |
| 2 | Melt white chocolate, condensed milk, and butter | 8 mins |
| 3 | Tint fudge mixture with green gel coloring | 2 mins |
| 4 | Pour and smooth mixture in pan | 1 min |
| 5 | Warm raspberry jam and add red coloring | 3 mins |
| 6 | Swirl the jam to create zombie veins | 4 mins |
| 7 | Chill until firm, then cut into squares | 2 hrs |
Total Active Time: 25 minutes
Total Time Including Chill: 2 hours 25 minutes
Yield: 36 squares
This no-bake method is similar to our fan-favorite no-bake caramel pretzel crack bars smooth, glossy, and totally foolproof.
Ingredients

You’ll need just a handful of spooky-sweet ingredients, most of which you probably already have in your pantry.
| Ingredient | Amount | Description |
|---|---|---|
| White chocolate chips | 3 cups | Base for your creamy fudge |
| Sweetened condensed milk | 1 can (14 oz) | Adds smoothness and sweetness |
| Butter | 2 tbsp | Rich texture and shine |
| Vanilla extract | 1 tsp | Balances the sweetness |
| Green gel food coloring | As needed | Creates that eerie zombie-green hue |
| Raspberry jam (or strawberry jam) | ½ cup | For “bloody” red veins |
| Red gel food coloring | Optional | Enhances the gore effect |
Emma & Ella says: “Gel food coloring is key liquid types dull your colors. Go bold, go glossy!”
Step-by-Step
1. Line and Prep
Line an 8×8-inch baking dish with parchment paper, letting the edges hang over for easy removal. This is your stage for all that gory magic.
2. Melt the Base
In a medium saucepan over low heat, melt the white chocolate chips, condensed milk, and butter together. Stir constantly until smooth and shiny. The texture should be thick but pourable.
3. Add Flavor and Color
Remove from heat, stir in vanilla extract, then add green gel coloring. Start with a small amount and build up until your fudge screams “zombie slime.”
For those who loved the electric look of our no-bake coconut cream pie, this step feels just as satisfying.
4. Pour and Smooth
Pour the green mixture into your prepared dish, spreading evenly with a spatula. Tap the pan lightly to smooth out bubbles.
5. Make the Bloody Veins
Warm your raspberry jam in the microwave for about 10 seconds just enough to loosen it. Stir in a drop or two of red gel coloring to enhance that bloodlike tone. Drizzle it over your green fudge in random streaks.
6. Swirl and Create the Effect
Grab a knife or skewer and gently swirl the jam through the fudge. Don’t overdo it you want distinct red veins running through, not a pink mess. This part feels a bit like painting… a very gory masterpiece.
If you’re into artistic desserts, check out our wildly fun no-bake moose farts recipe another quirky, swirl-friendly sweet.
7. Chill to Set
Refrigerate the fudge for at least two hours. Once firm, lift it out using the parchment paper and cut into bite-size squares. For extra drama, drizzle a little more jam on top before serving it’ll look like fresh zombie blood oozing out.
Ruby’s Pro Tips
- Low Heat Only: White chocolate scorches easily. Keep your stove low and stir constantly.
- Clean Swirls: Use a toothpick for delicate veins or a butter knife for bold streaks.
- Perfect Texture: If your fudge feels too stiff before pouring, stir in 1 extra tablespoon of condensed milk.
- Chill Time: Overnight chilling gives you perfect, sliceable squares without sticky edges.
This technique works across tons of spooky desserts especially ones like our no-bake cookies without peanut butter, where texture and color shine together.
For Serving Inspiration
Want to turn your fudge into a full Halloween dessert board? Pair it with:
- Gummy worms for a “graveyard crawl” theme
- Pretzel sticks as edible bones
- Crushed chocolate cookies sprinkled on top for “zombie dirt”
Or serve alongside no-bake Oreo lasagna for an unforgettable mix of creepy and creamy.
What to Serve Halloween Zombie Vein Fudge With
When your Halloween Zombie Vein Fudge hits the table, it steals the show. But pairing it with other spine-chilling sweets turns your dessert spread into something unforgettable the ultimate Halloween candy graveyard. Here’s how to serve it like a pro, Emma & Ella style: bold, dramatic, and totally viral-worthy.
Sweet & Spooky Dessert Pairings
No-Bake Monsters and Classics
Serve your zombie fudge next to a lineup of other Halloween-ready no-bake desserts. The glossy green and red fudge pairs perfectly with our no-bake caramel pretzel crack bars a salty-sweet balance to the creamy fudge. Add a platter of no-bake moose farts for a playful contrast; they look like spooky eyeballs when rolled in cocoa.
For something darker, drizzle melted chocolate over your fudge and sprinkle crushed cookies on top to create a graveyard dirt effect just like the texture base in our no-bake Oreo lasagna.
Fright Night Beverage Ideas
Wickedly Fun Drink Pairings
Pair the rich sweetness of your Halloween Zombie Vein Fudge with spooky drinks that keep the Halloween vibes flowing.
- Witch’s Brew Punch: Mix lime soda with a few drops of green food coloring and floating lychee “eyeballs.”
- Bloody Raspberry Mocktail: Combine sparkling water with raspberry syrup it matches the fudge’s jammy veins.
- Ghoulish Milkshakes: Vanilla shakes tinted with a drop of black gel coloring make the fudge’s bright green pop even more.
If you’re hosting adults, dark chocolate espresso martinis contrast the sweetness beautifully.
Savory Pairings to Balance the Sweet
Let’s face it after a few bites of fudge, you’ll want something salty. Ruby recommends serving these small savory bites between dessert samplings:
| Snack | Why It Works |
|---|---|
| Pretzel sticks | Salty crunch cuts through fudge richness |
| Mini popcorn cups | Adds texture and fun |
| Cheese cubes | Balances the sweetness |
| Salted nuts | Enhances the white chocolate flavor |
| Crackers with raspberry brie spread | Echoes the fudge’s jammy veins |
Freaky Presentation Ideas
Turn Dessert Into Decor
The magic of this fudge lies in presentation. Serve your zombie squares in black cupcake liners or mini cauldrons. Scatter candy eyes, gummy worms, and plastic spiders across your serving tray for a full “laboratory experiment” effect.
Place a few glowing LED candles or dry ice around the tray to create smoky fog that makes your fudge look alive.
Ruby’s pro tip: “For a TikTok-ready setup, film your reveal under neon purple or green lights it makes the veins glisten in the creepiest, coolest way.”
Kid-Friendly Party Board
If you’re building a kid-safe dessert table, pair this fudge with colorful, less spooky bites like our no-bake coconut cream pie cut into mini squares or rainbow cereal bars. The combo keeps things playful, not terrifying.
You can even let kids build their own “zombie trays” by choosing fudge pieces, cookie crumbs, and candy toppings. It’s hands-on, edible fun that keeps little ghouls entertained.
Top Tips for Perfecting Halloween Zombie Vein Fudge
Every Halloween treat deserves that “whoa, how did you make that?” reaction and this Halloween Zombie Vein Fudge guarantees it when done right. But to nail those striking veins, glossy finish, and melt-in-your-mouth texture, Emma & Ella swears by a few pro secrets that make the difference between “cool” and “viral.”
Master the Zombie Swirl
The swirl is everything it’s what transforms a plain fudge into a creepy masterpiece.
- Less is more. When swirling the jam, use gentle figure-eight motions. Too much stirring turns your veins into a pink blur instead of gory streaks.
- Tools matter. A toothpick gives precise, fine veins; a butter knife creates thick, dramatic ones.
- Temperature control. If the fudge base is too hot, the jam will blend in rather than swirl. Let it cool for 2–3 minutes before adding the “blood.”
Ruby’s insider tip: “When you drag the knife, stop halfway through each line to create branching veins it makes the fudge look freakishly realistic.”
Color Like a Pro
Green can make or break the zombie look. You want eerie and vibrant not toothpaste green.
- Use gel food coloring only. It’s more concentrated, giving that toxic-lime glow.
- For extra depth, mix a micro-drop of black gel into your green to add shadow.
- If your fudge looks too light after pouring, swirl in another touch of gel before chilling.
This same coloring trick works wonders for other themed desserts like our no-bake moose farts recipe it adds intensity without altering flavor.
Texture That Melts, Not Crumbles
Creamy fudge is all about timing and temperature.
- Low and slow melting: White chocolate can scorch fast. Stir constantly over low heat never rush this step.
- No dry fudge: If your mix thickens too much before pouring, stir in a spoon of condensed milk. It’ll revive that glossy texture instantly.
- Chill smart: Always refrigerate, never freeze. Freezing can cause sugar crystals that ruin the smooth finish.
Want inspiration for silky texture? Our no-bake caramel pretzel crack bars are another melt-perfect recipe that uses the same technique.
Swirl Science Table
| Fudge Temperature | Jam Consistency | Result |
|---|---|---|
| Hot (too early) | Watery | Veins disappear into fudge |
| Warm (ideal) | Slightly thick | Crisp red veins |
| Cool (too late) | Sticky | Jam clumps instead of swirling |
This visual guide ensures every batch looks hauntingly professional.
Serving Tips for Shock Value
Presentation matters.
- Chill completely before slicing clean edges make your veins stand out.
- Wipe your knife between cuts to keep the colors distinct.
- Drizzle fresh jam over slices right before serving for that “freshly bitten” look.
Serve it on black slate or parchment for that dark-lab aesthetic. Add some crushed cookies from our no-bake Oreo lasagna for spooky contrast.
Flavor Twists You’ll Want to Try
Don’t be afraid to remix it:
- White Chocolate Strawberry Vein Fudge: Swap raspberry jam for strawberry and add a drop of red food coloring for extra pop.
- Dark Chocolate Zombie Fudge: Use half white and half dark chocolate chips for eerie color contrast.
- Brain Swirl Fudge: Add a drizzle of pink-tinted white chocolate for a brainy finish gross and genius.
These flavor ideas echo the playful creativity of our no-bake coconut cream pie adaptable, simple, and irresistible.
Final Ruby Tip: The Viral Factor
“Don’t just make it perform it,” Ruby laughs. “Film your swirl moment, use a green spotlight, and watch your fudge go viral.”
With one saucepan and a few smart tricks, you’ll craft the kind of dessert that screams Halloween literally and visually.
Storing and Reheating Tips for Halloween Zombie Vein Fudge
Once you’ve created your perfect batch of Halloween Zombie Vein Fudge, you’ll want to keep those creepy colors vibrant and the texture silky for as long as possible. Luckily, this no-bake dessert is a storage dream it stays fresh for days without losing its spooky sheen or creamy bite. Here’s how to make it last.
Short-Term Storage (Party-Ready Freshness)
Your fudge holds its shape beautifully, but temperature and moisture can change its texture. Follow these quick hacks for keeping it flawless for Halloween night:
- Refrigerate, don’t freeze. Store your fudge in an airtight container and keep it in the fridge for up to 7 days.
- Layer smartly. Separate layers with parchment paper to prevent sticking or smearing of those gorgeous “veins.”
- Room temp rule: For serving, let the fudge sit at room temperature for 10 minutes. This softens the chocolate and releases the vanilla aroma without melting the jam.
Pro tip from Emma & Ella: “Cold fudge looks neat, but room temp fudge tastes creamier. Let it warm slightly before showing off those zombie swirls.”
If you’re prepping your full dessert table, you can safely refrigerate it alongside treats like our no-bake caramel pretzel crack bars both keep beautifully chilled and photo-ready.
Long-Term Storage (Plan Ahead Like a Pro)
Need to make your fudge in advance? Totally doable with the right wrap technique.
| Storage Method | Duration | Notes |
|---|---|---|
| Airtight container (refrigerator) | Up to 7 days | Keeps texture and color perfect |
| Vacuum-sealed or double-wrapped (freezer) | Up to 2 months | Freeze solid, then wrap tightly to prevent moisture |
| Defrosting tip | Overnight in fridge | Never microwave it ruins the swirl and texture |
If you want to freeze, wrap individual squares in plastic wrap, then place in a ziplock or freezer-safe box. Defrost overnight in the fridge don’t rush it, or the jam veins may blur.
You can use this same technique with layered sweets like our no-bake Oreo lasagna slow thawing keeps the creamy layers intact.
Reheating or Softening Fudge
While fudge isn’t typically “reheated,” there are ways to restore its soft, fresh-from-the-pan texture:
- Microwave method (gentle): Place a square on a plate, microwave at 50% power for 5–7 seconds.
- Steam method (for large batches): Put a small bowl of hot water inside your storage container for a few minutes to reintroduce moisture.
Be careful overheating can cause the fudge to separate or melt. Ruby’s trick: “If it looks too soft, pop it back in the fridge for 10 minutes balance is everything.”
Preserving the Look
That wild green and red swirl deserves to stay picture-perfect.
- Keep fudge away from direct light exposure can fade the food coloring.
- Always use dry utensils when serving; moisture dulls the surface.
- For events, slice right before display for the freshest, cleanest edges.
If your fudge is for a Halloween dessert bar, place it beside creamy options like our no-bake coconut cream pie or quirky sweets like the no-bake moose farts recipe for a mix of colors and textures that pop together.
Sustainability Bonus Tip
Instead of single-use plastic, Ruby recommends storing your fudge in glass jars or reusable silicone pouches. They seal tight, keep the fudge fresh, and make your kitchen look Instagram-ready.
Plus, since fudge has a long shelf life, you can batch-make it days before your party giving you more time for costume prep or creepy décor.
In Case of Melted Fudge (Emergency Fix)
If your zombie fudge accidentally gets too soft:
- Refrigerate it for 30 minutes.
- If still sticky, dust the bottom with cornstarch or cocoa powder.
- Cut it into smaller squares smaller pieces chill faster and stay firm.
It’s the same trick Ruby uses for salvaging soft desserts like our no-bake cookies without peanut butter quick, easy, and foolproof.
Ready to Serve or Gift
Once your fudge is chilled and firm, wrap individual squares in parchment paper or Halloween-themed foil for gift giving. Tie them with black ribbon and store them in cool containers instant spooky party favors!
FAQs About Halloween Zombie Vein Fudge
Can I use dark or milk chocolate instead of white chocolate?
You can, but the color effect won’t be as striking. The green and red “veins” show best against a pale background. If you prefer darker chocolate, mix 2 cups of white chocolate and 1 cup of dark chocolate chips it adds a marble effect while keeping the veins visible.
For more color-balanced no-bake desserts, check out our no-bake coconut cream pie it’s creamy, light, and a perfect contrast dessert for any fudge platter.
How long can Halloween Zombie Vein Fudge last?
Stored properly in an airtight container in the fridge, your fudge stays perfect for up to one week. For longer storage, freeze for up to two months (see storage instructions above).
The color holds up well, especially if you keep it away from direct light.
This long shelf life makes it an ideal make-ahead treat just like our no-bake Oreo lasagna, which tastes even better after a day of chilling.
Can I make Halloween Zombie Vein Fudge ahead for a party?
Yes, and you should! Make it up to three days in advance, cover tightly, and refrigerate. The texture and color actually improve over time as the jam sets into the fudge. Before serving, drizzle a tiny bit of fresh jam on top for that oozing “fresh blood” effect.
It’s a prep-friendly dessert, much like our no-bake caramel pretzel crack bars, which hold up perfectly for events and gifting.
What can I use instead of raspberry jam for the “veins”?
Any thick red fruit jam works strawberry, cherry, or even red currant. Avoid runny jams, since they’ll blend instead of swirl. For an ultra-realistic look, stir in a few drops of red gel coloring before swirling.
Why does my fudge look grainy or dry?
That usually happens when the chocolate gets too hot or cools too fast. Stir continuously on low heat, and don’t refrigerate until it’s poured smooth. If your mixture thickens too early, add a spoonful of condensed milk and stir until glossy again.
Can I make this fudge kid-safe and less scary?
Absolutely! Skip the red gel coloring and use strawberry jam as-is for a softer pink swirl. You can even add candy eyeballs or sprinkles for a fun, goofy “monster fudge.”
It’s a great Halloween project to make with kids like our no-bake cookies without peanut butter, it’s mess-friendly and oven-free.
How do I get that perfect “blood swirl” look?
It’s all about temperature control and swirl technique:
Let the green fudge cool slightly before adding jam.
Use a skewer or knife tip to draw branching patterns.
Stop before overmixing clear red veins are your goal.
For extra gore, drizzle a little warm jam on top just before serving. The shine makes it look “freshly bitten.”
Want more artistic swirl ideas? Try our no-bake moose farts recipe it’s another wild, visually satisfying dessert to practice your swirl game.
Can I make Halloween Zombie Vein Fudge vegan or dairy-free?
Yes! Swap the dairy ingredients with these:
White chocolate: Use vegan white chocolate chips (made with cocoa butter, not milk solids).
Condensed milk: Try coconut condensed milk or oat condensed milk.
Butter: Replace with coconut oil or vegan butter.
Ruby notes, “Coconut condensed milk adds a slight tropical note, but it still swirls beautifully!”
This tweak gives the same texture with a subtle hint of coconut sweetness.
Conclusion
Creepy, creamy, and utterly unforgettable, Halloween Zombie Vein Fudge brings a perfect mix of fun and fright to your October festivities. It’s quick to make, visually stunning, and shockingly delicious the kind of dessert that has guests asking, “Wait… is that blood?” before grabbing seconds.
Emma & Ella designed this one to be both playful and simple, the ultimate no-bake win.Hosting or feeding a crowd — this one always earns its place.
So grab your saucepan, swirl in some red, and let the monster magic happen. Then share your results with us because the best desserts are the ones that scare people a little before they fall in love.

Must‑Have Kitchen Equipment for This Recipe:
- Instant Pot Duo Plus 6‑Qt 9‑in‑1 Programmable Pressure Cooker
- Instant Vortex Plus 6‑Qt Air Fryer (ClearCook + OdorErase)
- Aucma 6.5‑Qt 6‑Speed Tilt‑Head Stand Mixer
Some links may be affiliate links. Read our affiliate disclosure.
Keep good recipes close
Add The Cooking Twins to your preferred sources on Google for more easy dinners, no-bake desserts and kitchen inspiration.


Ratings & Reviews
Leave a reviewWe'd love to hear how it turned out.