
No Bake Peanut Butter Oat Cups
We’re Emma and Ella, twin sisters behind The Cooking Twins. Our happiest moments are mixing up easy, no-bake desserts like these peanut butter oat cups simple, fun, and full of heart. This recipe is one of our favorites for busy mornings, healthy snacking, or a quick sweet treat. Enjoy, share, and make your own memories!

By Emma FrostUpdated June 12, 2026
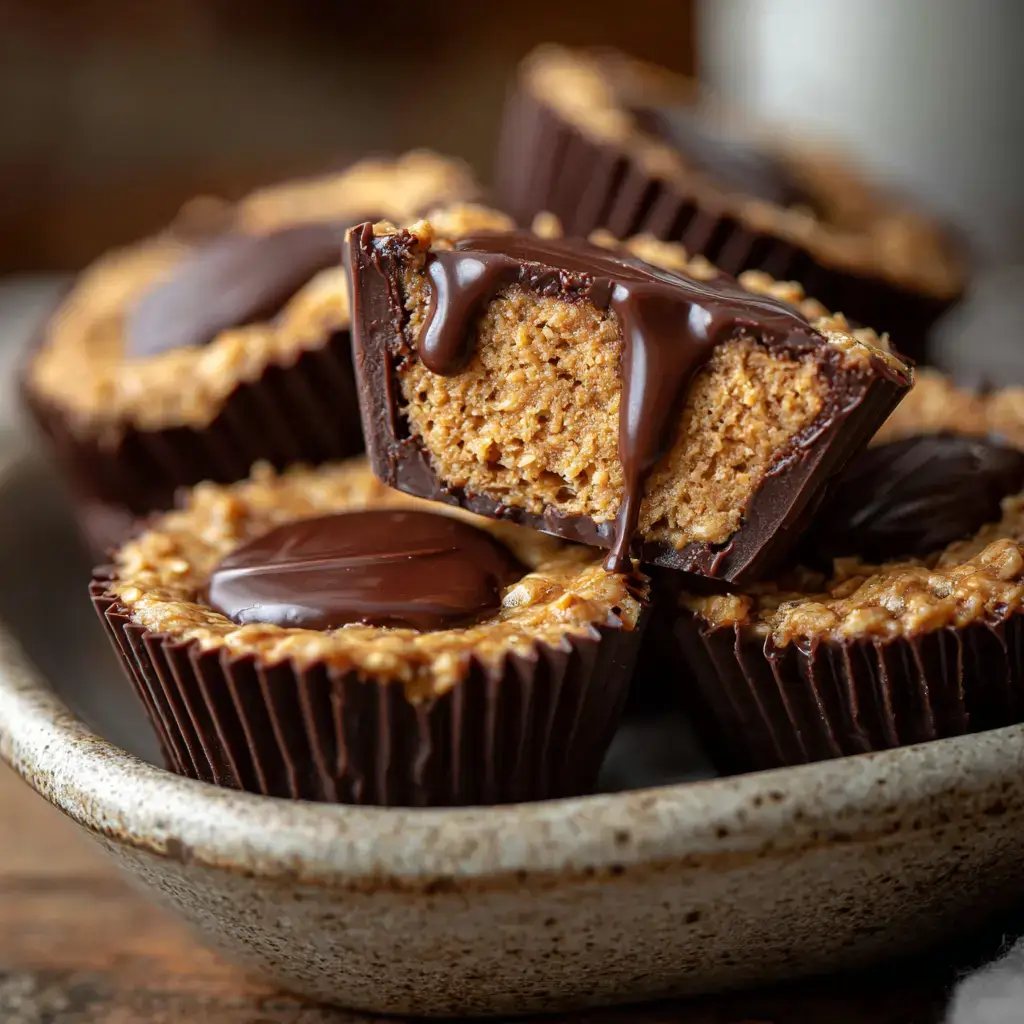
- Prep Time
- 10 min
- Cook Time
- 0 min
- Total Time
- 10 min
- Servings
- 12 cups

5-Ingredient Dump & Go Crockpot Meals
101 effortless slow cooker recipes for busy families.
View on AmazonAvailable on AmazonIf you crave an easy, no-bake treat that blends creamy peanut butter, hearty oats, and rich chocolate, these no bake peanut butter oat cups are perfect. They’re fast, delicious, and endlessly customizable for breakfast, dessert, or snack time. In this article, discover our favorite method, simple tips, and answers to your most-asked questions!
Table of Contents
Table of Contents
The Story & Intro
The Story Behind No Bake Peanut Butter Oat Cups
As twins who grew up baking together, our best kitchen memories are those simple, sweet afternoons without even turning on the oven. We were always on the hunt for treats like these no bake peanut butter oat cups the perfect blend of creamy, chocolatey, and chewy. It started as a way to satisfy our peanut butter obsession, but it became a staple for busy school days, sleepovers, and road trips.
Years later, we still reach for these oat cups because they’re delicious, portable, and secretly a little nutritious. We love sharing them with friends or freezing a batch for late-night cravings. The best part? No baking, just quick mixing, and a few hours to chill. Want more no bake inspiration? Our No Bake Oreo Lasagna and Chocolate Coconut Bars are two more crowd-pleasers for dessert-lovers.
No Bake Peanut Butter Oat Cups
- Total Time: 10 min
- Yield: 12 cups 1x
Description
We’re Emma and Ella, twin sisters behind The Cooking Twins. Our happiest moments are mixing up easy, no-bake desserts like these peanut butter oat cups simple, fun, and full of heart. This recipe is one of our favorites for busy mornings, healthy snacking, or a quick sweet treat. Enjoy, share, and make your own memories!
Ingredients
3/4 cup quick oats
1/2 cup peanut butter (or almond/sunflower seed butter)
1/4 cup maple syrup or honey
2 tbsp chia seeds
1/4 cup protein powder (your favorite flavor)
1 tsp vanilla extract
Pinch sea salt
Optional: cinnamon, mini chocolate chips, cacao nibs, raisins
Chocolate Layer:
1 1/4 cups chocolate chips
2 tsp coconut oil (optional)
Instructions
- In a large bowl: In a large bowl, mix oats, peanut butter, maple syrup or honey, chia seeds, protein powder, vanilla, and sea salt until well combined. If the mixture is too dry, add more nut butter or syrup. It should be moist, not sticky.
- Prepare a silicone mini: Prepare a silicone mini muffin pan or line a regular pan with parchment liners or spray well with oil.
- Divide the oat mixture: Divide the oat mixture among muffin cups, filling each about two-thirds full. Press down firmly to form the base.
- In a microwave-safe bowl: In a microwave-safe bowl, melt chocolate chips and coconut oil (if using) in 30-second increments, stirring until smooth.
- Spoon melted chocolate over: Spoon melted chocolate over each cup, filling to the top. Tap the pan to level the chocolate.
- Freeze for 2–3 hours: Freeze for 2–3 hours, or until fully set.
- Remove from the pan: Remove from the pan and store in an airtight container in the freezer for up to 3 months.
Notes
You can use any nut or seed butter to make this recipe allergy-friendly.
For vegan cups, use maple syrup and dairy-free chocolate chips.
For a gluten-free version, ensure your oats are certified gluten-free.
Add cinnamon, raisins, or other favorite mix-ins for extra flavor.
Store in the freezer for a firmer texture or fridge for a softer bite.
Great for meal prep, snack trays, and gifting!
- Prep Time: 10 min
- Category: Breakfast, Dessert, Snack
- Method: No Bake
- Cuisine: American
Nutrition
- Serving Size: 1 cup
- Calories: 140
- Sugar: 8g
- Sodium: 55mg
- Fat: 7g
- Saturated Fat: 3g
- Unsaturated Fat: 4g
- Trans Fat: 0g
- Carbohydrates: 14g
- Fiber: 2g
- Protein: 4g
- Cholesterol: 0mg
What Are No Bake Peanut Butter Oat Cups?
No bake peanut butter oat cups are like a homemade peanut butter cup met an energy bar only healthier, freezer-friendly, and endlessly customizable. They combine oats, peanut butter, honey or maple syrup, chia seeds, and a protein punch, then get topped with silky chocolate that firms up perfectly in the freezer. They’re ideal for anyone looking for a gluten-free or nut-free snack option (just swap the nut butter).
For a quick twist, we sometimes add a handful of chocolate chips, cinnamon, or even a swirl of our favorite jam. They’re so much easier than cookies or baked bars, but every bit as satisfying.
Why You’ll Love It
If you want a fuss-free treat that actually fuels you, these no bake peanut butter oat cups will win you over fast. Here’s why we make them again and again:
- They don’t require baking just mix, press, top, and freeze.
- Simple pantry ingredients keep it easy and affordable.
- Naturally sweetened and adaptable for allergies or preferences.
- High in protein and fiber, making them great for breakfast or pre/post-workout.
- They’re freezer-friendly, so you can always have a batch on hand.
And if you love these, try our Peanut Butter Cup Icebox Cake or explore the No Bake Coconut Cream Pie for your next dessert adventure.
Quick Overview
If you’re looking for a fast, healthy treat, no bake peanut butter oat cups check every box. You don’t need an oven, the prep is done in ten minutes, and most of the ingredients are already in your pantry. The method is simple: mix the oat base, melt chocolate, and freeze making these oat cups a great starter recipe for both kids and adults.
For those new to no bake recipes, the biggest perk is convenience. No more heating up the kitchen or worrying about overbaking. You can double the recipe for a big batch or scale it down for a small snack. Breakfast boost or a dessert that won’t wreck your energy — these peanut butter oat cups hit the mark.
Looking for even more easy desserts you don’t have to bake? Try our No Bake Moose Farts Recipe for a fun treat or get a creamy fix with No Bake Easter Cheesecake Recipe.
No Bake Peanut Butter Oat Cups At a Glance
| Prep Time | Total Time | Servings | Category | Cuisine |
|---|---|---|---|---|
| 10 mins | 10 mins | 12 cups | Breakfast, Dessert, Snack | American |
Main Ingredients: Quick oats, peanut butter, honey or maple syrup, chia seeds, protein powder, vanilla, and chocolate chips.
Best for:
- Quick snacks
- Make-ahead breakfast
- Healthy desserts
- Kids’ treats or lunchbox snacks
Why Choose This Recipe?
- No baking just mix, press, and chill
- Customizable with nut-free or vegan swaps
- Perfect texture: chewy base, smooth chocolate top
- Freezer-friendly for long-term storage
Want something even more decadent? Check out our High Protein Cheesecake Jars or a citrus twist in No Bake Orange Creamsicle Cheesecake.
Ingredients
No bake peanut butter oat cups use a handful of simple, wholesome ingredients you probably already have in your kitchen. They’re endlessly adaptable, so you can swap or add flavors to fit your mood or dietary needs.
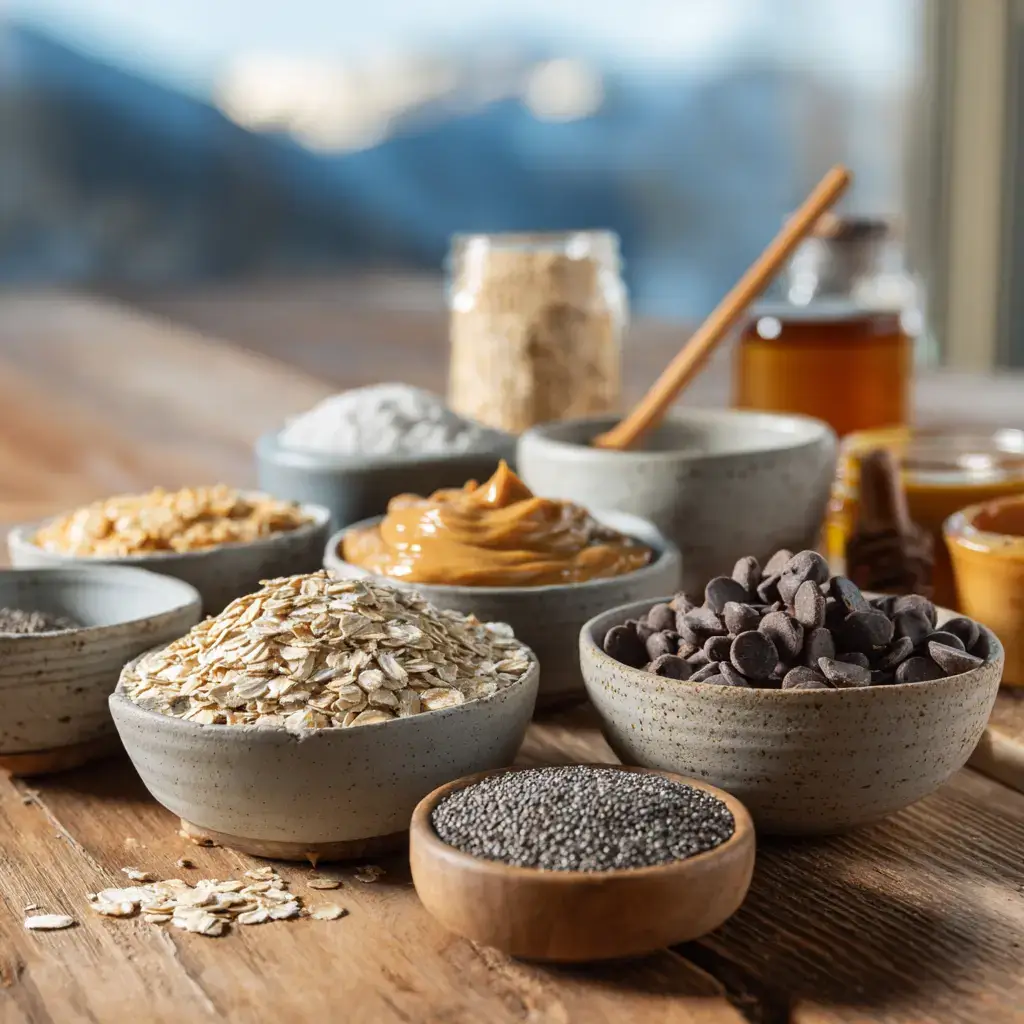
Oatmeal Cup Ingredients:
- 3/4 cup quick oats (or use rolled oats pulsed in a food processor for a softer texture)
- 1/2 cup peanut butter (or almond butter, or sunflower seed butter for nut-free)
- 1/4 cup maple syrup or honey
- 2 tbsp chia seeds
- 1/4 cup protein powder (use your favorite flavor)
- 1 tsp vanilla extract
- Good pinch of sea salt
- Optional add-ins: cinnamon, mini chocolate chips, cacao nibs, raisins
Chocolate Layer:
- 1 1/4 cups chocolate chips
- 2 tsp coconut oil (optional, to thin chocolate for smoother topping)
Notes:
- If you use rolled oats, give them a quick blitz in the food processor for a finer bite.
- You can make these vegan by using maple syrup and dairy-free chocolate chips.
- Want more texture? Stir in a few tablespoons of chopped nuts or dried fruit.
For even more creative, chilled snack ideas, check out our Chocolate Coconut Bars or explore the creamy layers of our No Bake Oreo Lasagna.
Ingredient Table
| Ingredient | Amount | Substitutes/Suggestions |
|---|---|---|
| Quick oats | 3/4 cup | Rolled oats (blitzed) |
| Peanut butter | 1/2 cup | Almond or sunflower seed butter |
| Maple syrup/honey | 1/4 cup | Agave syrup for vegan option |
| Chia seeds | 2 tbsp | Flaxseed meal or omit if desired |
| Protein powder | 1/4 cup | Use your favorite type/flavor |
| Vanilla extract | 1 tsp | Can omit for more neutral flavor |
| Sea salt | Pinch | To taste |
| Chocolate chips | 1 1/4 cups | Any chocolate you like |
| Coconut oil | 2 tsp | Optional; helps melt chocolate |
| Optional add-ins | To taste | Cinnamon, raisins, mini chips, nuts |
Looking for an oat-free treat? Our No Bake Coconut Cream Pie is a dreamy, creamy option.
Step-by-Step Instructions
Making no bake peanut butter oat cups is truly effortless no oven, no waiting around, just a little mixing and a short chill in the freezer. Here’s how to get that perfect chewy-chocolatey combo every time:
1. Mix the Oat Cup Base
In a large bowl, combine quick oats, peanut butter, maple syrup or honey, chia seeds, protein powder, vanilla extract, and a pinch of sea salt. Stir until everything is well mixed. If your dough looks a little dry (some protein powders are extra absorbent), add another spoonful of nut butter or maple syrup. The mixture should hold together when pressed but shouldn’t be too sticky.
2. Prepare Your Muffin Tin
Grab a silicone mini muffin tin for the easiest release. No silicone? Use parchment liners or spray a regular mini muffin pan well with oil. This step makes removing your oat cups a breeze.
3. Fill the Cups
Divide the oat mixture evenly among the muffin tin cavities, filling each about two-thirds full. Press the mixture down firmly so it holds together. (Kids love helping with this part!)
4. Make the Chocolate Layer
In a microwave-safe bowl, combine the chocolate chips and coconut oil. Microwave in 30-second bursts, stirring between each, until the chocolate is smooth and melted. You can also melt the chocolate in a double boiler if you prefer.
5. Top With Chocolate
Spoon the melted chocolate over each oat cup, filling to the top. Gently tap the pan on the counter to smooth out the tops. If you love a salty-sweet finish, sprinkle a little sea salt over the chocolate now.
6. Freeze to Set
Transfer the pan to the freezer and chill for at least 2–3 hours, or until the chocolate is firm and the oat cups are fully set.
7. Remove and Store
Once firm, pop the oat cups out of the pan. Store them in an airtight container in the freezer, where they’ll keep for weeks.
Tip: Craving a different flavor? Try adding a handful of mini chocolate chips or a swirl of nut butter to the base, or check out our No Bake Oreo Lasagna for another layered treat idea.
Step-by-Step Table
| Step | Action | Tips |
|---|---|---|
| 1 | Mix all oat cup ingredients in a bowl | Add more nut butter if too dry |
| 2 | Prepare mini muffin tin (silicone or lined) | Parchment liners work best if no silicone |
| 3 | Divide and press oat mixture into cups | Fill 2/3 full, press firmly |
| 4 | Melt chocolate chips + coconut oil | Microwave in bursts or use double boiler |
| 5 | Spoon chocolate over oat mixture | Tap to level, sprinkle sea salt if desired |
| 6 | Freeze for 2–3 hours | Until chocolate is set and cups are firm |
| 7 | Remove from tin, store in airtight container | Freeze for longer shelf life |
Serving Suggestions
No bake peanut butter oat cups are endlessly versatile you can enjoy them any time of day. Their chewy texture and rich chocolate topping make them just as fitting for breakfast as they are for dessert or an afternoon pick-me-up.
How to Serve No Bake Peanut Butter Oat Cups
- Breakfast on the go: Pair with a banana or a smoothie for a balanced, protein-packed start to your morning.
- Healthy snack: Pop a cup out of the freezer whenever you need a quick bite that keeps you satisfied. Their portable size makes them great for lunchboxes or road trips, similar to our No Bake Moose Farts Recipe.
- Dessert tray: Serve alongside other no bake favorites like High Protein Cheesecake Jars for a guilt-free treat table at parties or gatherings.
- Kid-friendly treat: Let kids pick their own add-ins, like raisins, mini chocolate chips, or sprinkles. Freeze extras for busy afternoons.
Topping Ideas:
- Sprinkle with flaky sea salt for a salty-sweet finish.
- Drizzle with melted white chocolate for an extra-decadent touch.
- Add crushed nuts or toasted coconut on top before the chocolate sets.
- For a seasonal twist, try a dash of pumpkin spice or cinnamon in the oat mixture.
Pair With:
- Coffee or iced latte for adults
- Glass of cold milk or plant-based milk for kids
If you’re building a snack spread, combine your oat cups with options like our No Bake Coconut Cream Pie or fruity No Bake Orange Creamsicle Cheesecake.
Pro Tips & Storage
Make your no bake peanut butter oat cups absolutely foolproof with these simple tips and storage tricks:
Pro Tips for Success
- Texture is key: If your oat cup mixture feels too dry, add an extra spoonful of peanut butter or maple syrup. If it’s too sticky, toss in a pinch more oats or protein powder.
- Get creative: Mix in your favorite flavors cinnamon, coconut flakes, or even a spoonful of jam in the center. For a chocolate boost, add mini chips or cacao nibs directly to the base.
- Even layers: For perfectly layered cups, gently tap your muffin tin on the counter after pouring in the chocolate. This evens out the topping and helps it set flat.
- Silicone for easy removal: A silicone mini muffin pan makes popping out the cups effortless, but if you’re using a metal tin, line it with parchment or use sturdy liners.
- Custom protein: Use a flavored protein powder you love for a unique twist vanilla, chocolate, or peanut butter all work well.
If you’re all about quick treats that taste like dessert but fit a healthy lifestyle, try our High Protein Cheesecake Jars or these No Bake Easter Cheesecake Recipe for your next prep session.
Storage
- Freezer: Store oat cups in an airtight container in the freezer for up to three months. Separate layers with parchment to prevent sticking. Grab one whenever you need a snack or dessert no thawing needed!
- Refrigerator: If you prefer a softer bite, refrigerate them in an airtight container for up to one week. Just keep in mind that the chocolate layer will be softer out of the fridge.
- On-the-go: For lunchboxes or travel, place a frozen oat cup in a small container. By the time you’re ready to eat, it’ll be the perfect texture.
Pro tip: These also make a thoughtful homemade gift pop a few in a gift bag with a recipe card!
For more no bake snack inspiration, browse our No Bake Coconut Cream Pie or check out our No Bake Orange Creamsicle Cheesecake for a fruity, creamy option.
FAQs
1. Can I make no bake peanut butter oat cups without protein powder?
Absolutely! You can skip the protein powder if you don’t have it on hand. Just add a couple extra tablespoons of oats or a bit more nut butter to maintain the right texture. If you want more protein, try adding a spoonful of chia seeds or hemp hearts.
2. Are these no bake peanut butter oat cups gluten-free?
Yes, as long as you use certified gluten-free oats and check your chocolate chips for hidden gluten. This makes them a great treat for those with gluten sensitivities. Want more gluten-free inspiration? See our No Bake Easter Cheesecake Recipe.
3. Can I use a different nut butter or make these nut-free?
Definitely! Swap peanut butter for almond butter, cashew butter, or even sunflower seed butter for a nut-free version. The flavor will change slightly, but the result is still delicious. Nut-free oat cups are perfect for school snacks or allergy-friendly dessert tables.
4. How do I keep no bake peanut butter oat cups from sticking to the pan?
Use a silicone mini muffin pan for the easiest removal. If you use a metal tin, line each cup with parchment or paper liners, or grease them well. Popping the tray in the freezer until the cups are very firm also helps with clean removal.
Conclusion
If you’re searching for a quick, satisfying treat, no bake peanut butter oat cups are your answer. Packed with protein, loaded with flavor, and so easy to customize, they fit perfectly into busy mornings, after-school snacks, or late-night dessert cravings. No oven, no fuss just real ingredients and real moments in the kitchen.
First no-bake recipe or a longtime fan — these oat cups earn a permanent spot in the rotation. So gather your oats, your favorite peanut butter, and get ready to whip up a batch then share your results with us on Facebook or Pinterest.
Try them once and you’ll see why this chilled treat is a Cooking Twins classic. Let’s get mixing!
Must‑Have Kitchen Equipment for This Recipe:
- Instant Pot Duo Plus 6‑Qt 9‑in‑1 Programmable Pressure Cooker
- Instant Vortex Plus 6‑Qt Air Fryer (ClearCook + OdorErase)
- Aucma 6.5‑Qt 6‑Speed Tilt‑Head Stand Mixer
Some links may be affiliate links. Read our affiliate disclosure.
Keep good recipes close
Add The Cooking Twins to your preferred sources on Google for more easy dinners, no-bake desserts and kitchen inspiration.


Ratings & Reviews
Leave a reviewWe'd love to hear how it turned out.