
Homemade Cheese Danish
This flaky homemade cheese danish is made with buttery puff pastry and a creamy vanilla-lemon filling. Finished with a sweet glaze, it's perfect for breakfast or dessert.

By Emma FrostUpdated June 13, 2026

- Prep Time
- 20 min
- Cook Time
- 17 min
- Total Time
- 37 min
- Servings
- 8 cheese danishes

5-Ingredient Dump & Go Crockpot Meals
101 effortless slow cooker recipes for busy families.
View on AmazonAvailable on AmazonHi there! We’re Emma and Ella, the twin sisters behind The Cooking Twins. This flaky, golden homemade cheese danish is one of our favorite chilled treats to make with puff pastry. It’s sweet, creamy, and topped with a silky glaze that melts in your mouth perfect for breakfast or dessert!
Table of Contents
Table of Contents
What is Homemade Cheese Danish
Growing up, our grandma always kept a stash of pastries in her freezer, ready to heat for surprise guests or just a cozy Sunday morning. But the one treat that never lasted long? Her homemade cheese danish. We’d sneak into the kitchen, fork in hand, and split one right down the middle. There was something irresistible about that flaky, buttery puff pastry hugging a velvety, sweet cheese filling. And the best part? You don’t need to be a pastry chef to make your own.
A homemade cheese danish is a delightful pastry made with layers of light, crisp puff pastry filled with a mildly sweet cream cheese center and finished with a simple glaze. It’s the kind of bake that feels indulgent yet approachable.A reliable recipe worth keeping in the rotation.
Unlike the dense, overly sweet danishes at the store, homemade cheese danish allows you to control the flavor and texture. The key is using softened cream cheese, a hint of lemon for brightness, and real vanilla extract for that classic bakery aroma. It’s not just for breakfast either this treat is just as welcome on a dessert tray as it is beside your morning coffee.
If you’re into chilled desserts, you’ll love how our no-bake cheesecake filling complements this recipe too it’s got a similar creamy profile but with a totally fuss-free prep. And for a twist of citrusy flair, our Luscious Lemon Cream Cheese Muffins pair beautifully on a brunch board alongside these danishes.
This homemade cheese danish recipe has the look of a bakery classic, the taste of a family favorite, and the ease of something you’ll turn to again and again.

Homemade Cheese Danish
- Total Time: 37 min
- Yield: 8 cheese danishes 1x
Description
This flaky homemade cheese danish is made with buttery puff pastry and a creamy vanilla-lemon filling. Finished with a sweet glaze, it’s perfect for breakfast or dessert.
Ingredients
1 batch homemade puff pastry (or 1.1 lb store-bought)
8 oz (226 g) cream cheese, softened
½ cup (100 g) granulated sugar
1 tsp lemon juice
¾ tsp vanilla extract
1 large egg
2 tsp water
1 cup (125 g) powdered sugar
3–5 tsp milk
½ tsp vanilla extract
Instructions
- Preheat oven to 400°F: Preheat oven to 400°F (205°C) and line two baking sheets with parchment paper.
- Mix cream cheese, sugar: Mix cream cheese, sugar, lemon juice, and vanilla until smooth.
- Divide puff pastry in: Divide puff pastry in half. Roll into 12×12” square and cut into 4 even squares.
- Spoon 2 tbsp filling: Spoon 2 tbsp filling into center of each square. Fold corners toward center.
- Whisk egg with water: Whisk egg with water and brush over pastry.
- Bake 17–19 minutes until: Bake 17–19 minutes until golden and puffed. Let cool.
- Repeat steps with second: Repeat steps with second half of pastry.
- Whisk powdered sugar, milk: Whisk powdered sugar, milk, and vanilla for glaze.
- Drizzle glaze over cooled: Drizzle glaze over cooled danishes and serve.
Notes
Store in an airtight container in the fridge for up to 2 days.
Reheat at 300°F for 5–7 minutes. Avoid microwaving to prevent sogginess.
Use homemade or store-bought pastry. If using store-bought, lightly roll it out to size.
- Prep Time: 20 min
- Cook Time: 17 min
- Category: Baked Desserts, Breakfast
- Method: Baking
- Cuisine: American, Austrian
Nutrition
- Serving Size: 1 cheese danish
- Calories: 532
- Sugar: 17g
- Sodium: 479mg
- Fat: 35g
- Saturated Fat: 20g
- Unsaturated Fat: 11g
- Trans Fat: 0g
- Carbohydrates: 46g
- Fiber: 3g
- Protein: 10g
- Cholesterol: 90mg
Why You’ll Love This
If you’re like us, you love recipes that look bakery-fancy but are secretly simple. This homemade cheese danish is exactly that impressive, indulgent, and made with pantry basics. Here’s why it’ll quickly become a staple in your sweet breakfast or dessert rotation.
Easy to Prepare, Impressive to Serve
You don’t need fancy tools or advanced pastry skills. With just a batch of puff pastry (homemade or store-bought), cream cheese, and a few flavor-boosting ingredients, you’ll create golden, flaky pastries that rival your favorite café. Bonus: they smell amazing while baking.
Perfect Balance of Flavors
The tangy cream cheese filling blends perfectly with sugar and vanilla, creating a light, sweet, and slightly tart flavor that complements the buttery pastry. It’s rich without being heavy, sweet but not cloying. The lemon juice adds a subtle zing that makes the whole danish pop.
Versatile for Any Occasion
Serve them warm on a chilly weekend morning, include them in a holiday brunch, or wrap one up as a thoughtful homemade gift. You can even make them ahead and reheat before guests arrive.
Looking for more fuss-free sweets? Try our chilled Peanut Butter Cup Icebox Cake or creamy No-Bake Orange Creamsicle Cheesecake for crowd-pleasers that pair beautifully with this danish on any dessert table.
Customizable with Fillings or Shapes
While this recipe sticks to the classic cheese danish, you can easily add a spoonful of jam, lemon curd, or sliced fruit before baking. Try braiding the pastry, folding it into pinwheels, or making mini danishes for party trays.
How to Make
Making homemade cheese danish is easier than you think, especially when using store-bought puff pastry. But even with homemade dough, the steps are simple and straightforward. Let’s break it down.
Quick Overview
Here’s a quick glance at what to expect:
- Prep Time: 20 minutes
- Cook Time: 17–19 minutes
- Total Time: Under 40 minutes
- Servings: 8 cheese danishes
- Skill Level: Beginner-friendly
- Flavors: Buttery, creamy, lightly tangy, sweet
This recipe can be made ahead and stored in the fridge. It’s perfect for weekend brunches or breakfast-for-dessert nights.
Ingredients
Here’s everything you’ll need:
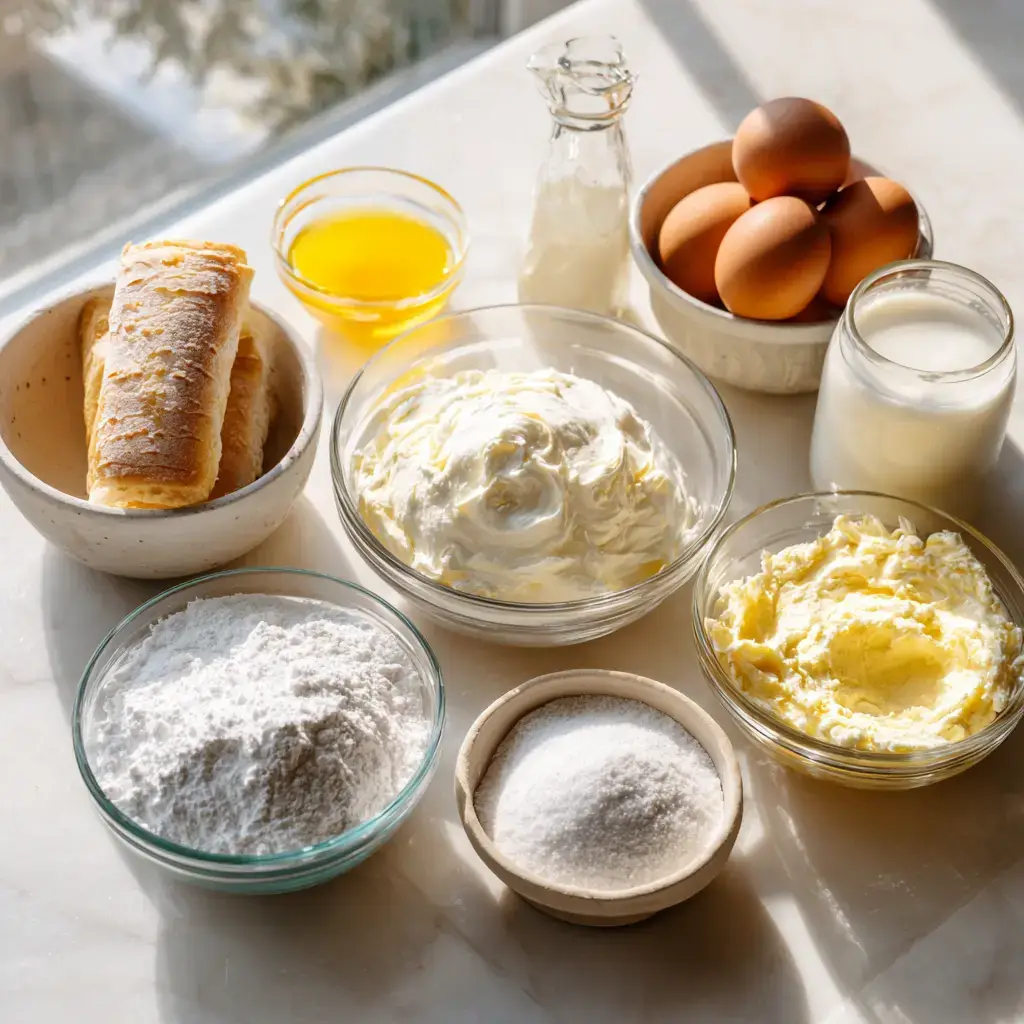
For the Pastry
- 1 batch homemade puff pastry (or 1.1 lb store-bought puff pastry, thawed)
For the Filling
- 8 oz (226 g) cream cheese, softened
- ½ cup (100 g) granulated sugar
- 1 tsp lemon juice
- ¾ tsp vanilla extract
For the Egg Wash
- 1 large egg
- 2 tsp water
For the Glaze
- 1 cup (125 g) powdered sugar
- 3–5 tsp milk
- ½ tsp vanilla extract
Note: If using store-bought puff pastry, you may still need to roll it out lightly to a 12×12” square. It tends to puff more than homemade, so gently press the folds down after baking.
Step-by-Step
- Preheat & Prepare
Preheat your oven to 400°F (205°C) and line two baking sheets with parchment paper. - Mix the Filling
In a bowl, stir together the softened cream cheese, granulated sugar, lemon juice, and vanilla extract until smooth. - Prepare the Dough
Divide the puff pastry into two parts. Roll the first half into a 12×12” square about 1/16” thick. Cut into four even squares. - Assemble the Danishes
Place each square on the baking sheet. Spoon 2 tablespoons of filling into the center. Fold the corners inward toward the center, leaving a small open gap. - Egg Wash
Whisk together the egg and water, then brush generously over the pastry edges. - Bake
Bake for 17–19 minutes until the pastries are puffed and golden brown. They’ll settle as they cool. - Repeat
Repeat steps 3–6 with the remaining pastry half. - Cool and Glaze
Let danishes cool before drizzling with glaze. For the glaze, whisk together powdered sugar, milk, and vanilla until smooth and pourable.
Love easy, make-ahead desserts? Check out our no-fuss No-Bake Oreo Lasagna for another crowd-pleasing option.
What to Serve Homemade Cheese Danish With
Homemade cheese danish is versatile and easy to pair with other dishes.Sweet craving or a special treat — this one delivers every time.
Sweet Serving Ideas
Pair your cheese danish with fresh fruit or berries for a pop of color and a natural balance to the richness. Sliced strawberries, raspberries, or even citrus segments work beautifully. You can also serve it with fruit compotes or flavored syrups on the side for dipping or drizzling.
For dessert boards, pair with No-Bake Coconut Cream Pie or Strawberry Shortcake Cheesecake Rolls to give your guests a creamy variety with different textures. They all chill beautifully and complement the danish’s soft center and crisp edges.
Savory & Beverage Pairings
If you’re adding cheese danish to a brunch buffet, balance it with savory items like soft-boiled eggs, breakfast sausages, or a sharp cheddar frittata. The contrast between sweet and salty enhances every bite.
When it comes to drinks, nothing beats a cup of bold coffee or a creamy chai latte. For something colder, a fruit smoothie or fresh orange juice rounds out the flavors nicely. And if you’re going fancy? Try it with sparkling water or a light brunch cocktail.
Top Tips for Perfecting Homemade Cheese Danish
Making a flawless cheese danish is all about the little details. From keeping your pastry cold to folding your corners just right, these tips will help you bake like a pro even if it’s your first time.
Keep Your Dough Cold
A reliable recipe worth keeping in the rotation. Warm dough gets sticky and puffs unevenly. Chill it if it starts to soften while working, and always preheat your oven fully before baking.Don’t Overfill
It might be tempting to load up on that creamy filling but a light hand is key. Two tablespoons is the sweet spot. Too much, and the filling will ooze out, ruining the shape and texture.
Use Parchment Paper
Parchment helps the bottoms bake evenly and makes cleanup a breeze. It also prevents sticking without the need for greasing your pan.
Fold Gently for the Best Shape
When folding the corners over the filling, do it gently but securely. You want the pastry to hold its shape while allowing a peek of that delicious center.
Craving more no-fuss desserts that look stunning? Our High Protein Cheesecake Jars and No-Bake Cheesecake Filling are full of creamy inspiration for any occasion.
Glaze Smartly
Make sure your danishes are fully cooled before adding the glaze, or it will melt off. For a thick drizzle, use less milk; for a thinner glaze, add a bit more. Start small and stir until smooth.
Storing and Reheating Tips
Homemade cheese danish is best enjoyed fresh, but if you’ve got leftovers or you’re planning ahead here’s how to keep them crisp, creamy, and totally delicious.
How to Store
After the danishes have fully cooled, transfer them to an airtight container. Place a sheet of parchment or wax paper between layers if you’re stacking them. Store in the refrigerator for up to 2 days.
Avoid storing at room temperature, especially if your kitchen runs warm. The cream cheese filling can spoil or affect the texture of the pastry.
For more make-ahead dessert options, check out our No-Bake Oreo Lasagna and Peanut Butter Cup Icebox Cake they’re fridge-friendly and just as irresistible.
Best Way to Reheat
To get that bakery-fresh crispness again:
- Preheat your oven to 300°F (150°C).
- Place danishes on a baking sheet and warm for 5–7 minutes.
- Serve immediately while the filling is just slightly warmed and the pastry edges are crisp.
Don’t microwave your cheese danish. It tends to make the pastry soggy and chewy. Trust us, the oven is worth the few extra minutes.
FAQs
How long can cheese danish last?
What does a cheese danish taste like?
What cheese is used for cheese danish?
Looking for more creamy dessert ideas? Don’t miss our Luscious Lemon Cream Cheese Muffins or No-Bake Cheesecake Filling both deliver big on flavor.
How long to warm up a cheese danish?
You’ve now got everything you need to whip up the kind of homemade cheese danish that disappears within minutes flaky pastry, a rich creamy center, and that glossy glaze on top.Sweet craving or a special treat — this one delivers every time.
If you’re new to working with puff pastry, this recipe is a great first try. It’s forgiving, fun to shape, and so rewarding to pull out of the oven. Trust us it’s the kind of recipe that’ll have your kitchen smelling like a European café and your family asking for seconds.
We’d love to see how yours turns out! Share your homemade cheese danish with us on Pinterest or tag us on Facebook we’re always here cheering you on.
Ready to bake something unforgettable? Let’s get started.
Must‑Have Kitchen Equipment for This Recipe:
- Instant Pot Duo Plus 6‑Qt 9‑in‑1 Programmable Pressure Cooker
- Instant Vortex Plus 6‑Qt Air Fryer (ClearCook + OdorErase)
- Aucma 6.5‑Qt 6‑Speed Tilt‑Head Stand Mixer
Some links may be affiliate links. Read our affiliate disclosure.
Keep good recipes close
Add The Cooking Twins to your preferred sources on Google for more easy dinners, no-bake desserts and kitchen inspiration.




Ratings & Reviews
Leave a reviewWe'd love to hear how it turned out.