
How to Check a Meat Thermometer Before Thanksgiving
A practical ice-bath check, model-specific next steps, and a simple equipment record to prepare your food thermometer before holiday cooking.

By Emma & Ella FrostUpdated November 8, 2026

5-Ingredient Dump & Go Crockpot Meals
101 effortless slow cooker recipes for busy families.
View on AmazonAvailable on AmazonTo check a meat thermometer, use a properly prepared ice bath and compare the reading with 32 F (0 C), allowing for your model's stated accuracy. If the result is outside that range, follow the manufacturer's adjustment or service instructions. Finding the thermometer is only the first step; knowing whether to trust its reading is the useful part.
Do this before Thanksgiving cooking starts, while there is still time to resolve a problem. This guide separates three decisions: prepare a reliable reference, read the result, and decide whether the instrument needs adjustment or replacement.
Find the model instructions before changing anything
Locate the model name on your food thermometer and open its instructions. Keep the information beside you rather than relying on a calibration button sequence for a similar-looking device.
- Range: confirm that 32 F (0 C) is within the probe's measuring range. If it is not, use the manufacturer's checking method instead of this ice-bath procedure.
- Accuracy: find the stated tolerance at the ice point, not just the smallest number the display can show.
- Immersion: identify the sensing area and how much of the probe must be inserted.
- Adjustment: check whether this model has a calibration nut, a documented digital adjustment, or manufacturer-only service.
Some digital thermometers can be adjusted and others need service or replacement. There is no universal button combination. ThermoWorks' accuracy guide explains why the model's specification matters and why an instrument already within that specification does not need adjustment.
Make the ice bath before taking a reading
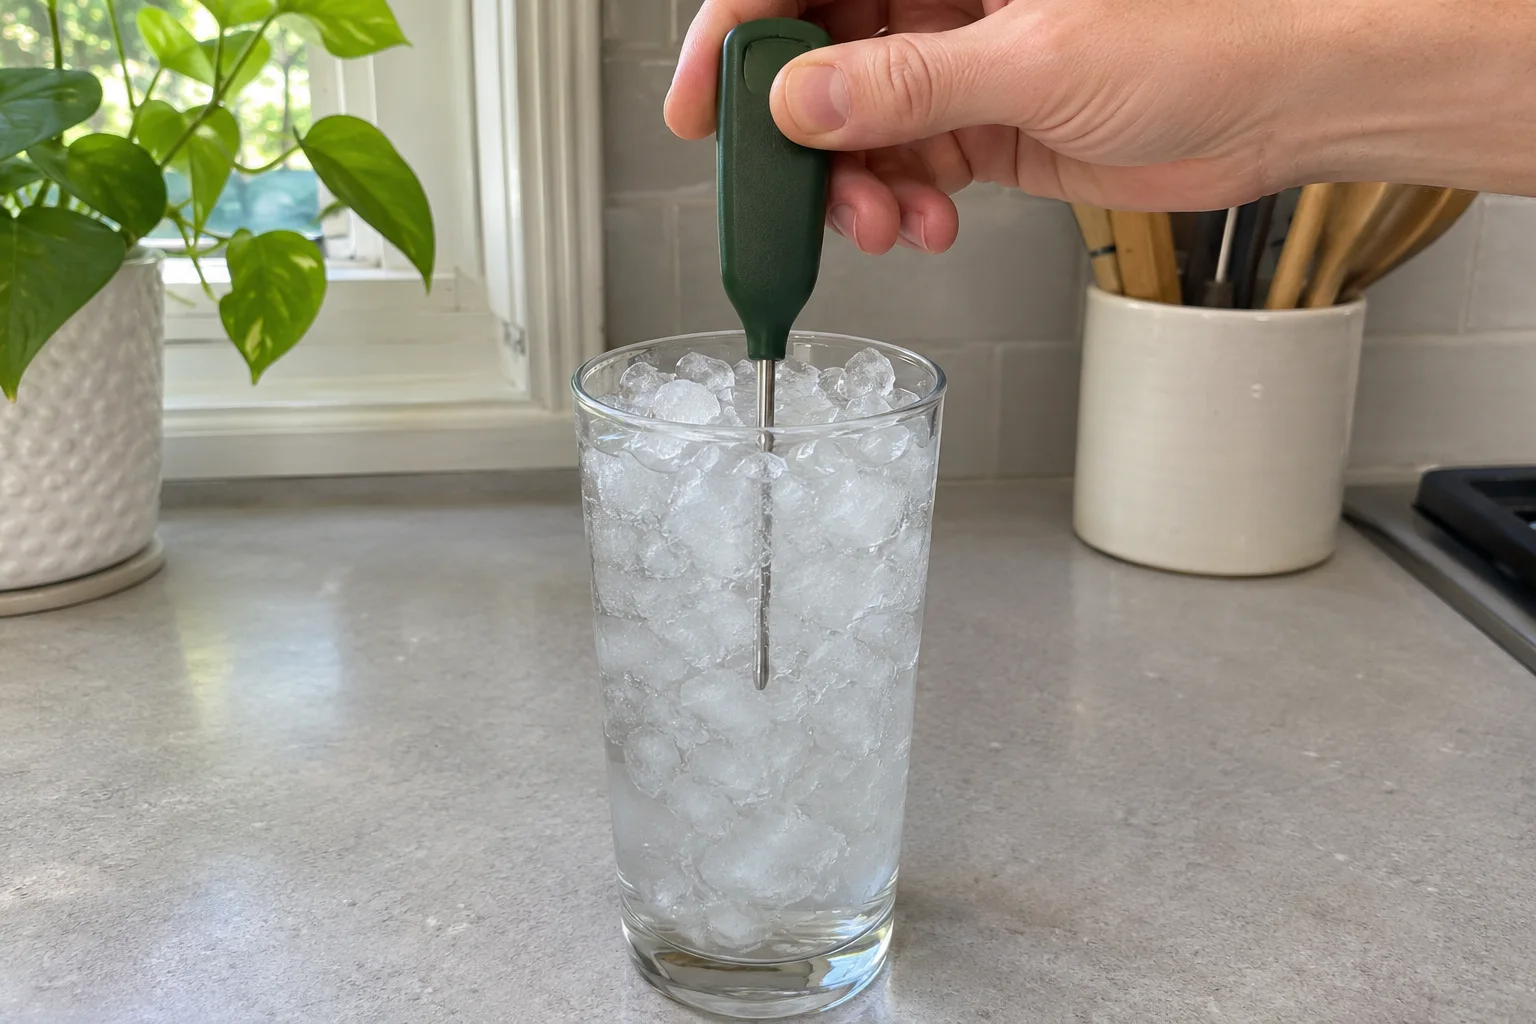
Use a tall container, ice, cold water, and your clean food probe. A drink with a few floating cubes is not the same setup. These steps follow the manufacturer's ice-bath instructions:
- Fill the container with ice to the top. Crushed ice packs more closely.
- Add cold water until it is about half an inch below the top of the ice. If the ice lifts away from the bottom, remove some water and add ice.
- Let the mixture settle for about a minute.
- Place the sensing portion in the center of the ice slurry, using your model's required immersion depth. Gently stir without resting the probe against the container's sides or bottom.
- Allow the reading to stabilize, then compare it with 32 F (0 C) and the manufacturer's tolerance.
Keep the instructions open during the check. The display unit does not belong underwater simply because the metal probe does.
Use the result to choose your next step
Write down the actual reading before making an adjustment. Use this as a decision record, not a certificate that a cooking dish is safe.
| What you find | What to do next |
|---|---|
| The reading is within the model's stated ice-point accuracy | Leave the calibration alone. Record the reading and date. |
| The probe was against the glass or the ice was floating over a pool of water | Correct the setup and repeat the check before judging the instrument. |
| The result is outside specification in a correctly prepared bath | Use the model's adjustment procedure, arrange service, or replace it. Do not improvise a repair. |
| You cannot identify the model or its accuracy range | Find the manual or ask the manufacturer. Do not borrow another model's tolerance. |
For a dial thermometer with an adjustment nut, South Dakota State University Extension describes adjusting the gauge and checking it again before use. Follow your own instrument's directions for the adjustment. The important distinction is between taking a reading and correcting the instrument; a second check confirms the result of the correction.
Keep a small thermometer record with your holiday plan
A note on paper is enough. Include the model, the date, the ice-bath reading, the accuracy range copied from the manual, and any action taken. For a household with more than one probe, name each one clearly so that the reading for the backup does not get assigned to the thermometer you actually use.
Finish the note with one practical question: Is this the instrument I plan to use, or is there an unresolved problem? Put an unresolved item on the shopping or service list before the cooking day. Keep the note with your Thanksgiving oven schedule, where it is more useful than a loose reminder in a kitchen drawer.
There is a reason to plan ahead. In its November 3, 2026 Thanksgiving report, Instacart said food thermometers' share of items rose 3,589% on Thanksgiving Day 2025 compared with the category's 2025 average. That describes shopping on one platform, not search volume or a forecast. The practical takeaway is simply to check your equipment before the last-minute rush.
A checked thermometer still needs correct placement
The ice bath checks the instrument; it does not tell you whether dinner is done. When cooking, use the food-specific temperature guidance and the thermometer's placement instructions. The University of Minnesota Extension food-safety guide explains that color and texture cannot establish safe doneness.
For whole-muscle meat and poultry, place the probe in the thickest area without touching bone. For a dial instant-read model, its sensing section must be covered; thin foods may need a sideways approach. Wash the stem with soapy water after use. Follow the model's directions about whether it can remain in an oven: an instant-read check and an oven-safe leave-in probe are different uses.
If you are taking a dish elsewhere, also settle the transport and serving plan. Our Thanksgiving potluck guide covers that separate handoff. A useful holiday setup combines a checked instrument, correct placement, and a clear plan for the food, not just a timer going off.
Keep good recipes close
Add The Cooking Twins to your preferred sources on Google for more easy dinners, no-bake desserts and kitchen inspiration.
Emma & Ella Frost
A practical resource from The Cooking Twins.
More from Emma & Ella Frost


Comments
Leave a commentShare your question or planning tip below.